DrawDecals/Minicraft 1/144 C-130K Hercules
| KIT #: | 44-C130-15Kit |
| PRICE: | $27.50 |
| DECALS: | One option |
| REVIEWER: | Bob Leonard |
| NOTES: |
| HISTORY |
 The
US Air Force and Lockheed were in sync in the 1950s for a simple, capable
tactical transport. The A model came out in ’54 and the extended range E in ‘62,
just in time for the Vietnam War with increased demands for trans-Pacific
airlift.
The
US Air Force and Lockheed were in sync in the 1950s for a simple, capable
tactical transport. The A model came out in ’54 and the extended range E in ‘62,
just in time for the Vietnam War with increased demands for trans-Pacific
airlift.
As the war escalated, tactical airlift aircraft of different types were needed and the C-130 fit the bill. The Marietta, GA plant produced so many the unit cost was low, making the Hercules the airframe of choice for a mid-air refueler (KC-130J), an electronic combat platform (EC-130H), a special ops support aircraft (MC-130E), a rescue/recovery version (HC-130H), a weather bird (WC-130J), and of course the AC-130 gunship. Its simple design, sturdy and adaptable airframe, and an active production line made the C-130 the preferred candidate for all these missions.
The C-130 was an ideal match for short, improvised, i.e., “tactical” runways. With the landing gear and tires it could land and takeoff from a dirt strip, and the engines had enough power to put it in a class of its own. The cockpit had more windows than any other airlifter, even windows at floor level, making accurate air drops easier.
Lockheed aggressively marketed the airplane for whatever variant could possibly be needed, either by the USAF, USN, USMC, Coast Guard or more than 60 countries. The C-130 is the longest continuously produced military aircraft, having reached 70 years of production in 2024.
| THE KIT |
 In
2006, Minicraft issued their first C-130, in a USCG scheme. Even in 1/144, the
Hercules is not a small model, it is bigger than a 1/48 Spitfire. Before the
Minicraft kit, the only way to make a 1/144 C-130 was from the Revell C-130A
issued 50 years earlier. Draw Decals issues bagged versions of this kit (with
all three different props: C-130A, C-130E, C-130J) and two different size of
fuel tanks. Conceivably, you could build an “A” model up to the most recent “J”
version of the short fuselage Hercules. The entire kit is white plastic, no
resin or metal parts. The kit’s scheme by Draw Decal is for the Royal Air Force
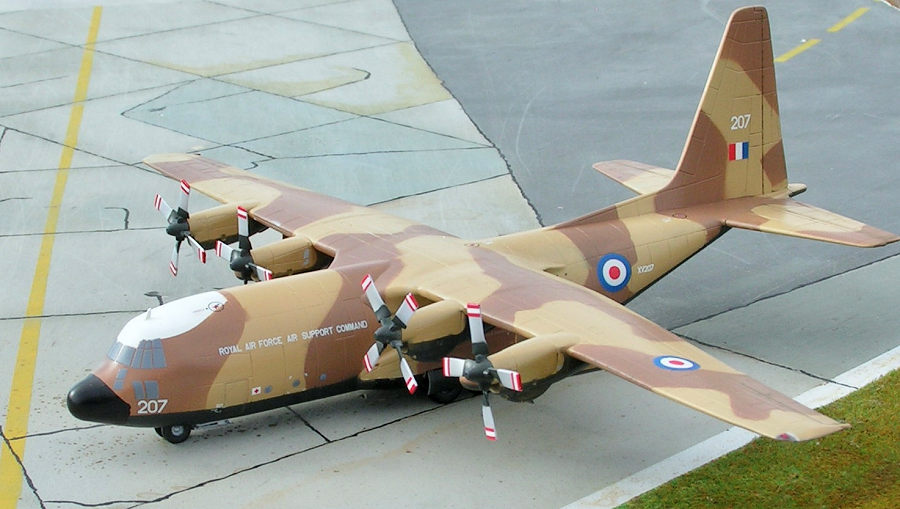
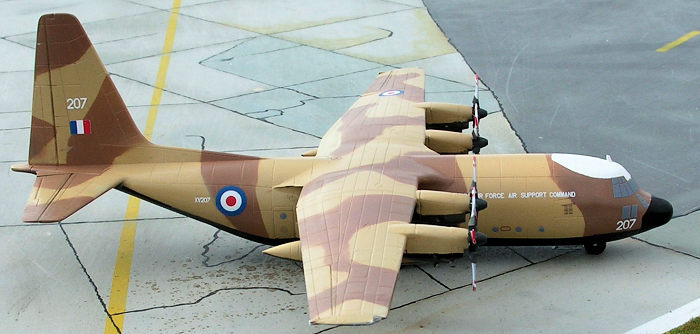
“delivery scheme.” That is not quite correct. The RAF’s C-130K were delivered to
the UK in natural metal and then painted in country by Marshall Aerospace in the
Light Stone, Dark Earth and Night Black scheme depicted here. The kit has
engraved panel lines, probably too deep for this scale, and clear parts for the
cockpit and wingtip lights, and landing lights. No flight deck with crew
stations is provided, but it would nearly be impossible to see anything anyway,
but a basic interior cargo hold is provided. No masks are provided for cockpit
windows, which was fine for me, since I was going to use the Draw Decal
windshield decals.
In
2006, Minicraft issued their first C-130, in a USCG scheme. Even in 1/144, the
Hercules is not a small model, it is bigger than a 1/48 Spitfire. Before the
Minicraft kit, the only way to make a 1/144 C-130 was from the Revell C-130A
issued 50 years earlier. Draw Decals issues bagged versions of this kit (with
all three different props: C-130A, C-130E, C-130J) and two different size of
fuel tanks. Conceivably, you could build an “A” model up to the most recent “J”
version of the short fuselage Hercules. The entire kit is white plastic, no
resin or metal parts. The kit’s scheme by Draw Decal is for the Royal Air Force
“delivery scheme.” That is not quite correct. The RAF’s C-130K were delivered to
the UK in natural metal and then painted in country by Marshall Aerospace in the
Light Stone, Dark Earth and Night Black scheme depicted here. The kit has
engraved panel lines, probably too deep for this scale, and clear parts for the
cockpit and wingtip lights, and landing lights. No flight deck with crew
stations is provided, but it would nearly be impossible to see anything anyway,
but a basic interior cargo hold is provided. No masks are provided for cockpit
windows, which was fine for me, since I was going to use the Draw Decal
windshield decals.
| CONSTRUCTION |
The fit on my kit was excellent. The only place I needed super glue for filler was for the seams where the wings attach to the fuselage and faring in the clear cockpit piece. Every other seam could be attended to with a light sanding or at worst and application of Mr. Surfacer 1500 with a brush. You need to decide before closing the fuselage if you going to have the ramp down.
| COLORS & MARKINGS |
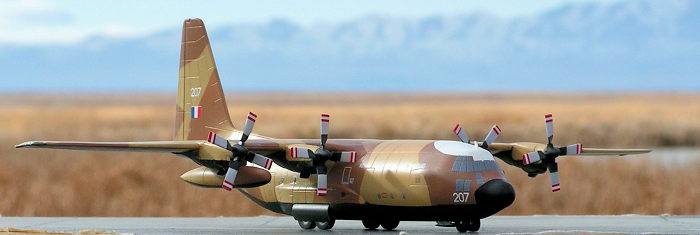
 The
initial operational paint scheme of the RAF C-130K is one of the sharpest ever
worn by an operational C-130. For the white cockpit crown, I used my favorite,
Tamiya Liquid Surface Primer. For the Light Stone, I used a 40 year old tin of
Compucolor 2. For the Dark Earth, I used the late, great Testors Model Master
FS30219. This bottle might be as old as the Compucolor 2 tin, since it still had
its AAFES (Army Air Forces Exchange Service) price tag on it. I paid the
princely sum of $1.10 for it sometime in the 1980s. For the Night Black, I used
Mr. Hobby 137 Tire Black. I used Tamiya XF-1 Flat Back for the nose, just to
contrast with the Tire Black. I had some paint adhesion problems and had to sand
and repaint some areas. I do not recall any mold release agent or grease on the
kit parts, but I had sections of paint lift, even under Blu-Tac or drafters
tape, which is low tack. Learn from my rookie mistake and wash all the plastic
parts in Dawn Dish soap to degrease everything. Given the depth of the panel
lines, I refrained from adding any wash to accentuate them further. Only the
flight control surfaces received a light black wash. This was the first time
using Draw Decals. They are printed on a continuous clear film and have to be
individually cut. The clear sections are as thin as I have ever seen on a decal.
The decal portions are a bit thicker than I am used to with screen printed
decals, but under an airbrushed coat of Vallejo Polyurethane Satin cut 1:1 with
Vallejo Airbrush thinner, it was acceptable.
The
initial operational paint scheme of the RAF C-130K is one of the sharpest ever
worn by an operational C-130. For the white cockpit crown, I used my favorite,
Tamiya Liquid Surface Primer. For the Light Stone, I used a 40 year old tin of
Compucolor 2. For the Dark Earth, I used the late, great Testors Model Master
FS30219. This bottle might be as old as the Compucolor 2 tin, since it still had
its AAFES (Army Air Forces Exchange Service) price tag on it. I paid the
princely sum of $1.10 for it sometime in the 1980s. For the Night Black, I used
Mr. Hobby 137 Tire Black. I used Tamiya XF-1 Flat Back for the nose, just to
contrast with the Tire Black. I had some paint adhesion problems and had to sand
and repaint some areas. I do not recall any mold release agent or grease on the
kit parts, but I had sections of paint lift, even under Blu-Tac or drafters
tape, which is low tack. Learn from my rookie mistake and wash all the plastic
parts in Dawn Dish soap to degrease everything. Given the depth of the panel
lines, I refrained from adding any wash to accentuate them further. Only the
flight control surfaces received a light black wash. This was the first time
using Draw Decals. They are printed on a continuous clear film and have to be
individually cut. The clear sections are as thin as I have ever seen on a decal.
The decal portions are a bit thicker than I am used to with screen printed
decals, but under an airbrushed coat of Vallejo Polyurethane Satin cut 1:1 with
Vallejo Airbrush thinner, it was acceptable.
| CONCLUSIONS |
If you want a 1/144 C-130 this is the way currently and I recommend it. Great Wall has just released a 1/144 C-130E, but I’ve seen no reviews of it. The detail is acceptable for this scale and shape of the Minicraft kit are very good to me.
| REFERENCES |
I found airliners.net a good source of photos for the initial paints scheme for the RAF C-130K.
Bob Leonard
7 February 2025 Copyright ModelingMadness.com. All rights reserved. No
reproduction in part or in whole without express permssion from the editor.
If you would like your product reviewed fairly and fairly quickly, please
contact
the editor or see other details in the
Note to
Contributors.