Kopro/KP 1/72 Piper L-4H
|
KIT #: |
P72132 |
|
PRICE: |
HK$25 |
|
DECALS: |
Two options |
|
REVIEWER: |
Richard F |
|
NOTES: |
New tool kit |
 20,000 of these planes were made. The L-4 Grasshopper was mechanically
identical to the J-3 civilian Cub, but was distinguishable by the use of a
Plexiglass greenhouse skylight and rear windows for improved visibility.
20,000 of these planes were made. The L-4 Grasshopper was mechanically
identical to the J-3 civilian Cub, but was distinguishable by the use of a
Plexiglass greenhouse skylight and rear windows for improved visibility.
According to the website of the Polish Aviation Museum at Krakow:
"By the end of the 1940's Poland had bought 141 PIPERS, registering 127 of
them. They were in service with the regional aero clubs, flying as school
and training aircraft, ambulances, agricultural and executive aircraft. In
the late Fifties, the majority of the nicknamed "Kubuś" L-4's were concealed
under the veil of standardisation of flying equipment."
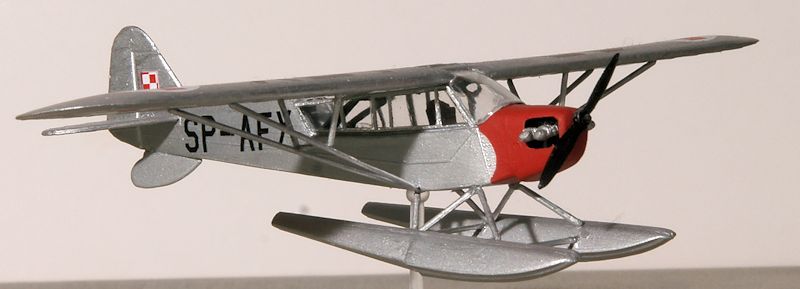
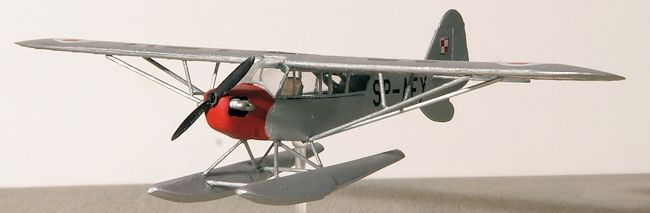
One of these planes seems to have been SP-AFY, an air ambulance on floats.
I previewed this simple kit
right here
on Modeling Madness.
 Cockpit is pretty basic. I used a leftover instrument panel decal from a
long-forgotten plane and scrounged up the bench from my old Academy Dodge
ambulance kit to put a stretcher in behind the pilot's seat. Yellow tape
made some restraints, as well as a seatbelt for the pilot.
Cockpit is pretty basic. I used a leftover instrument panel decal from a
long-forgotten plane and scrounged up the bench from my old Academy Dodge
ambulance kit to put a stretcher in behind the pilot's seat. Yellow tape
made some restraints, as well as a seatbelt for the pilot.
At that point, I glued the fuselage halves together, remembering first to
install the dinky little motor inside the engine compartment. This is pretty
simplistic with its four cylinders poking outside.
The first of two tricky parts came next. I build up the internal framework
that forms what looks like a rollcage over the cockpit area. It's made up of
four parts. I used superglue so that I wouldn't have to sit around all week
holding the parts in the proper place. Starting from the rear I built up
this structure.
The wings and clear cockpit ceiling went on next, and then the front
windscreen. All straightforward although the side windows have a pretty
decent sized gap between their bottom edge and the fuselage.
 The last part of the main aircraft I attached was the windscreen, and then
two small parts up near the engine. There is meant to be a flat panel above
the engine cylinders, but when it came time to install them, I realised what
that part that I'd used to hold up the pilot's seat had been for. Ooops.
The last part of the main aircraft I attached was the windscreen, and then
two small parts up near the engine. There is meant to be a flat panel above
the engine cylinders, but when it came time to install them, I realised what
that part that I'd used to hold up the pilot's seat had been for. Ooops.
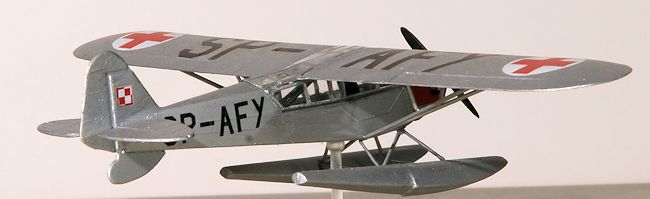
The second tricky bit was getting the floats on in something roughly
approximating the correct alignment. Again, superglue to the rescue (and a
bit of patience).
This model doesn't weigh much. Mine actually blew off the table when
a gust of wind came in from outside, more or less demolishing the kit. I put
it back together but it looked a bit like a kit that blew off a table and
got put back together.
Also, I should have put in a bit of nose weight. When not on its
stand, this one is a tail sitter. Who knew a float plane would need
nose weight? Either that, or I should have played round with the lengths of
the stalks that hold the floats on. (As a note from
your editor, I have had this happen as well and have learned that it is
prudent to put some weight in the front of the floats to help prevent this
from happening) The stand doesn't come with the kit.
For a while I thought this was going to be white until I read the
instructions more carefully. I used brush-painted Tamiya XF-16 for the bulk
of the plane and Tamiya flat red on the nose.
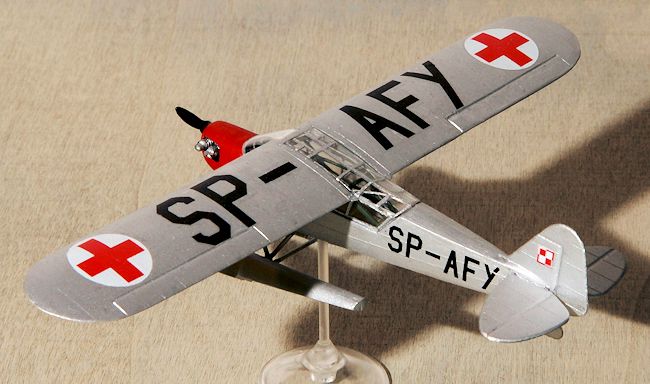
 I see that Kopro is putting out a line of decal sheets, and so I hope they
are a bit more robust than the ones that have come with every Kopro kit I've
ever built. I know Kopro is under new management since a few years ago and
releases better decals with their new kits. Perhaps my Cub was from the
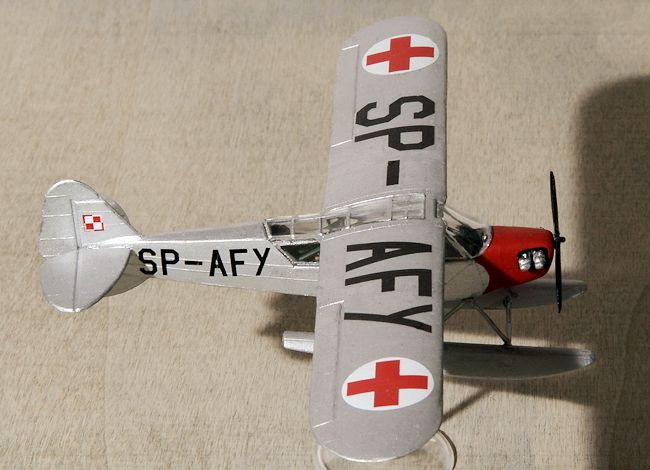
previous generation. Anyway, the decals were fragile and needed the jigsaw
puzzle treatment on the large lettering, as well as on the side lettering.
After Mr Mark Softer had done his work, I used flat black and a fine brush
to touch up some of the areas where the decals had cracked or split.
I see that Kopro is putting out a line of decal sheets, and so I hope they
are a bit more robust than the ones that have come with every Kopro kit I've
ever built. I know Kopro is under new management since a few years ago and
releases better decals with their new kits. Perhaps my Cub was from the
previous generation. Anyway, the decals were fragile and needed the jigsaw
puzzle treatment on the large lettering, as well as on the side lettering.
After Mr Mark Softer had done his work, I used flat black and a fine brush
to touch up some of the areas where the decals had cracked or split.
The red crosses worked well and I like the way they look against the silver.
 I liked this kit. The alternative seems to be a resin CMR kit. This Kopro
alternative is cheaper, and probably easier to build if you've not used
resin before. For most people the level of detail will be fine. A quick and
fairly straightforward build that just requires some patience with the
floats and decals.
I liked this kit. The alternative seems to be a resin CMR kit. This Kopro
alternative is cheaper, and probably easier to build if you've not used
resin before. For most people the level of detail will be fine. A quick and
fairly straightforward build that just requires some patience with the
floats and decals.
Richard
F
April 2015
If you would like your product reviewed fairly and fairly quickly, please
contact
the editor or see other details in the
Note to
Contributors.
Back to the Main Page
Back to the Review Index Page