AZ Models 1/72 X-3 Stiletto
| KIT #: | |
| PRICE: | ~$30.00 |
| DECALS: | Three options |
| REVIEWER: | Joel Hamm |
| NOTES: | Short run kit |
| HISTORY |
Man does not model by yellow wing tweeners alone. Diversity demands a traipse occasionally down the road less traveled, a segue from one inter-war period to another.
 The WWI armistice inspired
a lukewarm and underfunded period of experimentation and innovation; proving, at
least, that 2 wings are not better than 1, that landing gear should be neither
seen, heard, nor dragged in the slipstream when not needed, and that metal
trumps fabric (as well as paper, scissors and rock).
The WWI armistice inspired
a lukewarm and underfunded period of experimentation and innovation; proving, at
least, that 2 wings are not better than 1, that landing gear should be neither
seen, heard, nor dragged in the slipstream when not needed, and that metal
trumps fabric (as well as paper, scissors and rock).
Round Two of The War That Ended Nothing showed that there can be no rest in the quest for more effective, efficient, and egregious vectors for the imposition of mayhem upon members of the same species. Flying faster, higher, and farther were the sine qua non of that search. The late ‘40’s to early ‘70s or so roughly defined The Golden Age of Flight Testing, in which a fleet of dedicated research aircraft probed the perils of high speed high altitude flight
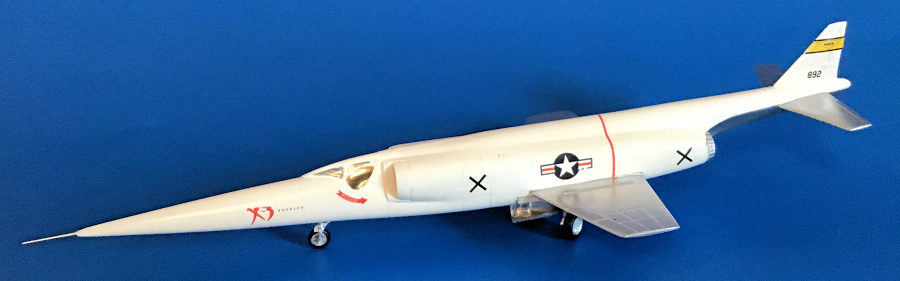
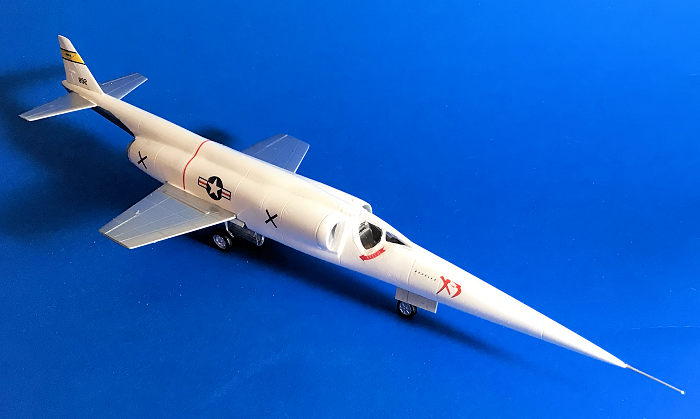
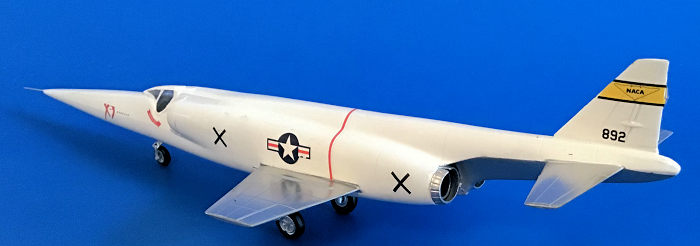
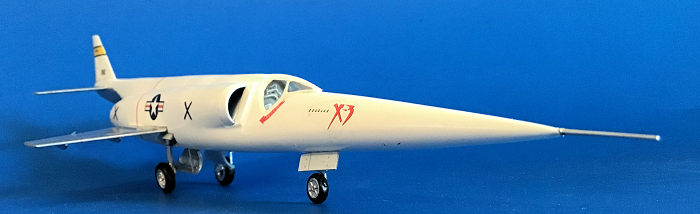
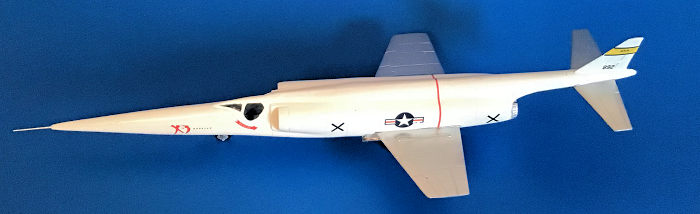
Bell’s X-1 bullet plane was built to bust the sound barrier. The also air dropped and rocket powered X-2 had was tasked with investigating aerodynamics and thermodynamics at Mach 3 speeds and 100K ft altitudes The X-3 would carry that torch as a conventional ground launched turbojet powered airplane. It flopped. Despite a needle fuselage and razor stub wings its anemic engines could push it supersonic only in a steep dive. The Stiletto’s legacy was limited to bestowal of its radical sexiness onto the man-with-a-missile inside F-104.
| THE KIT |
 The Stiletto set off a
stir in the early modeling world. Revell, Aurora, Lindberg, and lesser-knowns
such as Trim Molds released it in 1/48 and assorted box scales. 1/72 builders
had to content themselves with vacu-forms until the age of resin arrived. The
first known (to me) injected try was made several years ago by Mach 2; but
Internet photos show it too rough to be worth the effort. Finally the Czech AZ
company came out with this very decent version.
The Stiletto set off a
stir in the early modeling world. Revell, Aurora, Lindberg, and lesser-knowns
such as Trim Molds released it in 1/48 and assorted box scales. 1/72 builders
had to content themselves with vacu-forms until the age of resin arrived. The
first known (to me) injected try was made several years ago by Mach 2; but
Internet photos show it too rough to be worth the effort. Finally the Czech AZ
company came out with this very decent version.
Top notch plastic with no flash, seams, sinkholes or other goobers. Petite engraved panel lines. Instructions with walk-around detail photos from the Air Force Museum, Humbrol color call-outs, and glue lines marked in red for those who need help figuring out where the sticky stuff goes.
| CONSTRUCTION |
Not much needs or can be said about construction. There’s not much construction to do. 8 simple slap together steps; 9 if you want to stick Sidewinders on wingtip rails and zoom it around the living room zapping hyper-sonic bogies.
 Just a few point-outs: The
cockpit assembly is detailed and accurate; but its side consoles and rear
bulkhead must be filed to fit the fuselage and allow it to close. Ditto the main
gear well interior.
Just a few point-outs: The
cockpit assembly is detailed and accurate; but its side consoles and rear
bulkhead must be filed to fit the fuselage and allow it to close. Ditto the main
gear well interior.
Seat color is depicted as silver but GOOGLE shots show a bright red (though uncomfortably thin) cushion. The plane is probably not a tail sitter, but plenty room can be found up front to throw in some plumbous insurance. Sitting way up there ahead of the parade, a split shot fishing weight should suffice.
The canopy is a bit on the hazy side, which is easily fixed by a dunk in acryl-coat; but before painting and doing that, the side window outline needs to be changed. It is framed too high and round. Photos show the forward corner to be nearly square with the upper edge straight and parallel to the airframe’s backbone. Sounds like an insignificant change, but the google-eyed look of the as-cast window deprives the plane of its lean, mean, gonna-bite-your-butt-off demeanor. The semi-ammoeboid transparency shape demands an expert masking hand or after-market kabuki sheet. Neither was available.
| COLORS & MARKINGS |
Gloss white. But – horrors! – when I went to the paint locker the cupboard was bare! The nearest Hobby Lobby is a day’s round trip to Fredericksburg VA.
 The
semi-local Ace-is-the-Place Hardware Store used to keep a rack of Testors Square
Bottle brand. The rack was still there, but except for a few odd shades, the
paints were gone. Rumors are not just rumors that Testors is discontinuing its
enamel line.
The
semi-local Ace-is-the-Place Hardware Store used to keep a rack of Testors Square
Bottle brand. The rack was still there, but except for a few odd shades, the
paints were gone. Rumors are not just rumors that Testors is discontinuing its
enamel line.
The Helpful Hardware Man convinced me that enamels are enamels and that a $5 can of his Rustoleum knock-off could be thinned and airbrushed onto plastic. He lied. It can’t. No, I did not shpritz it untested onto my model. I tried various dilutions with various diluters at various pressure and needle settings on various junk wings and things. They all made a mess. Too thin. Too thick. Too sticky. Too picky. Apparently there is alchemy involved in formulating paints that look real in 1/72 scale.
The Missus came to the rescue, pointing out that her larder too was bare and could benefit from a re-supply mission to the F-burg COSTCO. Hobby Lobby’s paint rack was also running low with no hope of replenishment. I scarfed up all their Model Master and Testors in my most used colors.
I will
soon be adjudicated a federal felon for stockpiling VOC’s but it will be worth
it, because my X-3 got a flawless coat of gloss white, accentuated by chrome
silver on wings and elevators. Engine exhausts and under-tail are supposed to be
gun meta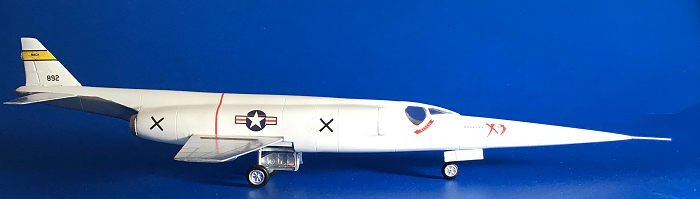 l or burnt iron, but when you are exhausted from an all day drive to
find model paint, chrome silver is close enough there too.
l or burnt iron, but when you are exhausted from an all day drive to
find model paint, chrome silver is close enough there too.
Kit decals are excellent in all respects, needing no setting fluids but nevertheless getting doused with Microsol. Near duplicate markings are provided for the “X-3” logos and “RESCUE” arrows. “Near” because sub-microscopic size differences can be discerned between the several options, and one version has the “DOUGLAS” label on the nose while others do not. In any event, the anxiety is relieved over boogering these irreplaceable decals.
The sheet also holds an extra set of Star-Bar national insignia; likely because the printer didn’t notice that the wings lack the usual upper port lower starboard markings.
Photos show the Stiletto sat low and level with the main gear doors nearly dragging the ground. Lop a millimeter or more off the back struts; else the ass-in-the-air stance deprives the bird of its crouched and ready to pounce appearance.
Add door retraction arms of stretched sprue or wire. These are also prominent in pics.
Oh, yes – a stretched sprue nose probe beats one where you have to sand away injection gates and mold mismatch.
| CONCLUSIONS |
I’ve done my duty to diversity. Now back to yellow wing tweeners.
Joel Hamm
9 March 2020
Copyright ModelingMadness.com
If you would like your product reviewed fairly and fairly quickly, please contact the editor or see other details in the Note to Contributors.