| KIT #: | 4583 |
| PRICE: | @ AUD $20.00 |
| DECALS: | One option |
| REVIEWER: | George Oh |
| NOTES: |
Modified to fit a specific theme. |
| HISTORY |
Conceived in 1946, and first flown in 1956, the eight-engined B.52 Stratofortress was the backbone of the US Air Forces’ Strategic Air Command (SAC) till the advent of the B-One Lancer and the B-2 Spirit stealth bomber. The B.52 was a very-long-range, sub-sonic, strategic, heavy bomber. During its life, the B.52 underwent several design changes, including changes to the tail fin and tail armament, several jet-engine changes, several equipment upgrades, and several role changes with associated internal and external weapon loads.
| THE KIT |
 This
is a beautifully-produced kit. The
engraved detail is very fine – OK, the moulded-on vortex generators are
over-scaled. And the parts fit
together well, with only a little filler needed.
I LOVE the way the cockpit clear piece incorporated a decent part of the
fuselage, because it makes filling and sanding SOOOOOOO much easier.
My biggest gripe is that the external weapons pylons have some of their
weapons moulded in place. This
virtually compels you to add the others.
It would have been nice if an open bomb bay (with optional loads?) was an
available option. Picky critiques
will point to a lack of a stressed-metal skin in places, but not me, and not in
1/144-scale.
This
is a beautifully-produced kit. The
engraved detail is very fine – OK, the moulded-on vortex generators are
over-scaled. And the parts fit
together well, with only a little filler needed.
I LOVE the way the cockpit clear piece incorporated a decent part of the
fuselage, because it makes filling and sanding SOOOOOOO much easier.
My biggest gripe is that the external weapons pylons have some of their
weapons moulded in place. This
virtually compels you to add the others.
It would have been nice if an open bomb bay (with optional loads?) was an
available option. Picky critiques
will point to a lack of a stressed-metal skin in places, but not me, and not in
1/144-scale.
| CONSTRUCTION |
Call me weird,
but I started this model by spraying the cockpit, and the wheel wells with their
associated legs, with Citadel Miniatures skull white from a spraycan.
Dry-fitting told me that this model would be too large (350mm/13” lg x
400mm/15” wing span) and too fragile to store easily, so I worked on a mechanism
to enable it to be quickly and easily dismantled and reassembled, on demand.
I concluded that the rare-earth magnets I’ve been carrying around for 6
years, were just the ticket.
Rare-earths are VERY strong magnets for their size – mine were 3mm thick x 6mm
butt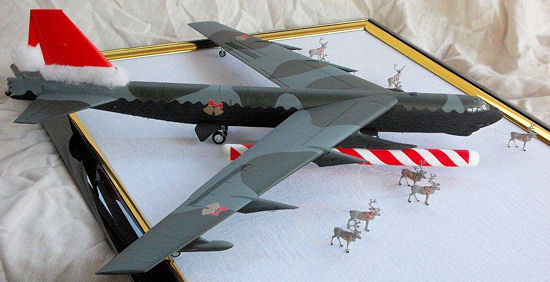 ons
(bought cheap from Forcefield.com).
ons
(bought cheap from Forcefield.com).
I didn’t detail
the cockpit much because it was small, and little would be visible from the
outside. The wheel well tubs got
some colour on their raised detail, and the undercarriage legs were firmly
attached (THIS is a mistake). All
of these were positioned, and the fuselage was closed.
Gluing had to be done in stages so as to keep the outer surfaces level,
and minimise the need for filler.
And some rescribing had to be done across the fuselage spine to restore panel
line detail. Oh – I removed a post from
the spine to make the filling & sanding easier, and the rotating cannon from the
tail turret, because I couldn’t think of a reason for Santa to have it.
| COLORS & MARKINGS |
 quadron/Signal
B.52 in action book & I reckon that
it looks mean. After more extensive
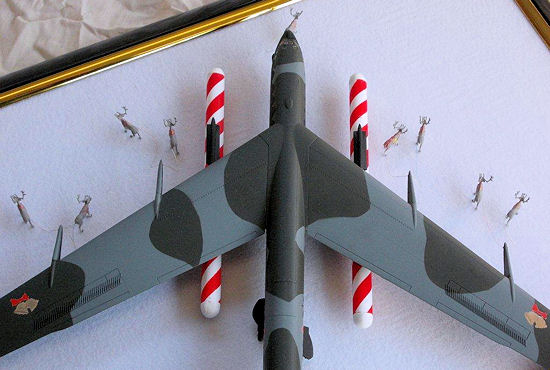
masking, the tops were sprayed with Gunze H22 grey, then camouflaged with Tamiya
XF-13 JA (dark) green as per the instructions (it was supposed to be a
wrap-around scheme) and I could remove all of the masking.
It looks RAF-ish, IMHO. BTW,
the black demarcation line was quickly done by wiggling a sharp blade across a
piece of Tamiya tape.
quadron/Signal
B.52 in action book & I reckon that
it looks mean. After more extensive
masking, the tops were sprayed with Gunze H22 grey, then camouflaged with Tamiya
XF-13 JA (dark) green as per the instructions (it was supposed to be a
wrap-around scheme) and I could remove all of the masking.
It looks RAF-ish, IMHO. BTW,
the black demarcation line was quickly done by wiggling a sharp blade across a
piece of Tamiya tape.
OK – my masking
wasn’t perfect. I had to touch-up
the legs with a brush, and my masking efforts went a little beyond the base of
the tailfin. Rats!!
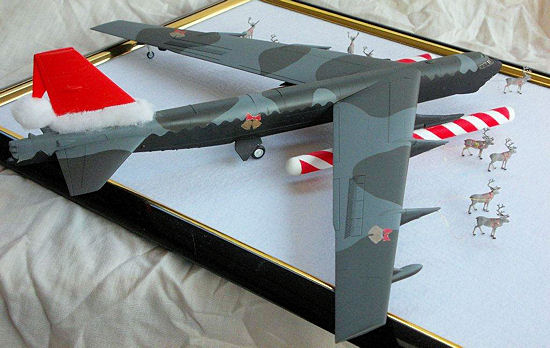
Never mind. Here, I paused,
created a white plastic triangle I (by extending the shape of the tailfin to an
apex) which I attached to the top of the tailfin, then filled (then smoothed)
the gap. When all was dry, I
brushed the tailfin bright red, and covered the poor base with a strip of white
fluffy furry material. The tip of
the added triangle got a white fluffy ball.
None of the kit decals were used because they weren’t suitable, but I felt that it needed some sort of markings. No decal I know-of would be suitable, so I down-loaded an image of a pair of bells under a ribbon (tied in a bow) from the internet. After photo-reducing it to a suitable size, I generously laminated it with clear sticky tape (no-cost method), then backed it with Tamiya tape. By cutting away the image, I created two sticky stencils (bells and ribbon) that I positioned in relevant places and painted the patterns in white so that the camouflage wouldn’t show through, and so that the final colours would be more vibrant. No – they ‘aint perfect, but they’ll do. Coloured paint gave me the items, but pencil lines and shading gave them a little 3-D detail.
| FINAL CONSTRUCTION |
 In
the home stretch - I attached the wheels and the UC doors.
Eight wheels, and not all of them were able to touch the ground.
Double rats!! The fix was to
gently rub the model back and forth over a sheet of sand-paper till all wheels
WERE touching. A better fix would
have been to leave one set of legs loose, and to glue it in later in a way that
all wheels to
In
the home stretch - I attached the wheels and the UC doors.
Eight wheels, and not all of them were able to touch the ground.
Double rats!! The fix was to
gently rub the model back and forth over a sheet of sand-paper till all wheels
WERE touching. A better fix would
have been to leave one set of legs loose, and to glue it in later in a way that
all wheels to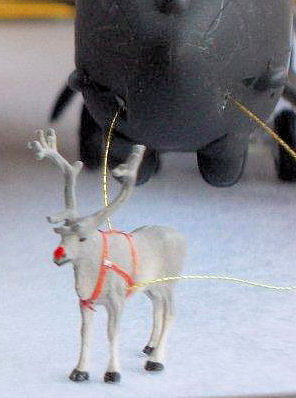 uched.
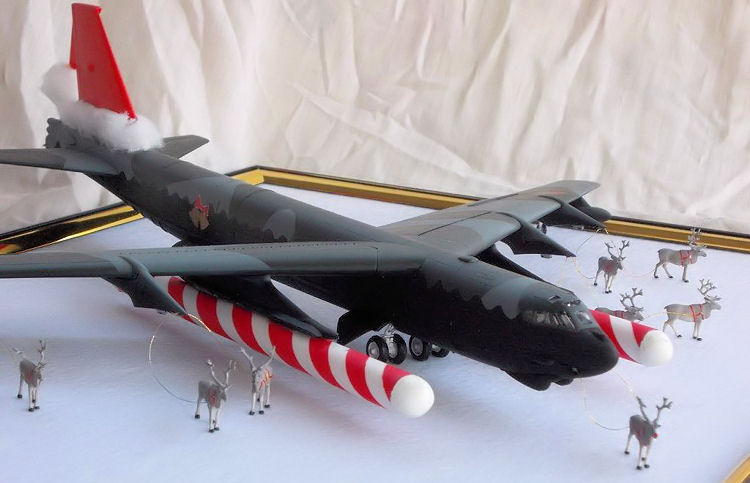
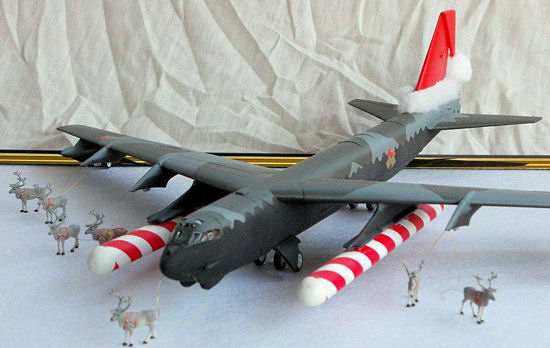
Large Christmas-themed pods were
scratch-built from plastic tubes, putty & paint, and attached under the weapon
pylons.
uched.
Large Christmas-themed pods were
scratch-built from plastic tubes, putty & paint, and attached under the weapon
pylons.
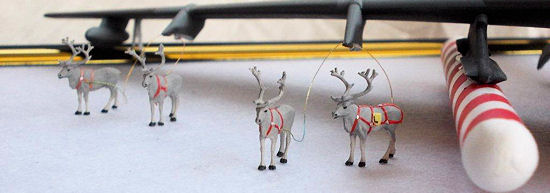
With metallic sewing thread, eight reindeer were loosely leashed (it’s not airborne, yet) in pairs, to the engine pylons, in place of the engines, and as they were bought from a model railway shop (6 for AU$26 – ouch!!), they didn’t need painting. For detail, I sought & found a photo of a harnessed reindeer in Lapland, and I replicated the harness on my dear deer figures, with narrow strips (0.4mm) of tape painted red. For a laugh, I put a small yellow L-plate on the flanks of one of the reindeer – only a keen observer will notice them. A lead/9th reindeer was positioned in front of the nose radome. Finally, I painted the red, green and white formation lights, and gave the lead reindeer a swollen red nose by using a little Krystal Kleer and red paint. For ease of carrying, everything was tacked onto a sheet of fluffy white cardboard that was mounted onto a picture frame. Why white? Well, you DO know that Santa lives at the North Pole - right?
| CONCLUSIONS |
 This
is a great kit that went together with a minimum of fuss (but a lot of care is
needed), so I’m happy to recommend it to builders of all skill-levels.
I reckon that a modeller would have no trouble with the engine parts that
I left-off.
This
is a great kit that went together with a minimum of fuss (but a lot of care is
needed), so I’m happy to recommend it to builders of all skill-levels.
I reckon that a modeller would have no trouble with the engine parts that
I left-off.
Call me picky,
but there were some things that I wanted to do, but didn’t.
I would have liked to place a suitably attired portly gentleman inside
the cockpit, with his waving arm protruding from an open window.
But I ran out of time because I had to search for the clear bit.
Anyway, the clear bit is really thick.
I would have loved to adorn the nose with a sexy noseart image (and named
her Mary Christmas?), but I couldn’t find a suitable one.
I would have liked to tether the reindeer to the pylons with wire (so
that I could remove the wings with the reindeer), but I wasn’t satisfied with
the look. And I would have liked to
build this in an in-flight mode, but the reindeer weren’t suitably configured,
and I wouldn’t be able to display it easily.
Never mind – I completed it in time for the End-of-Year/Festive Season
club meeting. Merry Christmas (or Happy
Holidays) to all MM readers, and especially to you, Scott.
| REFERENCES |
Just the instructions and a little lateral thinking.
December 2012
Thanks to for the preview kit. You can find this kit at your favorite hobby shop or on-line retailer.
If you would like your product reviewed fairly and fairly quickly, please contact the editor or see other details in the Note to Contributors.