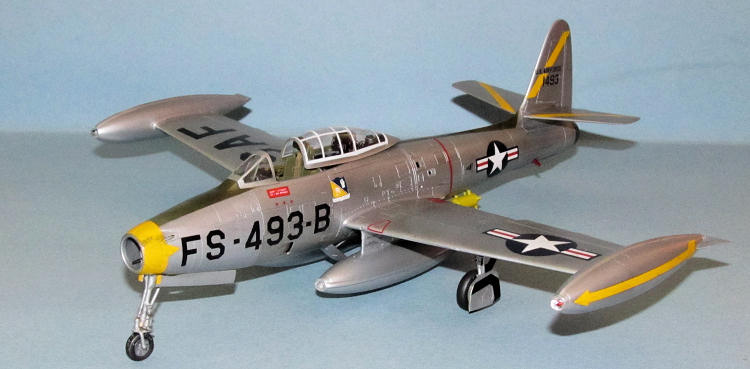
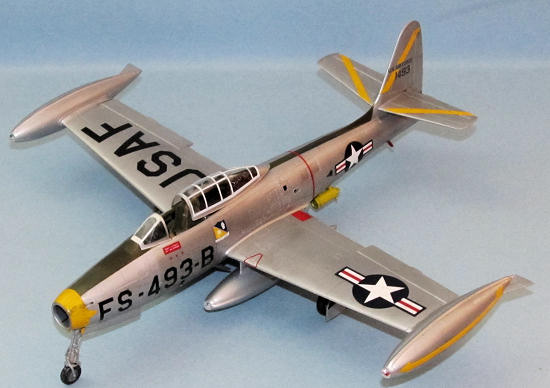
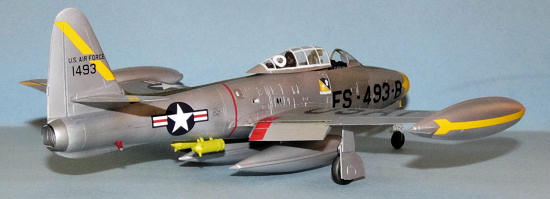
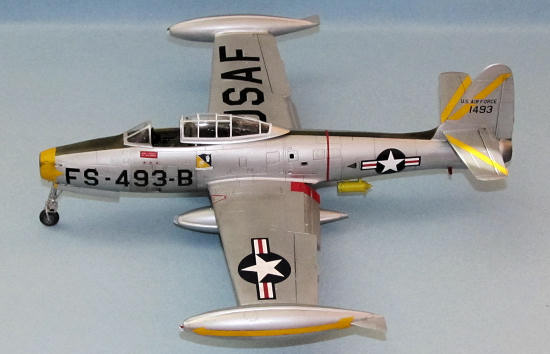
Tamiya 1/48 F-84G 'Thunderbirds'
| KIT #: | 61077 |
| PRICE: | $43.00 SRP |
| DECALS: | Several options |
| REVIEWER: | Dan Lee |
| NOTES: |
Cutting Edge Decal Sheet 48106, Cutting Edge F-84G Cockpit Set and
Teknics F-84G Landing Gear and Wheel Well Set |
| HISTORY |
The F-84G
was the ultimate straight wing version of the F-84 Thunderjet.
Designed by famed designer Alexander Kartveli as the
turbojet replacement for the P-47 Thunderbolt.
It was designed before the details of German swept wing
research were fully known.
F-84s went
into service in 1949 and suffered many problems that came with the first jets
including maintenance issues and its
 need to take
off using the entire length of a 10,000 foot runway with RATO/JATO assistance.
It wasn’t till the F-84E model that the F-84 became
useful soon to be followed by the “special weapon” and inflight refueling
capable F-84G.
Most F-84E/Gs in USAF were assigned to SAC as Fighter Escorts and
need to take
off using the entire length of a 10,000 foot runway with RATO/JATO assistance.
It wasn’t till the F-84E model that the F-84 became
useful soon to be followed by the “special weapon” and inflight refueling
capable F-84G.
Most F-84E/Gs in USAF were assigned to SAC as Fighter Escorts and
27th FEW
The 27th Fighter Escort Wing was originally the 27th Bomb Group (Light)
that flew A-24s (
In late 1950, it was sent to 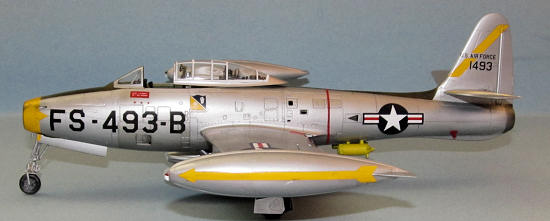 the 27th
Fighter Escort Wing was deactivated till 1991.
the 27th
Fighter Escort Wing was deactivated till 1991.
On a personal note, if an F-80 or F-84 pilot had slightly better aim then I would not be here today. During the early part of the war (late 1950/early 1951), my grandfather, then teenage father, was forced at gunpoint to help transport Chinese/NK supplies south in their ox cart at a time when their family farm was suddenly enemy held territory. Not surprisingly this convoy was noticed and came under serious air attack. The shanghaied farmers and laborers (including my grandfather and father) ran for their lives while their NK guards fired back using munitions loaded ox carts for cover (yeah, think about that.) .50 caliber tracers narrowly missed my father and hit a man just behind him. The gods of war smiled on them again as their cart was not one of those that were hit/blown up so they were able to get away with their oxen during the confusion.
| THE KIT |
Tamiya has
produced a couple of F-84G kits.
As it seems to be the Tamiya way, they tend not follow
up and do other planes in the series like the E or the swept wing F models.
The kit is made up of three sprues of typical Tamiya
Dark Grey plastic with parts that are free of flash and sink marks and one clear
sprue including the dreaded F-84G canopy reinforcement tape details plus a ball
bearing nose weight to keep it from being a tail sitter.
 This
particular boxing was for the F-84Gs that flew with the Thunderbirds.
It includes numerous decals for the spectacularly
painted demonstration jets but without most of the stencils.
This
particular boxing was for the F-84Gs that flew with the Thunderbirds.
It includes numerous decals for the spectacularly
painted demonstration jets but without most of the stencils.
I bought
this boxing on sale for half price at a LHS remainder sale.
At the time I had the Cutting Edge sets for the cockpit
and nose wheel well/intake splitter which address the two complaints about this
kit: lack of detail in the cockpit and the nose wheel well/intake splitter.
The nose wheel well/intake splitter is probably the most
troublesome of the two issues as the way it is molded there is no easy way to
fix the obvious seam running down the middle.
Of course there is no easy way to mold/engineer the nose
wheel well/intake splitter except as one piece so I can’t really blame Tamiya
there.
I was originally going to use them with a Revell F-84E kit I had
purchased, but I figured I would use them in this one because there are
significant differences in fuselage thickness between the Revell and Tamiya
kits.
Inspired in part by the recent impressive 1/32 HB builds by our editor and Tom Cleaver, I decided to build a F-84G as a Korean War build during my employer forced “vacation” caused spring/summer/fall of Near Metal Finish. It lacks the swept wing sexiness and “The Hunters over Mig Alley” cool of the F-86 Sabre, but it served the important role during the war providing long range escort for B-29s and more importantly close air support for the grunts at the sharp end of the stick.
| CONSTRUCTION |
It all
begin with trying to jam the Cutting Edge resin cockpit into the Tamiya F-84G.
It went well till I discovered much later that the angle
of the cockpit had shifted a few degrees.
I tore the fuselage apart and moved it again, but to my
dismay much later when I installed the seat I had noticed that the angle was
still off.
I glued in the ball bearing nose weight provided with the kit.
Next I added the nose wheel well/intake splitter which
went in without any issues.
 The exhaust
tube was next.
It is a two piece affair that required some sanding.
I think that Tamiya probably would have been wiser to do
what Revell did and used a one piece exhaust (downside--it is shallower) that
would be easier to assemble.
I found this to be one of the more difficult areas on
the F-84 model.
I left some of the seam there as it would have been difficult to
redo the detail.
The exhaust
tube was next.
It is a two piece affair that required some sanding.
I think that Tamiya probably would have been wiser to do
what Revell did and used a one piece exhaust (downside--it is shallower) that
would be easier to assemble.
I found this to be one of the more difficult areas on
the F-84 model.
I left some of the seam there as it would have been difficult to
redo the detail.
I left the
fuselage alone and worked on the wings and fuel tanks (wing tip and wing
mounted.)
The wings and fuel tanks were assembled without any real issue
aside from sanding/filling.
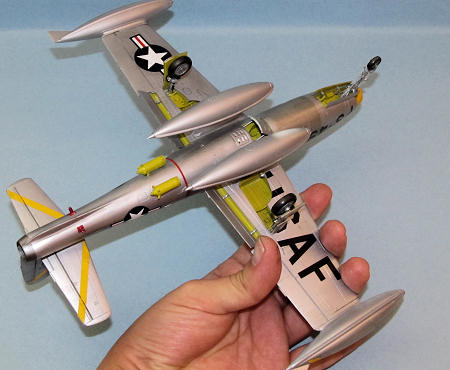
At this
point I sprayed on Chromate Yellow on the various interior details such as wheel
wells and the underside of flaps while the cockpit was painted interior green.
The cockpit details and instrument panel were done after
painting because they would just get in the way of the masking.
Closing up
the fuselage was a bit of a pain in the rear thanks to the resin bits.
I had some gaps on the underside that I needed to fix.
A lot of filling and sanding was done and then I had to
rescribe a lot of lost detail.
The nose gun detail parts were left off as I wanted to
close up the gun cover.
To my surprise the gun cover did not fit perfectly
closed and I had to do quite a bit more filling and sanding till it was done to
my satisfaction.
I added in the intake nose ring and that went smoother than the
gun cover.
The wings and ailerons were glued in place (angles adjusted) and the
model was polished with various grades of polishing cloth in preparation for
painting.
| COLORS & MARKINGS |
Painting
The first
thing I did was prime the model (and various detail bits including flaps, gear
doors and the resin air brake) using Tamiya Fine White Primer out of the spray
can.
It seemed to work well with the other builds and I had a lot fewer
problems with orange peel and runoff.
I did a decent job of sanding the seams so I only had a
couple of minor areas to work on.
The surface polished using various grits of polishing
cloth (3200-8000.)
After the model was cleaned and sprayed once again but
with TS-30 Old Silver.
Again the surface was polished using various grits of
polishing cloth (3200-12000.) I had to redo the paint only once.
Unlike
 previous
builds I did not use SNJ metal polishing powder as these planes were heavily
used in combat and exposed to the elements.
previous
builds I did not use SNJ metal polishing powder as these planes were heavily
used in combat and exposed to the elements.
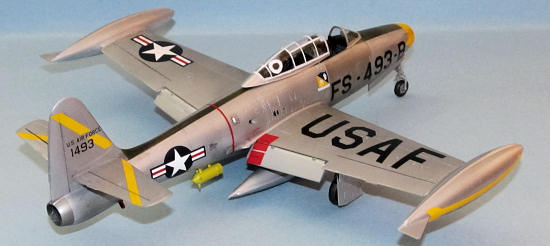
Once
everything was dry, I masked off various areas and sprayed on Tamiya Titanium
Silver or Metallic Grey acrylics to get various shades of metal.
I did not spray on a clear coat for the decals.
Lastly, I masked off the OD anti-glare panels and sprayed on Xtracrlyix
Olive Drab.
Decals
I used the
CE Decal Sheet 48106 that had Jacob Kratt’s F-84... E!
According to the serial numbers supplied, the plane in
question is an F-84E not G as mentioned on the decal sheet.
So much for the model being totally historically
accurate.
If one wants to convert a Tamiya G to an E model then one area
that needs to be fixed is the blown doors on the underside of the fuselage.
I opted not to as I did not realize this history
inaccuracy until everything was done.
The canopy
and windscreen were first painted interior green and then painted TS-30 Old
Silver.
The reinforcement tape was not as dreadful as I feared as it just
required some careful masking and decent coordination of a brand new number 11
Exacto knife blade.
 Otherwise
the decals went on without issues except two.
The first one was regarding the red squares that
indicate fuel dumps need to have holes drilled in the middle so that they will
not interfere with the fuel dump mounting holes.
The second issue was the nose band.
I prefer to paint stuff like this but the chromate
yellow I have is a slightly different shade than the one on the decal sheet so I
used the nose band which did not line up as well as I hoped.
BTW, Tamiya usually supplies a lot of stencils, but they
did not with this particular boxing of the F-84 so there are only a few.
Normally I would be one to howl and complain about the
stencils (ask me about my previous F-14A build) but in this case it looks wrong
without stencils and is just another thing the JMNs can take me to task about.
Otherwise
the decals went on without issues except two.
The first one was regarding the red squares that
indicate fuel dumps need to have holes drilled in the middle so that they will
not interfere with the fuel dump mounting holes.
The second issue was the nose band.
I prefer to paint stuff like this but the chromate
yellow I have is a slightly different shade than the one on the decal sheet so I
used the nose band which did not line up as well as I hoped.
BTW, Tamiya usually supplies a lot of stencils, but they
did not with this particular boxing of the F-84 so there are only a few.
Normally I would be one to howl and complain about the
stencils (ask me about my previous F-14A build) but in this case it looks wrong
without stencils and is just another thing the JMNs can take me to task about.
Weathering and Final Coat
I used a thin black watercolor wash for the details, removed the excess
with Q-tips and then sprayed on a couple of thin coats of Xtracylix Satin for
the final coat.
| FINAL CONSTRUCTION |
First thing done was completing the cockpit including painting the
interior and adding the pre painted instrument panel and gunsights as well as
the ejection seat.
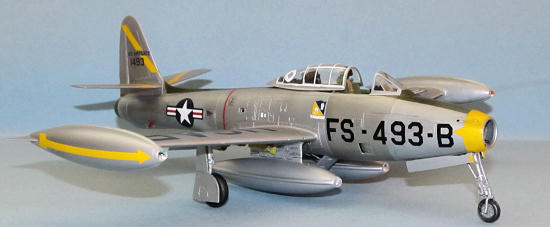 The Teknics
landing gear was painted AS-12 Aluminum, the excess metal removed and then glued
in place using CA glue.
I used the Tamiya wheels.
The only two areas that caused me a bit of grief was the
mounting of the nose wheel and the mounting of the nose landing gear struts.
The Teknics
landing gear was painted AS-12 Aluminum, the excess metal removed and then glued
in place using CA glue.
I used the Tamiya wheels.
The only two areas that caused me a bit of grief was the
mounting of the nose wheel and the mounting of the nose landing gear struts.
Meanwhile I
polished, primed and painted the external fuel tanks the same way as the rest of
the plane.
I did not polish these as much as the plane in part because I was
starting to tire of doing NMF planes and lazy.
Next the
flaps were glued in place (the mountings are fragile.)
The fuel dumps were painted red and silver then glued
in.
Next the canopy and windscreen were glued in place.
The resin underside air brake and braces were added as
well.
Lastly, the pitot tube was cut from some steel tubing and glued into the
intake with a bit of CA glue.
| CONCLUSIONS |
The Tamiya
F-84G is a decent kit that can be made into a show stopper, but it needs a lot
more work than their Bf-109, Corsair, Mustang and Spitfire kits.
The addition of aftermarket parts isn’t a necessity, but
it does improve the cockpit and deals with that difficult to remove centerline
seam on the nose wheel well.
I certainly had fun building this kit.
A lesson for some of you and myself... If you want historical accuracy then it is always good to have doubts about the veracity of the aftermarket decals you want to use and do some additional research to avoid having to write about how you used an F-84G kit to build an F-84E.
| REFERENCES |
Dan Lee
November 2011 If you would like your product reviewed fairly and fairly quickly, please contact the editor or see other details in the
Note to
Contributors.