Hasegawa 1/72 F-104G Starfighter
| KIT #: | 1002 |
| PRICE: | $5.00 'used' |
| DECALS: | Four options |
| REVIEWER: | George Schembri |
| NOTES: |
| HISTORY |
The F-104
Starfighter has always been an interesting aircraft for me – I remember being at
the Toronto CNE Labour DAY Weekend Airshow in my younger years and a pair of
CF-104’s were on the list of performing aircraft. One display was showing a
difference in speed with one Starfighter doing a slow fly-by and then another
zip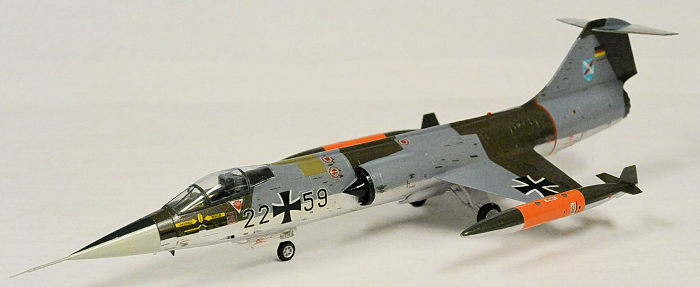 ping by at a much greater speed. I remember that the slower Starfighter
appeared to be ‘fighting’ to stay in the air with a high angle of attack and you
could hear the engine be throttled up and down as the pilot seemed to have the
aircraft almost sitting on its tail.
ping by at a much greater speed. I remember that the slower Starfighter
appeared to be ‘fighting’ to stay in the air with a high angle of attack and you
could hear the engine be throttled up and down as the pilot seemed to have the
aircraft almost sitting on its tail.
The printed sources I checked noted that only about three hundred and fifty Starfighters built as short range interceptors and fighter trainers but the multi-missionF-104G had over nineteen hundred units built for tactical support and recon activities. Back in the 60’s, the Starfighter was the subject of the biggest co-operative manufacturing programme in Europe since WWII with Belgium, Denmark, Germany, Italy and Norway all flying the F-104 in Europe and assembling also occurring in Japan and Canada.
| THE KIT |
This kit was purchased from a nearby regional hobby
store which also has consignment sales including ‘resale’ kits. Most of the
consignment kits may have been opened with the majority of them would still have
their inner packaging all sealed and also have been checked to be complete. This
particular kit had most of its fuselage built – an item not typically offered as
‘re-sale’ but I knew it was an awesome Starfighter kit; I was able to acquire
the kit ‘as-is’ for only $5 with minimal expectations but with a great fall back
plan of obtaining some excellent spare parts if things did not work out. The
focus of finishing this kit would be to complete the build and focus on
airbrushing with acrylics. In the past, I have
 assembled the Matchbox and ESCI
F-104’s in my younger years and knew this kit is the next level up in detail,
assembly and decals.
assembled the Matchbox and ESCI
F-104’s in my younger years and knew this kit is the next level up in detail,
assembly and decals.
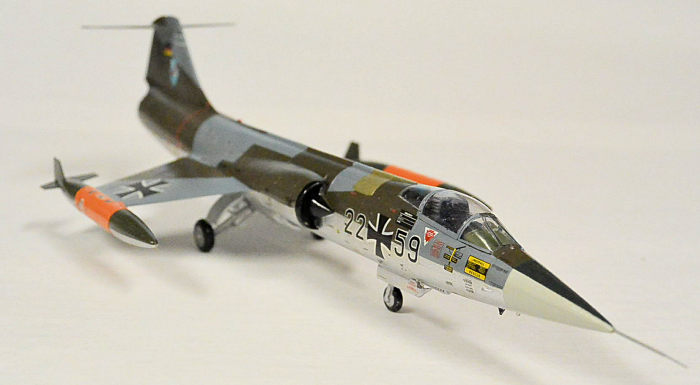
The kit instructions are print dated from 1989 – and the nicely engraved detail would be able to keep up with any recent more modern kits. The cockpit surfaces do have raised details but no detail on the side walls. There are some decals if one wishes a simpler route. The canopy has three pieces and can be in an opened or closed position.
The instructions show the fuselage is comprised of a front ‘single seat’ cockpit area from nose tip back to the intake vents with some drilling and some cut away items. The kit includes pylon components for the front end sidewinders and a centre line gas tank – but no actual equipment is provided for the forward pylons. The rear fuselage includes the main landing gear housing and an exhaust section which has decent detail and depth. The landing gear assembly is nicely detailed being made up of multiple strut pieces including clear landing lights. Each wing and the stabilizer are each molded as single pieces due to the actual wings being so thin (I remember seeing a CF-104 in a hanger in Hamilton and there were leading edge rubber guards in place in order to protect ground crew!) There are 2 types of ejection seats in the kit – I would assume the seats that are used are for the upward direction ejection seats while the unused pieces are for the downward ejection seats. (Editor's note: Several F-104 operators opted for Martin Baker seats which I believe are the other option beside the Lockheed seat).
| CONSTRUCTION |
This preowned kit had most of the fuselage assembled with some of the main landing gear struts in place. The previous owner did not drill out the front holes for the front equipment racks. The assembled components did look decent enough but minimal filler was required around the air intakes due to minor misalignment issues by the previous owner.
It was noticed that Part C6
was not seated correctly during assembly so the main landing gear struts needed
to be removed (broken apart) and had to be reassembled compen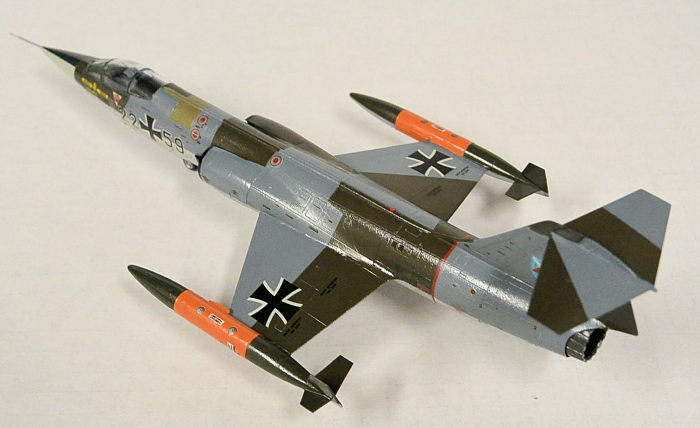 sating for the
misalignment of the landing gear housing with one extender arm shortened
slightly and the other extended using a thin bit of stretched sprue. Parts B11 &
B12 could not be found but some stretched sprue was used as replacements, these
would be pretty much covered up by the landing gear doors anyways.
sating for the
misalignment of the landing gear housing with one extender arm shortened
slightly and the other extended using a thin bit of stretched sprue. Parts B11 &
B12 could not be found but some stretched sprue was used as replacements, these
would be pretty much covered up by the landing gear doors anyways.
Similar alignment issue was noticed when putting the identified ejection seat in place; this probably occurred due to the kits requirement to have the cockpit tub ‘pinched’ into place – the cockpit floor was just a fraction of an inch to high and the installed seat interfered with the canopy being in the close position. I just simply removed the overhead pull-down loops and continued with the build.
The single piece wings were added with proper alignment but I was a little surprised that there are no ‘forward-view’ diagrams which show proper wing anhedral angle and landing gear alignment. There are mounting holes located on the wings for the inboard wings tanks. There are kit components which appears the be outer missile rails for wingtip Sidewinders but the rails are identified as ‘not for use’ and only wingtip tanks are provided and shown in the instructions. I had full intentions of mounting the inboard tanks so I kept the mounting holes open only to find out that part B14 was missing when I assembled the tanks – I’ll probably grab that part from another kit in a future build – so the mounting holes were left unfilled for future use.
| COLORS & MARKINGS |
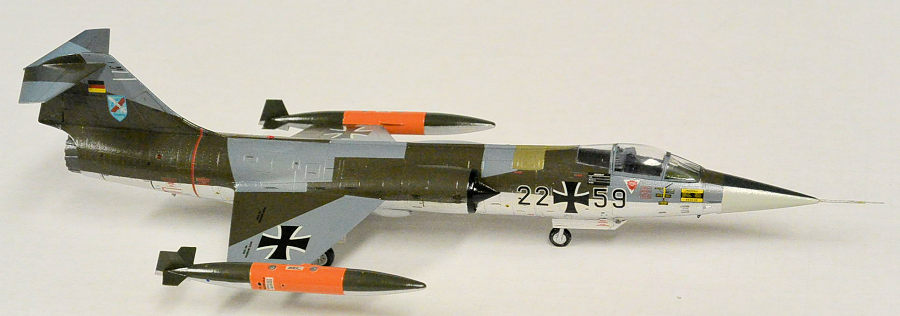
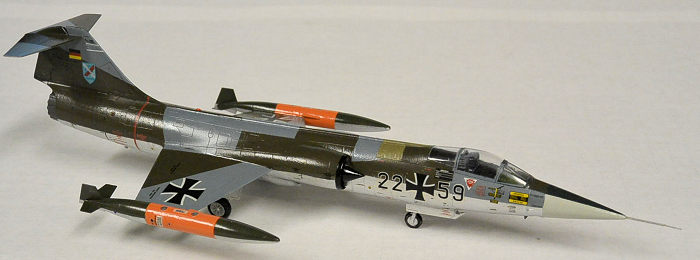 The kit provides four
options for Germany aircraft. Option 1 is a modern ‘lizard’ camo scheme from
JBG34 and then option 2 is an Olive/Grey camo unit from JBG31 (I chose this
aircraft). Option 3 & 4 are Neutral Grey units from MFG1 and MFG2 Marineflieger
units.
The kit provides four
options for Germany aircraft. Option 1 is a modern ‘lizard’ camo scheme from
JBG34 and then option 2 is an Olive/Grey camo unit from JBG31 (I chose this
aircraft). Option 3 & 4 are Neutral Grey units from MFG1 and MFG2 Marineflieger
units.
Colours are identified by
Gunze and Mr. Color paint shad identification. Conversion charts identified
colour interpretations, choosing Tamiya X-11 Chrome silver to replace H8 Silver
and XF-58 Olive Green to sub for H78 Olive Drab and XF-53 Neutral Grey to sub
for H53 Neutral Grey. Additionally, XF-21 Sky subbed for H74 Sky for the nose
cone and exhaust tunnel and for some reason I cannot remember what I used for
the H309 Dark Green Antiglare Panel. All paints were thinned down using Tamiya
X-20A Acrylic thinner. Tamiya masking tape was used for the sharp edged colour
separation – which made things a lot easier as I did use my Paasche H-1 tipped
external action airbrush, not having to worry about blending any colours. I had
to mix my own shade of H14 Orange; I ended up mixing Testors Model Master #1708
Insignia Yellow and #2719 Italian Red, mixing the two until the desired shade
was achieved. Being away from modelling from about 25 years, I was reminded
about the difference in airbrush cleanup when using the different paint types –
I think I am now sold on using acrylics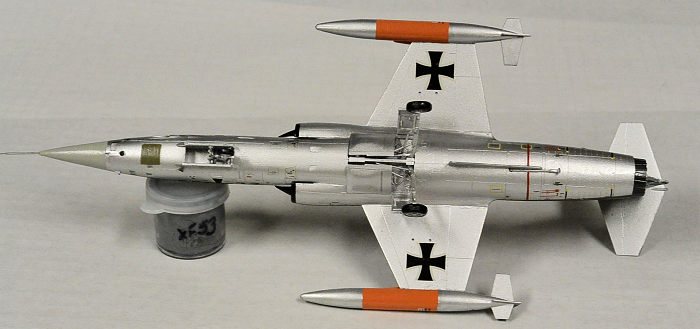 whenever they was available – which will
be pretty much ‘always’ from now on. I have always preferred the finish of
enamels but the smell and clean-up do make painting with enamels a bit of a task
– acrylics just seem to require minimal effort. I was quickly reminded just how
any imperfections appear to be magnified when finishing a model with a silver
paint and took note for any future builds. The tan sections on the top and
bottom of the plane were painted using Testors Model Master #1792 SAC Bomber
Tan.
whenever they was available – which will
be pretty much ‘always’ from now on. I have always preferred the finish of
enamels but the smell and clean-up do make painting with enamels a bit of a task
– acrylics just seem to require minimal effort. I was quickly reminded just how
any imperfections appear to be magnified when finishing a model with a silver
paint and took note for any future builds. The tan sections on the top and
bottom of the plane were painted using Testors Model Master #1792 SAC Bomber
Tan.
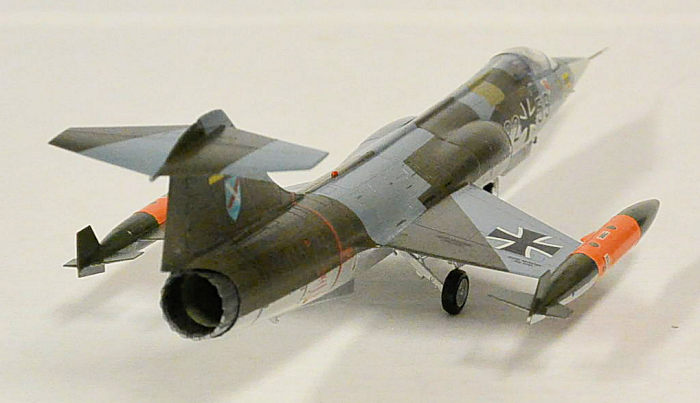
Once painting was completed the entire model was coated using Future/Pledge Floor Glaze to prepare for the decals. The older kit decals did have some yellowing; I was able to reduce the yellowing by ‘bleaching’ the decals by placing them in direct bright sunlight for a few days. The yellowing was not completely eliminated but it was noticeably reduced. The decals cooperated splendidly although they were on the thick side. The decals separated well after proper soaking and using Micro Set and Sol provided me with great adhesion with no silvering effect. The amounts of detail provided with the decals do produce a great looking aircraft with stencilling comparable to a larger scaled model.
| FINAL BITS |
 Final landing gear was
glued in place ensuring proper alignment (or the best I could) then the wing
tanks and tail stabilizer (that’s when I noticed I painted the stabilizer
backwards and I was not really interested in correcting the mistake). The canopy
was separately masked and brush painted with an initial interior colour coating
followed by the external camouflage colours. Micro Kristal Clear was used to set
the canopy in the closed position. The front Pitot tube was missing from the kit
but that was corrected with a couple of stretched sprues which were cut and
glued into place, painted Titanium Silver. The rear body navigation lights were
prepared to be put in place but ended up being shot across the room a few times
when I applied too much pressure on the tweezers – I ended up losing one of the
lenses and had to fill in the void using a couple of applications of Micro
Kristal Klear.
Final landing gear was
glued in place ensuring proper alignment (or the best I could) then the wing
tanks and tail stabilizer (that’s when I noticed I painted the stabilizer
backwards and I was not really interested in correcting the mistake). The canopy
was separately masked and brush painted with an initial interior colour coating
followed by the external camouflage colours. Micro Kristal Clear was used to set
the canopy in the closed position. The front Pitot tube was missing from the kit
but that was corrected with a couple of stretched sprues which were cut and
glued into place, painted Titanium Silver. The rear body navigation lights were
prepared to be put in place but ended up being shot across the room a few times
when I applied too much pressure on the tweezers – I ended up losing one of the
lenses and had to fill in the void using a couple of applications of Micro
Kristal Klear.
| CONCLUSIONS |
Well the main objective was accomplished. I was able to deal with difficulties from the original build and get a bit more experience using acrylics with the airbrush and was able to get the decals applied all without pulling out too much of what hair I have left. I was pleased with the Tamiya paints and the colour matching which achieved the look and camo scheme that I was after using stock kit parts and decals. I liked this kit enough that I went ahead and purchased a couple of Hasegawa D16 F-104J/CF-104 kits and plan on building 2 versions of the CF-104 configuration. My ESCI CF-104 kit (9044) will probably end up staying in storage longer than I originally planned. This G model now sits next to my ESCI 9011 F-104C which was built a couple of decades ago.
One thing I did notice as I was taking pictures was that aircraft identification decals on the port side just below the cockpit appeared to have grabbed the acrylic paint and caused slight cracking around the edge of the decal – I may have applied the decals in haste and the paint may not have cured fully – note for future builds to allow the acrylic paint to cure for a couple of days instead of just overnight.
| REFERENCE |
Military Aircraft of the World – Editor Chris Chant, Presidio Press California
Pocket Encyclopedia of World Aircraft in Colour: FIGHTERS – Kenneth Munson, Blanford Press, London
21 September 2020
Copyright ModelingMadness.com.
If you would like your product reviewed fairly and fairly quickly, please contact the editor or see other details in the Note to Contributors.
Back to the Main Page Back to the Review Index Page Back to the Previews Index Page