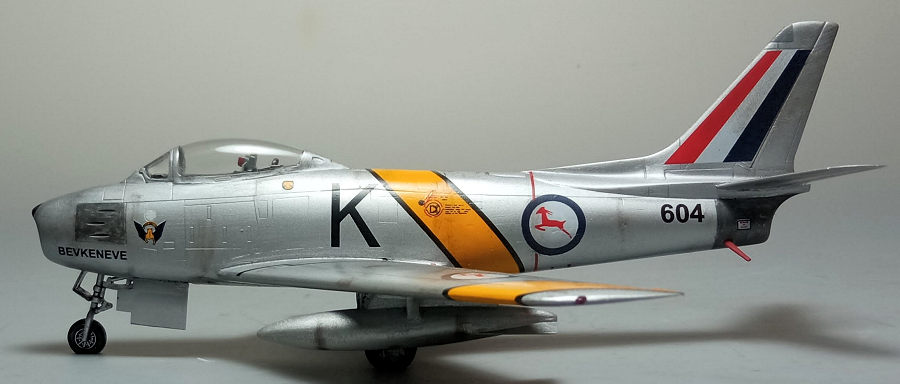
Hobby Boss 1/72 F-86F-30 Sabre
| KIT #: | A00504 |
| PRICE: | $8.00 |
| DECALS: | Two options |
| REVIEWER: | Spiros Pendedekas |
| NOTES: | Easy Assembly kit |

| HISTORY |
 The
2 Squadron SAAF was formed in 1940 and has a long history, having been involved
in every single combat action in which the SAAF has taken part. During the
Second World War it made a name for itself in the battles for East Africa,
before distinguishing itself in North Africa as part of the Desert Air Force and
later in Italy.
The Squadron was South Africa's contribution to the United Nations war effort during the Korean War from November 1950 to December 1953, having been attached to the 18th Fighter-Bomber Wing USAF for the duration of the war. Initially flying the P-51 Mustang, it was re-equipped with the F-86 Sabre in February 1953. During the war it flew a total of 12,067 sorties, most being dangerous ground attack missions.
74 of the 94 Mustangs and 4 out of the 22 Sabres were lost during the Korean War along with 33 pilots (14 killed in action, 11 missing in action, 8 killed in accidents). For its actions, the 2 Squadron received the Republic of Korea Presidential Unit Citation, United States Presidential Unit Citation and numerous other awards and decorations. Eleven Korean War SAAF casualties are buried at the United Nations Memorial Cemetery, Busan, South Korea.
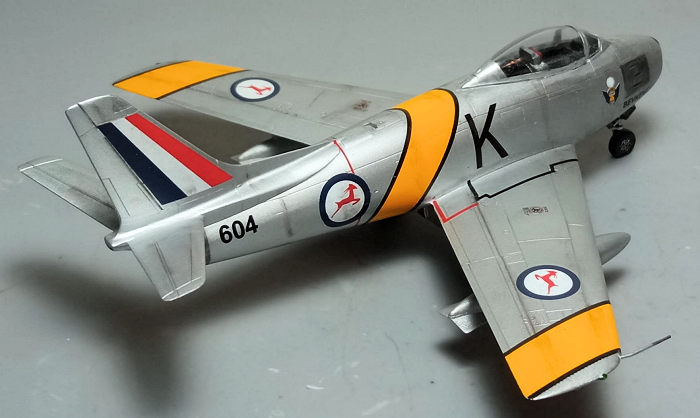
F-86F-30-NA s/n 52-4311 was loaned to 2nd Squadron SAAF in early 1953, receiving the code ‘604/K” and was initially named “BEVKENEVE” by Capt. J. F. Nortje, before renamed “BLACK DICK” by 2Lt. H. H. Ludic. Along with all the other SAAF 2nd Squadron Sabres, it was based at Osan Air Base, falling under overall command of USAF’s 18th Fighter-Bomber Group. At some point, it was returned to the USAF, assigned to the 16th FIS (51st FIG) and finally transferred to the Republic of China AF.
| THE KIT |
 Hobby
Boss Easy Assembly kits are in general cheap, quite simple in layout and easy to
put together. They can mostly be snap-fitted, but can also be permanently glued.
They are very well done in their own manner, with the level of detail in some
cases (as is the case here) approaching closely the one found in other “Non Easy
Assembly” kits.
The subject kit is the F-86F-30 2020 reboxing of the 2007 original edition and for a look at its contents you may read its preview, found in the ever growing MM archives.
| CONSTRUCTION |
I started by assembling the intake duct that doubles as a cockpit tub and mounting it onto the lower fuselage half (which also contains the wings). Knowing that every F-86 model is a major candidate for tail sitting, I secured around 20 grams of suitably cut fishing weights at the space between the rear area of the cockpit tub and the lower fuselage half.
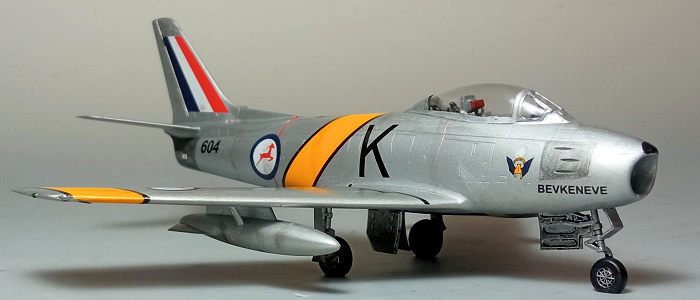
Basic cockpit color was black, as was the instrument panel, side consoles, stick grip and inner anti glare areas. A leftover instrument decal was cut to size and applied onto the plain instrument panel, as it would be visible even from the very clear canopy. The rear mounted ADF loop aerial was painted clear orange. The seat had red upper cushion, green lower cushions, yellow/black ejection handles and received seat belts from masking tape. Though I was tempted to paint the seat’s framing black per the basic cockpit color, I chickened and went for the “safer” gray.
 The
top fuselage half was next attached to the lower half, with the exhaust trapped
in the rear, followed by the tail planes. The latter are to be attached at a
distinctive dihedral, something very easy to be accomplished due to the very
precise fuselage cutouts. Having decided to go for retracted airbrakes, I
carefully glued them as flush as I could to the fuselage. The nose lip was
finally attached to the front, followed by the wing tanks that were assembled at
this time, as well.
Since, for my bird, all landing gear parts and door innards were silver, with only the gear bays interior green, I decided to attach all landing gear parts (sans the main wheels) in position and effortlessly paint them silver together with the basic model. Interestingly, Hobby Boss has molded the main doors’ attaching points differently, to make them sort of keyed, presumably to help the inexperienced modeler attach them correctly, resulting in some difference in appearance between these attaching areas (they should be identical) when viewed from a close distance.
Concluding basic assembly, overall fit was very good, especially for a “snap-tite” kit. I used filler at some of the fuselage joints and at the airbrakes area. As a note, photo reference shows the specific bird (and most, if not all Korean War SAAF Sabres) carrying the slatted wing, so I shaved off the molded-on wing fences, only hoping that the wiing length would not be off scale. After a fine-grade sanding, I took the Sabre to the paint shop!
| COLORS & MARKINGS |
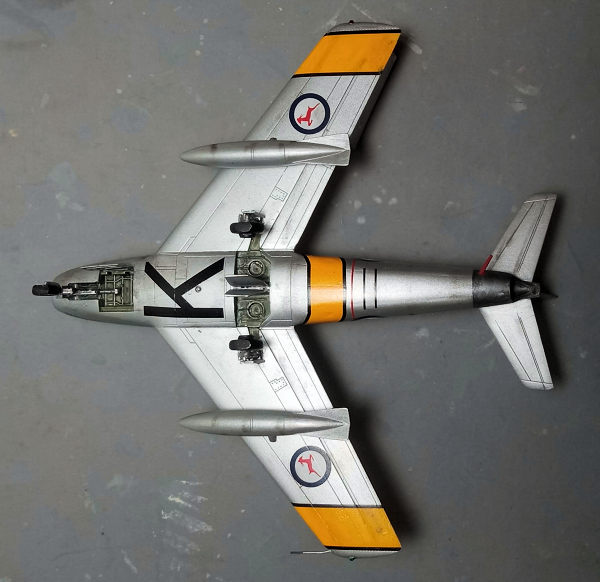 I gave the
complete model, together with the wing tanks and doors, a coat of Hu11 Silver,
which I lightly buffed with a soft cloth upon drying, to add some extra shine.
The gun panels then had their borders masked and were painted Testors Burned
Metal, with the same color used for the exhaust and the distinctive external
area around it. The small front radome and the fin located dielectric aerial
fairing were painted black and light gray respectively. A coat of Future (not
for glossiness, as the silver dries nevertheless gloss, but for its protection)
prepared the bird for decals.
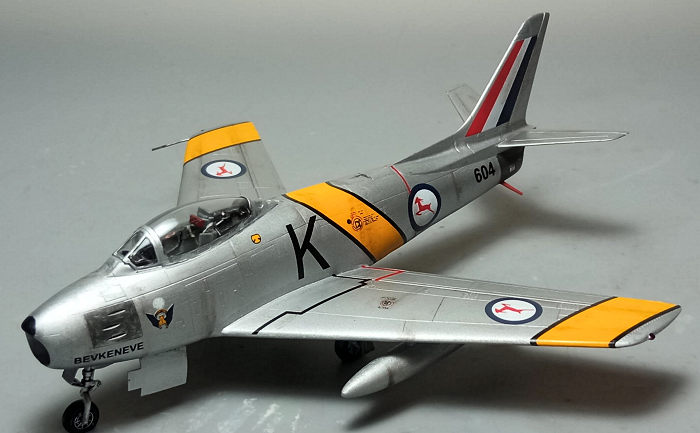
I used the kit decals, in order to represent 2 Squadron’s SAAF s/n 604 example, named “BEVKENEVE” as it stood in Osan Air Base in Korea sometime in early 1953. As all recent Hobby Boss decals, they behaved flawlessly, easily detaching from their backing paper and nicely adhering to the model, succumbing to every engraved detail without any use of decal softener! I even used the distinctive yellow bands for the wings and fuselage, which, with some careful placement, went together beautifully, making the otherwise nerve wracking job of attaching the yellow Korean War bands (and the thin wing walk lines) a pleasant experience. Bravo Hobby Boss!
A coat of Future sealing everything.
| FINAL CONSTRUCTION |
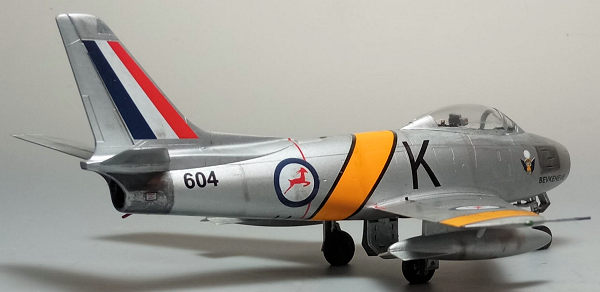 The
main wheels were attached. Tires were painted black, all three rims were painted
silver, while the main wheels' distinctive brake housings were painted gunmetal.
To somehow enhance the looks, I added brake lines from stretched sprue. All
wheels were tad filed to look weighted. The wing tanks were snap fitted at this
time, as well.
Time for some weathering, consisting of a black wash, which accentuated all engraved paneling and also gave at the landing gear area a used, oily look. Some dark brown and black dry pastels were also applied at areas where some dirt or grime would reside, with a final satin coat giving the bird its final hue.
The distinctive rear port mounted fuel vent pipe was represented by a piece of oval shaped stretched sprue, painted red. Typically, I had cut off the wing mounted pitot tube at early stages, in order not to damage it. Not changing the habits of a lifetime, I lost it at some point, so I made one from stretched sprue, with its body painted silver and its tip gunmetal.
The canopy had its well defined frames hand painted and attached in position, with fit being good and the gaps treated with white glue. The wingtip lights were represented with blobs of red and green clear paint, before calling the SAAF Sabre done!
| CONCLUSIONS |
I cannot stress enough how happy I was with this Hobby Boss “Easy Assembly” 1/72 Sabre kit: general shape looks correct, molding is crisp with nicely done engraved panel lines, detail is all over acceptable, canopy is well molded and crystal clear, instructions are great, the construction itself could not be simpler and decals are absolutely superb, with all these offered at a price tag that is a good fraction of the ones mainstream kits are typically sold.
Judged by absolute terms, the kit’s level of detail lacks (though not that much) compared to recent more detailed offerings, but, really, what you get for its price tag is stunning, let alone the fact that the simplicity of construction (which even allows to snap-fit almost all parts), deems this kit absolutely suitable to introduce a youngster to the magic world of modeling.
Happy Modeling!
19 November 2024 Copyright ModelingMadness.com. All rights reserved. No
reproduction in part or in whole without express permission. If you would like your product reviewed fairly and fairly quickly, please
contact
the editor or see other details in the
Note to
Contributors.