Airfix 1/48 Canadair Sabre Mk.5
| KIT #: | A08109 |
| PRICE: | $50.00 |
| DECALS: | Three options |
| REVIEWER: | David Jones |
| NOTES: |
| HISTORY |
 The
North American F-86 Sabre family really doesn’t require a lot of introductions
as it was used all over the globe. The versions that I’m focusing on are the
Canadian built Canadair family of Sabres that were designated CL-13 Mk 1-Mk 6
and had some features unique to them from U.S. built North American Sabres.
The
North American F-86 Sabre family really doesn’t require a lot of introductions
as it was used all over the globe. The versions that I’m focusing on are the
Canadian built Canadair family of Sabres that were designated CL-13 Mk 1-Mk 6
and had some features unique to them from U.S. built North American Sabres.
The subject of this build is a CL-13A Mk 5 which was externally similar to a U.S. F-86F-30 but had a more powerful Orenda 10 engine. Obviously, it wasn’t that simple but for modeling purposes, any Sabre with a ‘6-3’ hard wing is close.
There were 370 Canadair CL-13A Sabre Mk 5’s built. They were all intended for the RCAF but 75 were withdrawn and went to the West German Luftwaffe. After retirement, many were sold to the U.S. as drones as well as civilians.
| THE KIT |
The Airfix Sabre is made in several versions and comes with some unusual wing engineering as a result. The one I used to build this kit is the Canadair F.4 boxing in British markings. Before I delve into the kit in detail, I must emphasize that my example had short-shot parts and warpage here and there so obviously there were some quality control issues.
As for the kit itself, it is molded in soft gray plastic and the panel lines and details are rather clunky for a kit made in 2020.
| CONSTRUCTION |
 The kit
of the F.4 is one fitted with the “6-3’ hard wing and for modelling purposes is
almost identical externally to the Orenda powered Mk 5 before the ‘Sugar Scoops’
were added starting in 1958/1959. Given the aircraft I’m depicting was in 1955,
it’s basically out of the box except for detail sets I chose to add myself.
The kit
of the F.4 is one fitted with the “6-3’ hard wing and for modelling purposes is
almost identical externally to the Orenda powered Mk 5 before the ‘Sugar Scoops’
were added starting in 1958/1959. Given the aircraft I’m depicting was in 1955,
it’s basically out of the box except for detail sets I chose to add myself.
I started with the fuselage inserts that were for closed gun bay panels and found the fit was poor. This was a sign of things to come due to the warpage on my kit.
Next, I decided to dress the kit up a bit with a CMK cockpit and a Reskit exhaust. The cockpit was painted dark gull gray with black consoles. The cockpit, air intake and exhaust all go in at the same time. These did not want to fit that well, but whether it was an operator error on my part or warpage I can’t decide. After wrestling everything into place, I took the time to add lead shot ballast before closing up the fuselage.
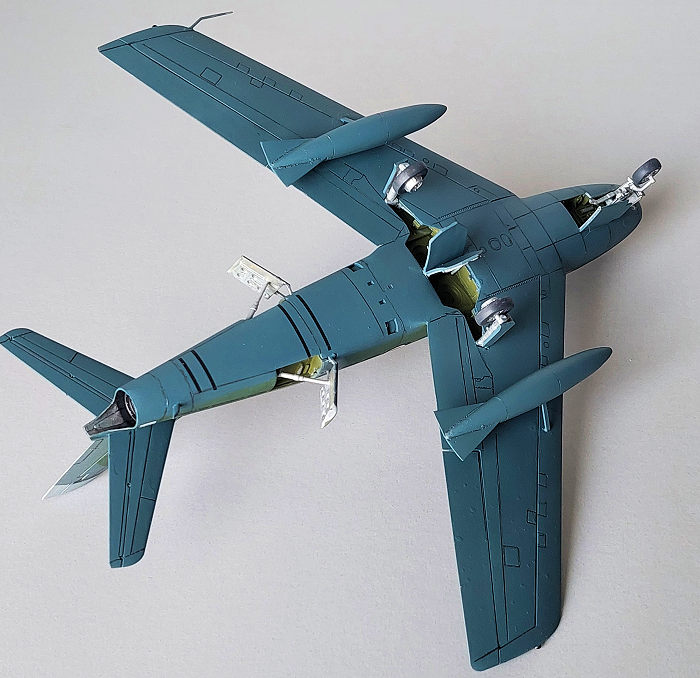
From there I moved to the wings which also suffered from warping fore and aft. The wings themselves fit together well enough but the fit to the fuselage was not good at all. I browsed the web about this matter and saw no one else mentioned this. Then I discovered another problem: The flashed over holes for the fuel tanks were too far out on the wing!
Though I was less than thrilled, I puttied the holes over I drilled out previously and drilled new holes for the drop tanks 3/8ths of an inch inboard on either side.
After that it was a matter of putty and primer multiple times until things were set right. The airframe was given a final coat of Mister Surfacer 1000 and the panel lines were carefully reengraved with an X-acto knife.
| COLORS & MARKINGS |
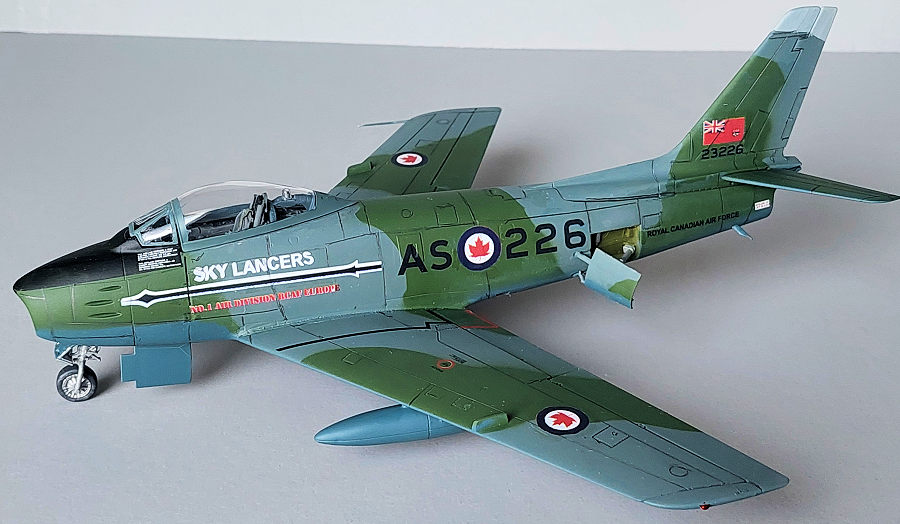
 The
upper surface camouflage was painted with Atom Acrylic colors Dark Sea Grey and
Dark Green. I used Humbrol PRU Blue Acrylic underside. These all performed
flawlessly, and I was really impressed with the Atom paints since I’d never used
them before. All the additional details were picked out with Tamiya Acrylics.
The
upper surface camouflage was painted with Atom Acrylic colors Dark Sea Grey and
Dark Green. I used Humbrol PRU Blue Acrylic underside. These all performed
flawlessly, and I was really impressed with the Atom paints since I’d never used
them before. All the additional details were picked out with Tamiya Acrylics.
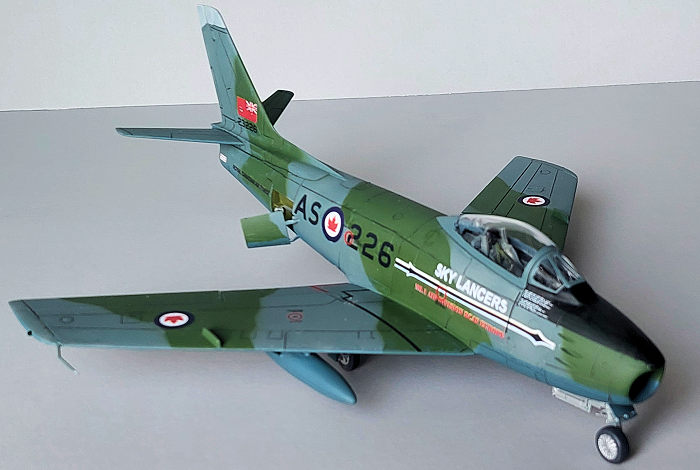
I wanted to build an RCAF bird and found DEK’LS from Australia makes a Skylancers Aerobatics Team sheet from their 1955 season. The markings are sedate for an aerobatic team with just a basic “Skylancers” logo emblemized on the side. These limited run decals are multilayered and very thin, so extra care was needed. The stencil decals were sourced from the kit and went down nicely over a coat of Tamiya’s Acrylic Gloss.
Lastly, the model was painted with Tamiya Flat and weathered with pastels and pencils. Since the photos of the actual aircraft show it to be very clean, I kept weathering to a minimum. Afterwards the kit was finished with an additional coat of Tamiya Flat.
| CONCLUSIONS |
Despite all the difficulties, I like the results of my build. I have two other Airfix Sabres that have no evidence of short-shots or warpage issues I can detect so I’m going to guess that this particular kit was a fluke. The Airfix wing is engineered a bit wonky to make multiple versions but aside from that, the kit is conventional.
I would recommend the Airfix kit to those who like the open gun bays and have a few kits under their belt. It really doesn’t supersede the older Hasegawa or Academy kits. They still look quite nice by comparison and are much simpler to build.
| REFERENCES |
There aren’t that many Sabre references out there considering the popularity of the subject. The main ones I used for this model are:
The Canadair Sabre by Larry Milberry
Koku-Fan Illustrated No. 2 F-86 Sabre
Modeler’s Guide to the Sabre & Fury by Jay Sherlock
Happy Modeling!
12 August 2025
Copyright ModelingMadness.com. All rights reserved. No reproduction in part or in whole without express permission from the editor.
If you would like your product reviewed fairly and fairly quickly, please contact the editor or see other details in the Note to Contributors.