Airfix 1/48 Canadair Sabre F.4
| KIT #: | A08115 |
| PRICE: | $50.00 or so |
| DECALS: | Two options |
| REVIEWER: | David C Jones |
| NOTES: | Kitbashed with Revell F-86D. Cutting Edge decals |
| HISTORY |
 The North American F-86
Sabre family is well known so little needs to be said as it was used all over
the world. The versions that I’m focusing on are the Canadian built Canadair
family of Sabres that were designated CL-13 Mk 1-Mk 6 and had some features
unique to them from U.S. built Sabres.
The North American F-86
Sabre family is well known so little needs to be said as it was used all over
the world. The versions that I’m focusing on are the Canadian built Canadair
family of Sabres that were designated CL-13 Mk 1-Mk 6 and had some features
unique to them from U.S. built Sabres.
The subject of this build is a Mk 4 (British F.4) which was similar to a U.S. F-86E-10. Some of the Mk 4s were fitted with early ‘slatted’ wings and others had the ‘6-3’ hard wings. As I already had a Mk 5 kit with a hard wing, I wanted to do a ‘slatted’ wing instead. For this, I sourced a wing from the Revell F-86D Dog Sabre which I’ve seen other builders do with their kits.
The CL-13 Sabre Mk 4 was mainly intended for the RAF, but some were diverted to the USAF and RCAF. 438 were built. After retirement they were refurbished and passed to many other allied countries.
| THE KIT |
The Airfix Sabre is molded in gray plastic and the panel lines and details are rather soft for a kit made in 2020. Since I was doing a major conversion, most of my comments will focus more on that.
| CONSTRUCTION |
 The Airfix kit of the
F-86F-40 is (naturally) fitted with the later F-40 slatted wing and I needed an
early slatted wing associated with the F-86A-F-86E versions. For the most part,
the fuselage F-86F-40 is very close externally to the Mk 4. I cautiously
dry-fitted the Revell wing to the taped together Airfix fuselage before
committing to the plastic surgery involved.
The Airfix kit of the
F-86F-40 is (naturally) fitted with the later F-40 slatted wing and I needed an
early slatted wing associated with the F-86A-F-86E versions. For the most part,
the fuselage F-86F-40 is very close externally to the Mk 4. I cautiously
dry-fitted the Revell wing to the taped together Airfix fuselage before
committing to the plastic surgery involved.
After carefully installing the closed fuselage panels associated with the gun bays, I decided to add a CMK cockpit and Reskit exhaust to dress up the Sabre a bit. The cockpit was painted black with black consoles. The only real interior color was the green seat harnesses. Next, the cockpit, air intake and exhaust were all installed as a group. These fit well with careful alignment but are very tight. I also added lead shot ballast to the nose before sealing up the fuselage.
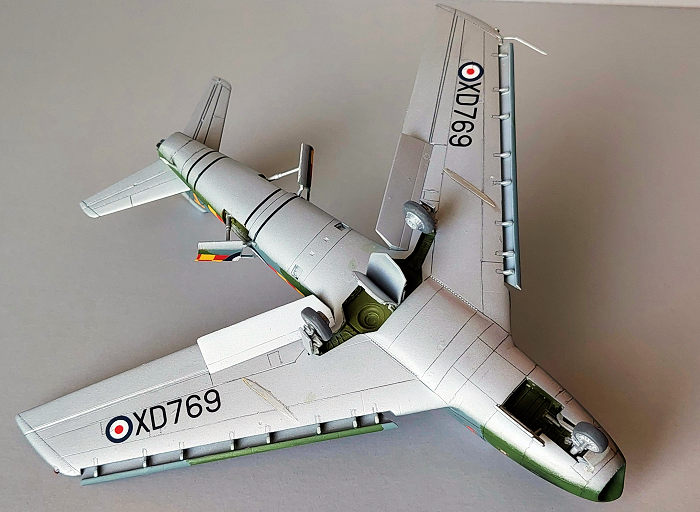
At this point I moved to the wing. The wings were constructed conventionally with all the Revell parts. The only deviations I made were to cut the center section out of the Revell gear bay and installing the Airfix center wheel well section (Part B27) which was a drop fit and had more depth than the Revell one (Part 82).
Once the Revell wings were done, the fit to the fuselage is actually very close. The forward and aft sections of the Airfix wing were carefully sawed off and fitted to the fuselage before grinding things back a bit to fit the Revell wing. It took about fifteen minutes between my Dremel Tool and a flat file to get things mated up positively.
After that it was a matter of putty and primer multiple times until things sat properly. Then the airframe was given a final coat of Mister Surfacer 1000 and the panel lines were carefully reengraved with an X-acto knife.
| COLORS & MARKINGS |
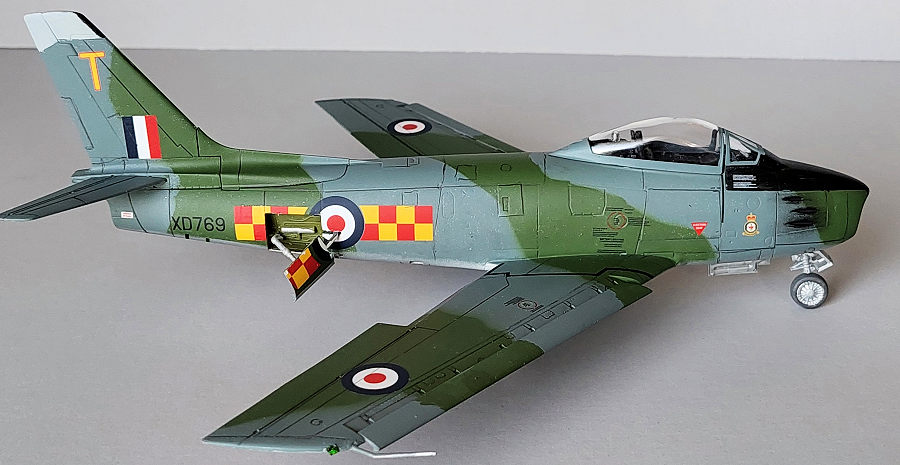
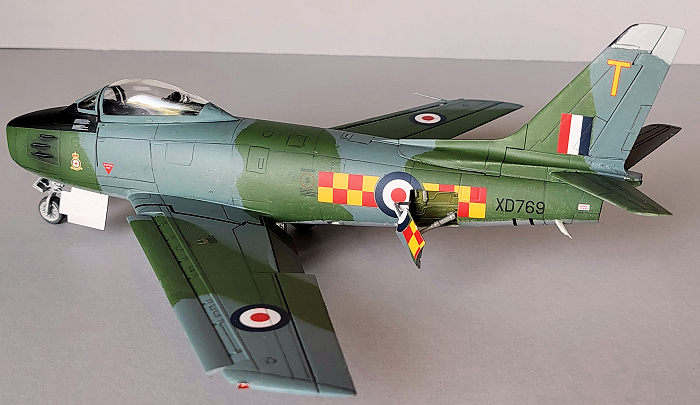 The camouflage
was painted with a combination of Atom Acrylic paints. The top was finished in
Dark Sea Grey and Dark Green. These performed well, going on thin and opaque
with a minimum of fuss. The undersides of the real aircraft were painted with
silver lacquer.
The camouflage
was painted with a combination of Atom Acrylic paints. The top was finished in
Dark Sea Grey and Dark Green. These performed well, going on thin and opaque
with a minimum of fuss. The undersides of the real aircraft were painted with
silver lacquer.
I decided to use Atom Acrylic Silver and had mixed results. Metallic colors have always been a weak point for me and this was no exception. It did not want to lay down evenly and took several coats before it looked right. All the additional details were done with Tamiya Acrylics.
The remaining fiddly bits were to attach were all Airfix except the main landing gear struts and wingtip lights that were Revell.
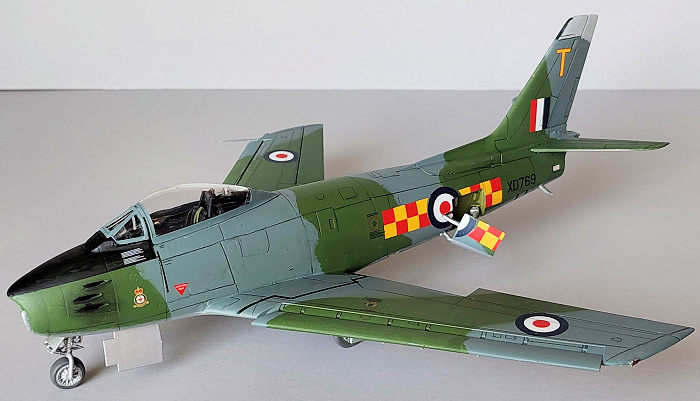
I wanted to do an RAF bird and found several sets made by Eagle Strike that had slatted wing options. Eventually I settled on XD769 that had colorful red and yellow checkerboards to brighten things up a bit. They went down nicely over a coat of Tamiya’s Acrylic Gloss.
Next the model was coated with Tamiya Flat and weathered with pastels and pencils. Most of the photos of RAF 92 Squadron were of clean aircraft, so I kept the weathering toned down to soot around the gun muzzles and minor staining. Afterwards it was sealed with another coat of Tamiya Flat.
| CONCLUSIONS |
I enjoyed this conversion. It had difficult points but overall, it was a clean build, and I plan to construct an F-86L out of the spare wing and fuselage in the future. This kind of bodywork isn’t for everyone, but if you’ve done serious resin conversions in the past, it shouldn’t prove that much more of a challenge.
| REFERENCES |
There aren’t that many comprehensive Sabre books out there considering the popularity of the subject. The main ones I used for this model are:
The Canadair Sabre by Larry Milberry
Modeler’s Guide to the Sabre & Fury by Jay Sherlock
Sabre -The Canadair Sabre in RAF Service by Duncan Curtis
Happy Modeling!
18 August 2025
Copyright ModelingMadness.com. All rights reserved. No reproduction in part or in whole without express permission.
If you would like your product reviewed fairly and fairly quickly, please contact the editor or see other details in the Note to Contributors.