Airfix 1/48 Sabre Mk.6
| KIT #: | A08115 |
| PRICE: | $$50.00 |
| DECALS: | Two options |
| REVIEWER: | David C Jones |
| NOTES: | Armycast 48-027 decals |
| HISTORY |
 The North
American F-86 Sabre family really doesn’t require a lot of introductions as it
was used all over the world. The versions that I’m focusing on are the Canadian
built Canadair family of Sabres that were designated Canadair CL-13 Mk 1-Mk 6
and had some features unique to them from U.S. built Sabres.
The North
American F-86 Sabre family really doesn’t require a lot of introductions as it
was used all over the world. The versions that I’m focusing on are the Canadian
built Canadair family of Sabres that were designated Canadair CL-13 Mk 1-Mk 6
and had some features unique to them from U.S. built Sabres.
The subject of this build is a CL-13B Sabre Mk 6 which was similar to a U.S. F-86F-40. However, the Mk 6 had a more powerful Orenda engine and standard length ‘slatted’ wings. This conversion mainly centers around ‘clipping’ the wings of the Airfix F-86F-40.
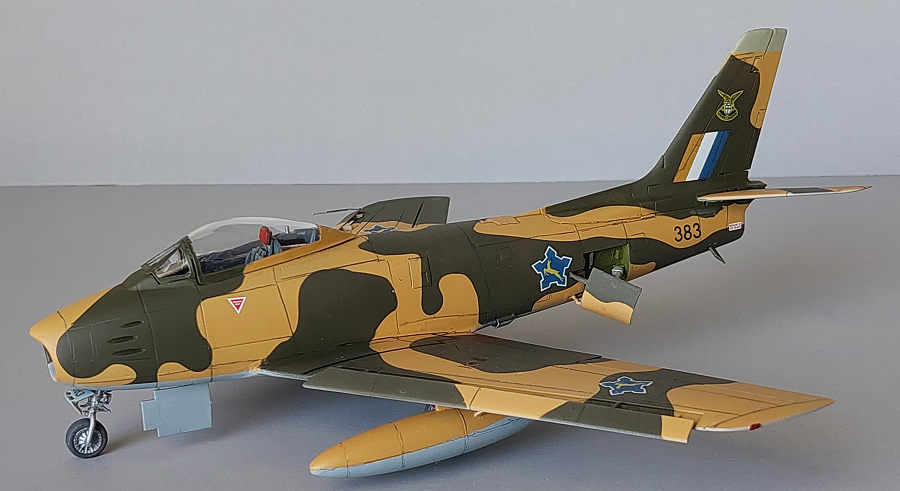
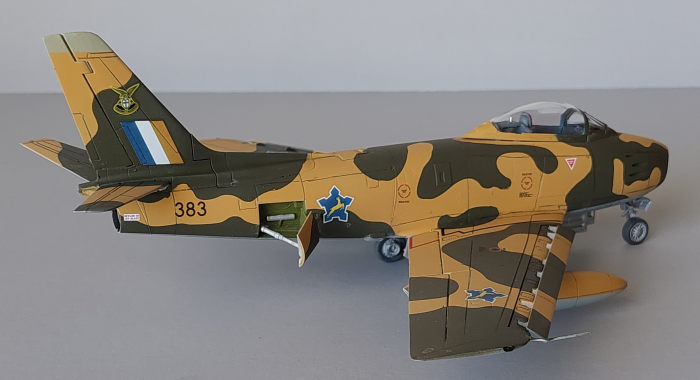
The aircraft I’m depicting is one of the 34 Sabres the South African Air Force acquired. After retirement, this Mk 6 Serial Number “383” was restored in Australia at the RAAF Aviation Heritage Museum.
| THE KIT |
The Airfix Sabre is molded in gray plastic, and the panel lines and details are rather soft for a kit made in 2020. It’s a bit clunky and the wing’s engineering is odd to make multiple versions. However, the way it is put together actually lends itself to making a Mk 6.
| CONSTRUCTION |
The Airfix kit of the F-86F-40 is fitted (naturally) with the F-40 slatted wing, and I needed to section out a scale foot from each wingtip. That basically gives you an early Mk 6 straight from the factory.
For a change, I started with the wing on this kit. The first modification is to the flashed over fuel tank mounting holes. Do not drill these out as they are in the wrong place! If you plan to add fuel tanks, drill holes 3/8ths of an inch inboard on either side. This is the correct wing station to mount the drop tanks.
 Now for the
real work. Each wingtip needs to be carefully removed along the seamline and
1/4th inch needs to be sectioned out from each wing stub. Afterwards, the
wingtips need to be glued back on along with some white plastic card and putty
to fill the gaps. Voila! Most of the work is done!
Now for the
real work. Each wingtip needs to be carefully removed along the seamline and
1/4th inch needs to be sectioned out from each wing stub. Afterwards, the
wingtips need to be glued back on along with some white plastic card and putty
to fill the gaps. Voila! Most of the work is done!
Turning to the fuselage, I carefully installed the closed gun panels, I decided to add a CMK cockpit and Reskit exhaust to dress up the Sabre a bit. The cockpit was painted dark gull gray with black consoles.
Next, the cockpit, air intake and exhaust were installed. These fit well but are very tight. I also added lead shot ballast before sealing up the fuselage.
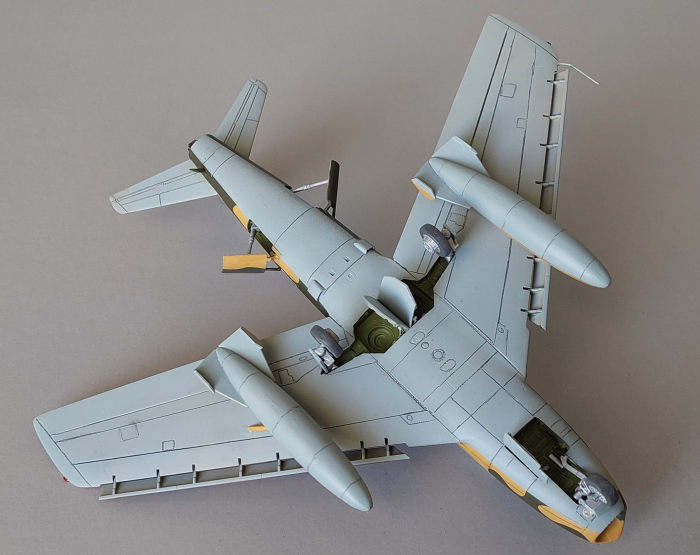
At this point I attached the already completed wing and added the so-called ‘Sugar Scoop’ air intakes under the rear fuselage. These were retrofitted to the Orenda powered Mk 5 and Mk 6 versions by 1958/59. The intakes were constructed from white plastic sheeting.
After that it was a matter of putty and primer multiple times until things were just right. The airframe was given a final coat of Mister Surfacer 1000 and the panel lines were carefully reengraved with an X-acto knife.
The rest of the kit went together following the instructions except I had to use a cranked pitot tube from the spares box. The kit only proves a straight one associated with the F-40 wing.
| COLORS & MARKINGS |
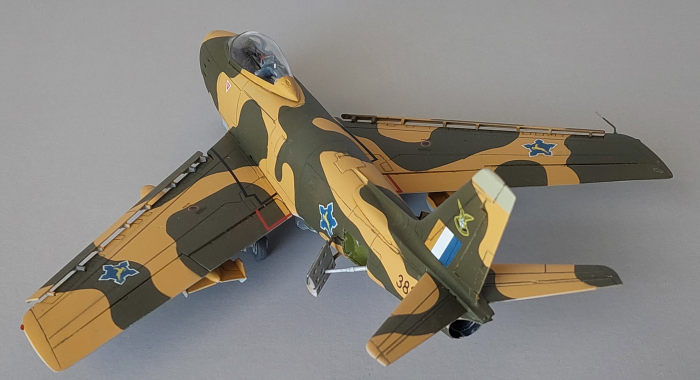
 The unusual,
hard-edge camouflage of the SAAF was painted with a combination of Mig Acrylic
paints. The top colors are Olive Drab and Deep Buff, and the undersides are
Light Admiralty Grey. Given the complexity of the scheme, I decided to give
TopNotch vinyl masks a try. I painted on the Deep Buff and let it cure for 24
hours before applying the masks.
The unusual,
hard-edge camouflage of the SAAF was painted with a combination of Mig Acrylic
paints. The top colors are Olive Drab and Deep Buff, and the undersides are
Light Admiralty Grey. Given the complexity of the scheme, I decided to give
TopNotch vinyl masks a try. I painted on the Deep Buff and let it cure for 24
hours before applying the masks.
TopNotch are extremely thin and conform to surfaces well. The masks are numbered, and they advise you to apply them in the order of the numbers. They are designed for the airbrakes and slats to be closed it took a little finesse on my part because my plane had both deployed. I made my own masks for the slats and carefully trimmed the existing masks to fit the airbrakes.
After I was satisfied with things, I applied the Olive Drab in light coats and set the model up to cure for a few hours before removing the masks. When all was said and done, the TopNotch set performed splendidly and presented no problems. The masks peeled off easily and left no reside behind. After letting the paint cure completely, I masked the topside and sprayed the Light Admiralty Grey on.
All that was left after that was a bit of touch-up of the main colors. The additional details were picked out with Tamiya Acrylics.
As I wanted a South African Air Force bird, I searched around and found Armycast 48-027 that included SAAF “383” as an option. They were a bit thick but went down nicely over a coat of Tamiya’s Acrylic Gloss. Then the model was coated with Tamiya Flat and weathered with pastels and pencils. Afterwards it was sealed and finished with another coat of Tamiya Acrylic Flat.
| CONCLUSIONS |
I really enjoyed this conversion. It’s very simple but there are many colorful options for the Mk 6 variant. The variations require some research, but it is not that difficult. I would recommend this conversion to anyone who wants to try something a little different.
| REFERENCES |
There aren’t that many comprehensive Sabre books out there considering the popularity of the subject. The main ones I used for this model are:
The Canadair Sabre by Larry Milberry
Koku-Fan Illustrated No. 2 F-86 Sabre
Modeler’s Guide to the Sabre & Fury by Jay Sherlock
Happy Modeling!
12 September 2025
Copyright ModelingMadness.com. All rights reserved. No
reproduction in part or in whole without express permission.
If you would like your product reviewed fairly and fairly
quickly, please
contact
the editor
or see other details in the
Note to
Contributors.