Airmodel 1/72 C-123 Provider
|
KIT #: |
|
|
PRICE: |
12 Euros |
|
DECALS: |
None supplied |
|
REVIEWER: |
Carmel J. Attard |
|
NOTES: |
Basic
vacuform kit
|
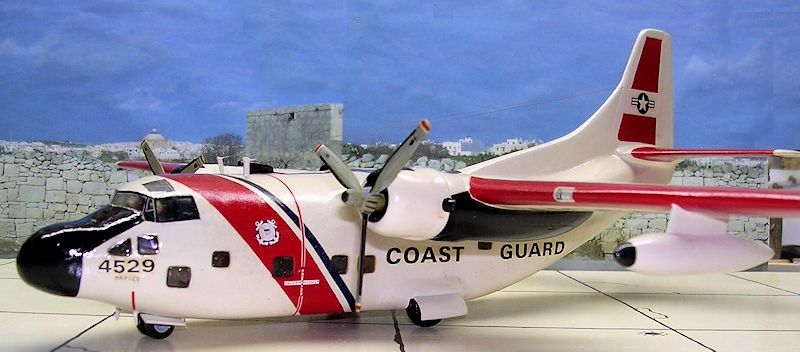
A not so
frequent visitor to Luqa airfield in Malta was the C-123 Provider. This
transport aircraft always appealed to me particularly whenever a USCG Provider
in USCG livery made visits here from time to time. The type had the base name
prominent on the tail fin, which indicated it came from its base in
 Naples,
Italy. Even less visitor to Luqa was a USAF Provider attached to Tactical Air
Command probably coming all the way from Wheelus air base, Libya. By the turn of
the 1970s visits by the type became very rare as the C-123 gave way to more
modern types like the C-130 Hercules.
Naples,
Italy. Even less visitor to Luqa was a USAF Provider attached to Tactical Air
Command probably coming all the way from Wheelus air base, Libya. By the turn of
the 1970s visits by the type became very rare as the C-123 gave way to more
modern types like the C-130 Hercules.
The
C-123 Provider entered service circa 1955 following a long, tedious period of
development. Chase Aircraft built five C-123Bs from a contract of 300 awarded at
the time. The company then ran into difficulties and order cancelled. Later same
year Fairchild came to the rescue, making modifications into the original design
incorporating a larger dorsal fin that from then on became standard feature on
subsequent product models. USAF contracts received 302 while 24 were exported to
Saudi Arabia and Venezuela.
To
enhance power and all up weight Fairchild fitted two J-44-R-3 turbojets to
wingtips creating C-123J ten of which were converted in 1957. Later underwing
jet pods were fitted having two J-85-GE-17 turbojets to be called C-123K. There
were 123 C-123Bs converted to this configuration and served with distinction
during the Viet Nam war.
The
C-123 Provider is one of those cold war types that has very infrequently
modelled. For vac-form kit enthusiasts the Airmodel kit release some time ago
looks simple, a fairly straight forward high-winged type but lacked
undercarriage, propellers and engine front parts which provides few difficulties
in the 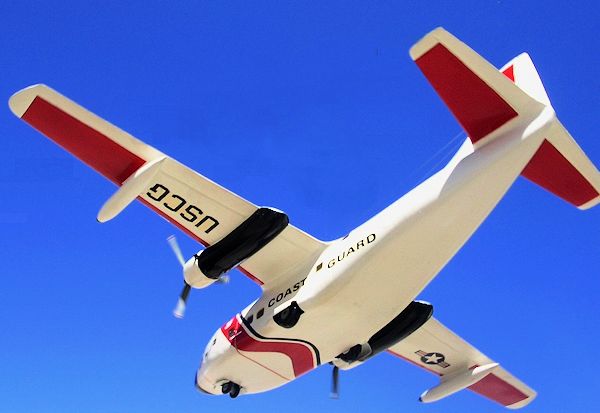 making apart from finding the suitable parts named.
The kit
consists of two fuselage halves, four wing sections, four engine nacelle parts
and four fuel tank halves. There is a good detailed instruction sheet but the
modeler will have to find his own wheels, engine fronts, and propellers and
decals apart from additional detail as require
Although
transport type of aircraft do not offer a particular attraction to the
mainstream modeler the bright and colorful colorschemes that these type carried
would certainly makes one think twice and may be hooked to add one to a
collection of post war types. Airmodel production
appears to have discontinued the kit although it may still be found on e-bay and
other kit shop outlets that stock bought and sold kits. My kit bought in time
while
stock lasted direct from Airmodel and I could then build the C-123 that came to
my attraction when the type was spotted a number of times carrying the USCG
revised livery.
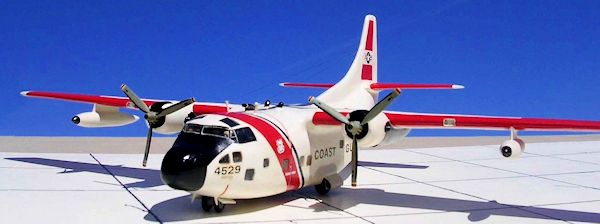
The only item on
the kit that looked inaccurate to me was the pointed nose but this was not going
to deter me from building one as the type that I had in mind to do as the USCG
version had a different nose radome and this inaccurate area will be altered
completely.
 Main kit
parts were first scored with a sharp pointed blade and separated by snapping
from the base plate. Parts were then rubbed down on wet and dry sanding paper
until they were smooth and parallel at the edges. The remainder of the parts
followed this operation as each was cut from the sheet in turn. The fuselage
square windows were then cut at the sides. These were first marked, and then
drilled small holes around them and in corners, excess plastic removed and
resulting hole cleaned with a file to conform to dimensions on scale side view.
Main kit
parts were first scored with a sharp pointed blade and separated by snapping
from the base plate. Parts were then rubbed down on wet and dry sanding paper
until they were smooth and parallel at the edges. The remainder of the parts
followed this operation as each was cut from the sheet in turn. The fuselage
square windows were then cut at the sides. These were first marked, and then
drilled small holes around them and in corners, excess plastic removed and
resulting hole cleaned with a file to conform to dimensions on scale side view.
Long
lengths strips of plastic were fitted on the inside of one fuselage half to act
as locating guides when fitting the other half. Only liquid cement was used on
this soft plastic. The undercarriage wells housings were then cut and boxed and
adequate strong bed was built to take the undercarriage legs at the appropriate
place. Outside the fuselage the undercarriage doors were cut along the length
and bent in the open position. Three bulkheads were measured and cut matching
these to cross-sections at three different places on the inside. A cockpit floor
added and a cockpit sub assembly was built to be fitted in place at a later
stage. A small compartment close to the nose wheel well was also made to house
the lead weight to balance the model on the nose wheels.
 Using
the strips as guides, the fuselage went together without difficulty. Since I
needed a strong bond I have used Revell nozzle cement ‘Contacta’. Then fuselage
halves were held together with masking tape while pegs were used to hold tail
unit together. Nacelles, tanks and wings were all then sanded and held together.
Wing pylons to hold the tanks were fashioned from solid plastic sheet. I had a
discarded Heller Constellation and two propellers and the undercarriage legs and
wheels and two engine fronts were all cannibalised from it as these matched the
size required exactly. Wing leading edges were smoothened and trailing edges
were scraped down to improve wing section thickness at this area all along the
wing lengths.
Using
the strips as guides, the fuselage went together without difficulty. Since I
needed a strong bond I have used Revell nozzle cement ‘Contacta’. Then fuselage
halves were held together with masking tape while pegs were used to hold tail
unit together. Nacelles, tanks and wings were all then sanded and held together.
Wing pylons to hold the tanks were fashioned from solid plastic sheet. I had a
discarded Heller Constellation and two propellers and the undercarriage legs and
wheels and two engine fronts were all cannibalised from it as these matched the
size required exactly. Wing leading edges were smoothened and trailing edges
were scraped down to improve wing section thickness at this area all along the
wing lengths.
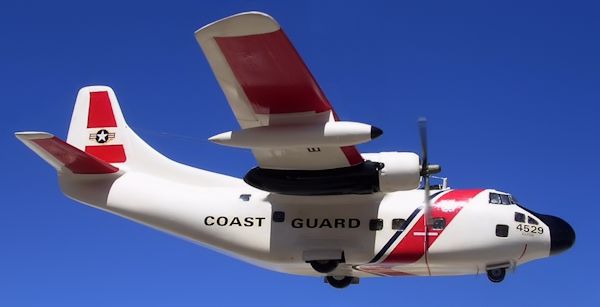
A main
spar was added on to which the wing could fit. This was made from a piece of
wood of square section thickness and plugged through the wing position. The
pointed nose part was marked and cut to make way for a replacement nose, which
was a more cumbersome shape in comparison to the kit nose. The new radome nose
was shaped out of pine and was the shape of the type carried by USCG
 Providers.
This was joined to the fuselage with a plug in piece and faired with Plasto
filler. Filler was also used along the length of fuselage seal at undersides and
tops. These areas were then rubbed down excess filler removed but avoiding
removing surface detail. A fine engraving tool refined the panel lines. Wing
parts were now stuck to fuselage adding engine nacelles and wing tanks and so
completing the general assembly. Other details such as aerials, lights, small
air intakes on top of fuselage, exhaust pipes to engine nacelles were alluded at
the final stage.
Providers.
This was joined to the fuselage with a plug in piece and faired with Plasto
filler. Filler was also used along the length of fuselage seal at undersides and
tops. These areas were then rubbed down excess filler removed but avoiding
removing surface detail. A fine engraving tool refined the panel lines. Wing
parts were now stuck to fuselage adding engine nacelles and wing tanks and so
completing the general assembly. Other details such as aerials, lights, small
air intakes on top of fuselage, exhaust pipes to engine nacelles were alluded at
the final stage.
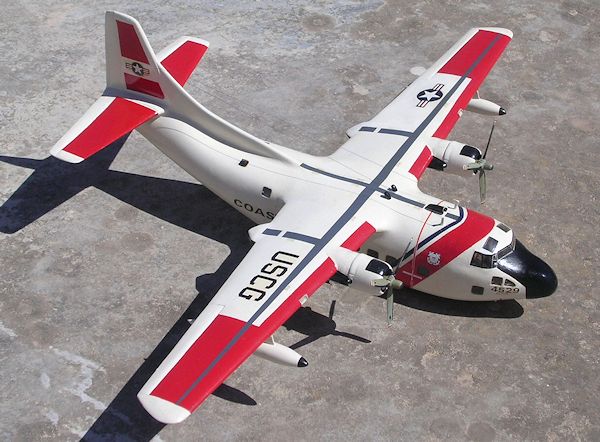
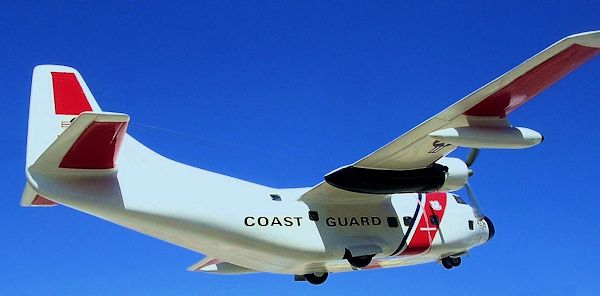
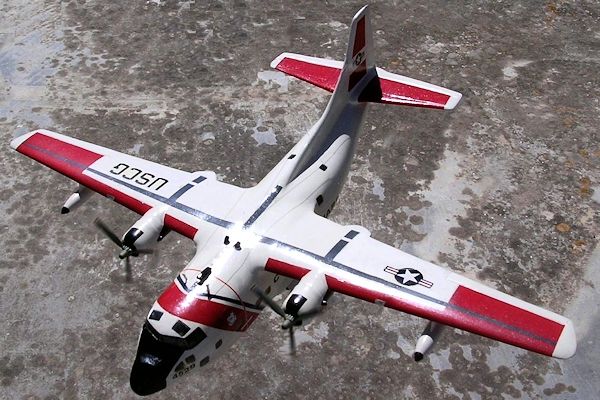 The kit was given an overall gloss
white coat. Then areas were masked and the red and blue areas and stripes were
also airbrushed using enamel Humbrol paints. As for decals I picked the set from
Micro Scale decal sheet, which contained various sizes of Coast Guard lettering
and insignia etc.
allowing me to pick the correct size ones for my model. Engine nacelles sides,
and anti dazzle paint on nose as well as nose radome were in semi matt black
while wing walk ways were decals in dark sea grey. Being a USCG aircraft these
are known to be is very clean condition as they are operating in corrosive
seawater environment on most of the time and there was no reason to add any
excessive exhaust stain or weathering.
The kit was given an overall gloss
white coat. Then areas were masked and the red and blue areas and stripes were
also airbrushed using enamel Humbrol paints. As for decals I picked the set from
Micro Scale decal sheet, which contained various sizes of Coast Guard lettering
and insignia etc.
allowing me to pick the correct size ones for my model. Engine nacelles sides,
and anti dazzle paint on nose as well as nose radome were in semi matt black
while wing walk ways were decals in dark sea grey. Being a USCG aircraft these
are known to be is very clean condition as they are operating in corrosive
seawater environment on most of the time and there was no reason to add any
excessive exhaust stain or weathering.
This was an
interesting model and a fairly lager one for a vac-form kit. It is reasonably
accurate and a pity that it is no longer produced now that there is the Mach 2
injection kit on the market. I am sure it can still be acquired from after
market outlets like e-bay and other outlets.
Carmel J. Attard
October 2013
If you would like your product reviewed fairly and fairly quickly, please contact the editor or see other details in the
Note to
Contributors.
Back to the Main Page
Back to the Review
Index Page