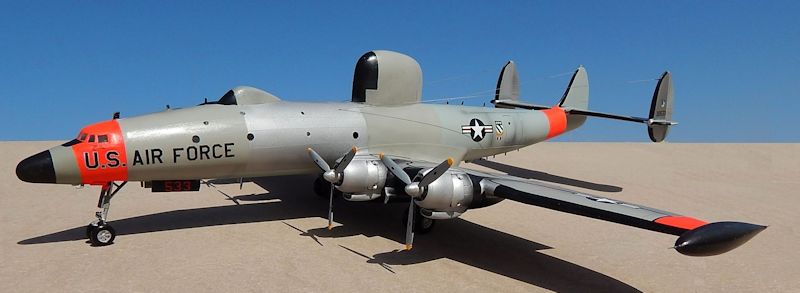
Heller 1/72 EC-121 Warning Star
| KIT #: | |
| PRICE: | 18 Euros |
| DECALS: | One option |
| REVIEWER: | Carmel J. Attard |
| NOTES: |

| HISTORY |
The Lockheed Constellation arising from its civilian success
was to have far more important role on the post 1960 era with the
profusion of technically intriguing military versions. The aircraft was now
packed with unusual devices mainly of electronic nature which thundered
faithfully all over the globe until 1980 despite concerted efforts made from
1975 to eleminate everything calling for 115/145 gasoline.
In the 1960s Super Constellations of the USAF and US Navy flew more than
600,000 hours though by this time the basic type ceased to apear in books on
US military aircraft. On 15th April 1969 a US Navy Connie was
attacked by two North Korean Mig 17 fighters over the Sea of Japan and shot
down. The loss of EC-121M Serial No 135749
from electronics squadron
VQ-1 and all 31 American crew members-the only loss in anger of a US
military Constellation- highlights the special role of this aircraft type in
reconnaissance, intelligence-gathering and airborne early warning.
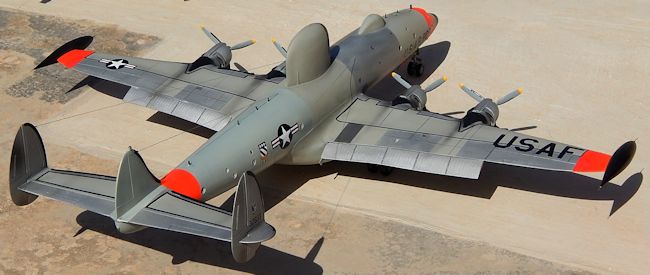 This role was first undertaken with conversion of the type by Lockheed /
Burbank for trials as an AEW platform. Modifications to accommodate radar
and other gear gave the Connie a tall, narrow dorsal hump and a large under
fuselage bulge. First seen in this configuration operationally as US
Navy WV-1 and WV-2 weather reconnaissance and AEW machines based
respectively on 749 and 1049 airliners. Later other duties were added to AEW
role including electronics eavesdropping and countermeasure role which
formed the C-121 series.
In these Connies large crews could journey up to 30 hours far from the fleet
or from shore, relief crews replacing each other
while searching for air or sea threats.
Initially USAF Constellations were used off American coasts by Air Defence
Command. In Vietnam under ‘Big Eye’ and ‘College
Eye’ programmes USAF Connies stood loitering off the enemy coasts and
reported Mig fighter activity to endangered US combat pilots.
More than a dozen designations were eventually applied to ‘Spook’ Connies. Typical in the series were EC-121Q augmented and updated AWACS systems, EC-121R camouflaged and devoid of radome bulges (30 in total) for project ‘Igloo White’ in Vietnam serving as airborne data-relay stations., EC-121T a classified conversion of EC-121D, H and J as Elint Electronic intelligence platforms. EC-121H a rebuild of 551st AEW &C Wing EC-121D with SAGE data-link electronics, large airborne computer new navaids and other equipment, a total of 42 aircraft among other versions. Today one of the most beautiful of these preserved machines is the US Navy EC-121K Ser No 141292, from Squadron VAQ-33 on display at the Air and Space Museum in Florence, South Carolina. This aircraft had the honour of being the last EC-121 to visit the UK on 11th October 1975.
| THE KIT |
 The Super Constellation remains one of the most graceful of the piston
engine type. The model was first released by Heller as the commercial
type,the passenger liner.The kit of the EC-121 still utilizes the wings from
the earlier kit release L-749 and the rest of the kit parts are new. The
white wing parts and the bright blue fuselage plastic are of the usual high
standard of surface detail and finish on earlier Heller kits but not without
a few reservations in connection with shape of props and engine cowling
detail.
The EC-121 kit has a complete relocation of windows, these being round and of
two different sizes as opposed to the liner kit that were numerous and square
type. It comes with a good instruction sheet containing illustrated exploded
views that are easy to follow. There are two separate cumbersome radomes located
on top and bottom of fuselage. And in addition there is an array of of antannae
at top and bottom of the fuselage. No problems were encountered during assembly
and the fit of parts was perfect. Decals provide for one US Navy machine in
engine grey and white finish and are of good quality. The kit required some 75
grams of nose weight to balance on the nose gear.
Some time since the release of the kit, SAC of Texas have issued the metal legs
as replacement gear which added strength and improved definition and detail
to the kit. I also envisaged
frequent handling of the model in improving it with other replacement parts and
therefore fixing robust legs (SAC-72028) for the kit to rest on was an asset.
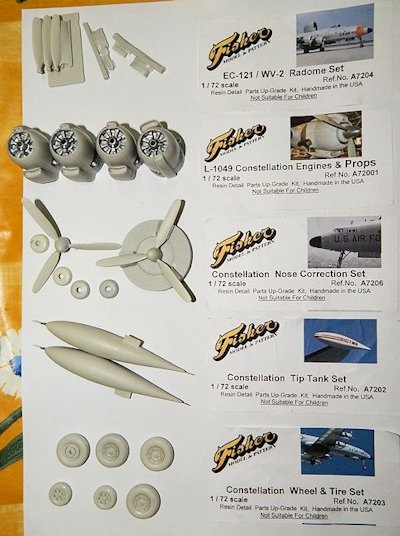 Careful detail study of the kit parts indicated that there was room for
improvement when it comes to the accuracy to produce the ultimate class EC-121.
Paul and Susy Fisher of Paradise, California, under the trade mark ‘Fisher Model
& Pattern’ have since released a series of resin sets to replace not only the
two undersize radomes but also
replacement parts for the engines, propellers, antennae, wheels and a complete
forward nose assembly. For those who want to show more detail to the flaps a set
of extended fowler flaps is also issued.
In greater detail the sets for these correction update parts are as follows:
Set A7204: for EC-121/WV-2 master sail radome, belly radome, and SAGE radome.
Set A7201: for engine cowlings, cowl flaps,
engines, propellers and crankcase fairing.
Set A7206: Nose correction set complete with revised clear canopy part.
These sets all come with comprehensive instructions and clear photos.
Having gone that far to produce the class EC-121 I went for Caracal Models CD
72022 decals which contains four different EC-121s, two being USAF and two are
US Navy liveries out of which I made my pick.
| CONSTRUCTION |
It is imperative that one has photos of the kit to be made and this is so
because I noticed that there are variations in the position and number of
windows on different EC-121s., some did not carry wing tip tanks, and there
are differences in position and
number of aerials, wire aerials and some just carried the belly radome
i.e.without the upper sail radome.
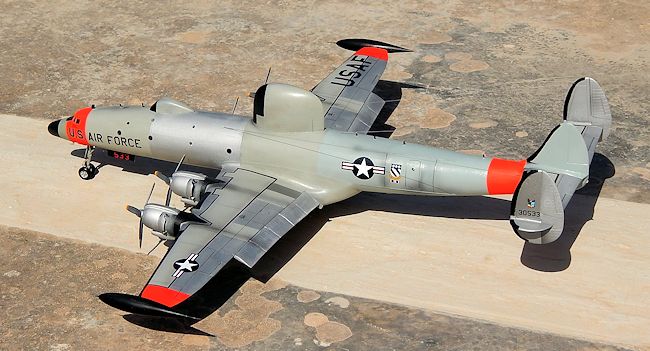 Apart from following the kit instructions to fit the cockpit office, painting
the interior, adding nose weight before closing the fuselage some additional
work I did was as follows: Three tiny holes are drilled one on each fin and
three on the fuselage upper to take the wire aerials. On the particular EC-121 H
the wing tip tank had thin aerials at forward and rear. The resin molding sprue
was cut and surface of tanks sanded smooth, then I fitted a short thin steel
wire after drilling a tiny hole at each end.. The kit tip tank was cut away from
the wing and also cut away the tip portion of the lower wing. The integral tab
attached to the resin tank could then be located but this was left to the final
stage of assembly.
The EC-121H 53-0533 differed from other EC-121s in having additional windows. So
I shaped four round windows to rear starboard fuselage of 4.4mm diameter using a
drill size whch also conforms to existing kit windows. For best accuracy the
centre of the window was first marked and a small 1mm drill hole was made which
will guide the larger drill.
All three wheel wells had detail added inside in form of webbing using plastic
card of different thicknesses. Time consuming but was worthwhile.
The Constellation nose in the Heller kit was oddly shaped and far too narrow.
The Fisher rectifies this inaccuracy and also captures the round to elliptical
cross-section as the nose moves forward to the radome. The set A7206 that
contains the new resin nose also solves the problem with the Heller kit that has
the cabin roof and wind screen panels too small and so do not have the correct
look. Kit nose was cut away 2.062 inches back from tip. In order to keep cut
clean and at right angles to fuselage I
attached a thin strip of Tamiya
tape as a guide around the fuselage halves which were also securely taped
together. The edge to mount the new nose was then sanded on a sanding board.
Cockpit was then added to the fuselage and once the two halves were assembled
and glued permanently then added the new nose. Careful work was essential and
the correct nose profile and shape captures the unique and real look. The clear
canopy was then aded ensuring that the coaming did not come in the way. A very
small amount of filler was needed to blend the joining area of the new nose.
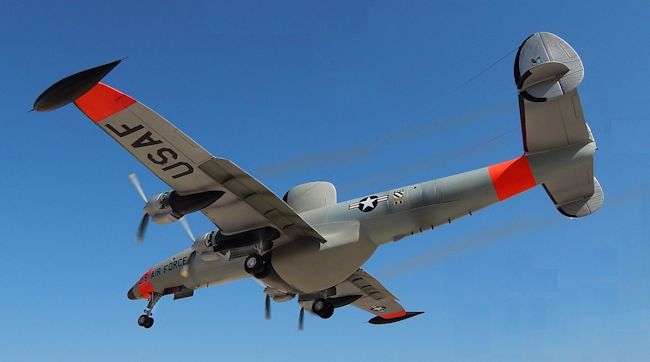
It was now the turn to fit the Fowler flaps in extended form. These are
beautifully molded in every detail on the inside. The flaps were first cut from
the lower wing. Clear illustrations that come with the ‘Fisher’
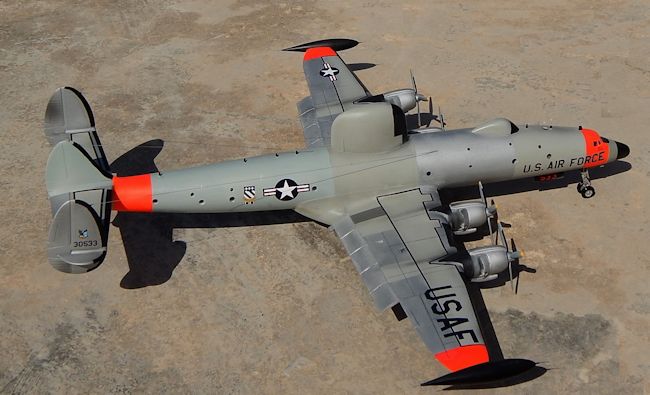 instruction
sheet makes this a simple task. The
flap wells had the feeder removed and carefully sanded at edge. Some areas
needed to be sanded on the inside of the Heller kit wings. Again this is clearly
illustrated in a series of pictures.. Also three of the four trailing edge vents
located ontop of starboard wing were filled as for the EC-121.. Also the inboard
flap segments were not used on radar Connies.. The main flap strip was inserted
and cemented to the exposed inside of kit wing and the extended flap itself
fixed in any pose or angle one desires ensuring that both sides hand the same
way.
Proper looking engines and props were achieved with set No A72001. The mounting
rings were first cut from kit wings engine nacelles taking care to keep them
flat and true.In doing so the outboard nacelle faces are left open. And the
inboard faces simply cut flush following ‘Fisher’ resin kit instructions. No
alteration was made to faces of the two destributor cans attached to front of
radial engine since unlike civil version the EC-121 did not carry the crankcase
fairings.
The cowl flaps were then cut and mounted in open position. I bit of the forward
edges was filed so that they could tuck into the recess molded onto the engine
cowl at both sides. All four sets were done the same way. Next step was to add
the oil cooler fairings to both outboard engines nacelles, and their flaps. The
cowls were then added to the wings.ensuring that they are rigged properly with
the intakes correctly aligned to the ground line.
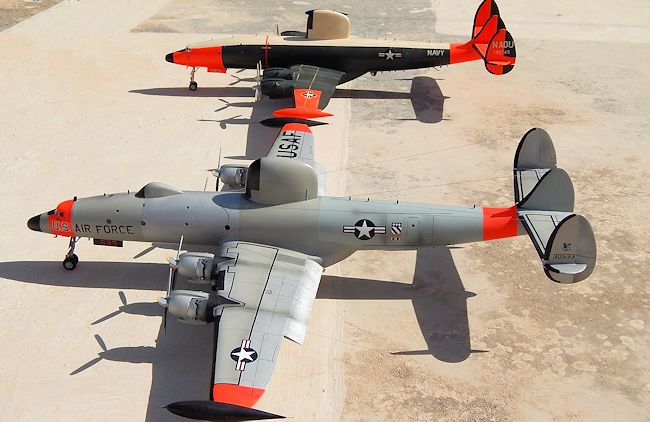
The radome parts supplied in the Heller plastic kit were quite poorly shaped and
undersize, so replacements were in order. My particular choice fell on EC-121 H
53-0533 which also carried a hump SAGE (Semi Automatic Ground
Environment) electronics. A large assortment of blade antennae were also
fixed in place. Resin set also has horn antennae but none was mounted on –33.
The upper sail radome fitted nicely in place of the too-thin kit part. The belly
radome was then fixed in place. Finally the wire line antennae running from fins
to fuselage were added.
| COLORS & MARKINGS |
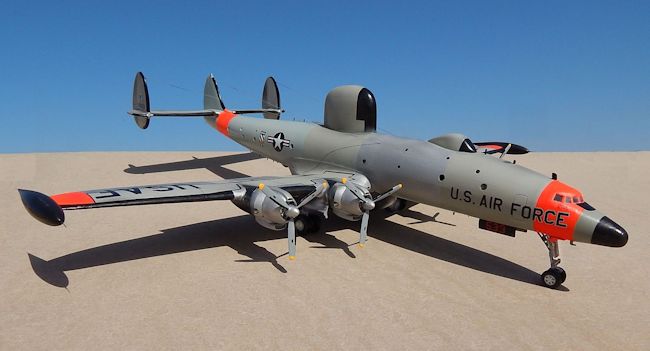 ers natural metal, propellers were light grey with
yellow tips. Mid fuselage region had gray areas beginning right in front of the
dorsal radome and extends to the rear edge.
There is also a gray area between the day-glow band in the front fuselage
and the nose. The rest of the airframe is natural metal with day-glow orange
bands . Rear fuselage was also painted gray as were in the late 60s. Wing walk
ways were light grey.
| CONCLUSIONS |
Both ‘SAC’’ and Fisher Model and Pattern’ are to be congratulated for providing
such revised and detailed metal and
resin parts respectively for a great aircraft.I am really pleased with the final
result which brought an old Conne kit up to today’s level of accuracy..
| REFERENCES |
Ref: Steve Ginter book NF08 on EC-121