The X-15 research program was a parallel part of the
American space program in the 1950s and 60s, producing valuable
scientific data that was later used in the design of the Space Shuttle.
The rocket-powered aircraft was carried to altitude by a modified B-52
and released just the rocket engines
 were
ignited in order to execute a parabolic climb to the outer reaches of
earth’s atmosphere. The X-15 returned to earth in an unpowered glide
and landed on the extended runway of Edwards AFB in California. Several
of the missions exceeded an altitude of 100 km (62 miles), earning the
pilots astronaut status.
were
ignited in order to execute a parabolic climb to the outer reaches of
earth’s atmosphere. The X-15 returned to earth in an unpowered glide
and landed on the extended runway of Edwards AFB in California. Several
of the missions exceeded an altitude of 100 km (62 miles), earning the
pilots astronaut status.
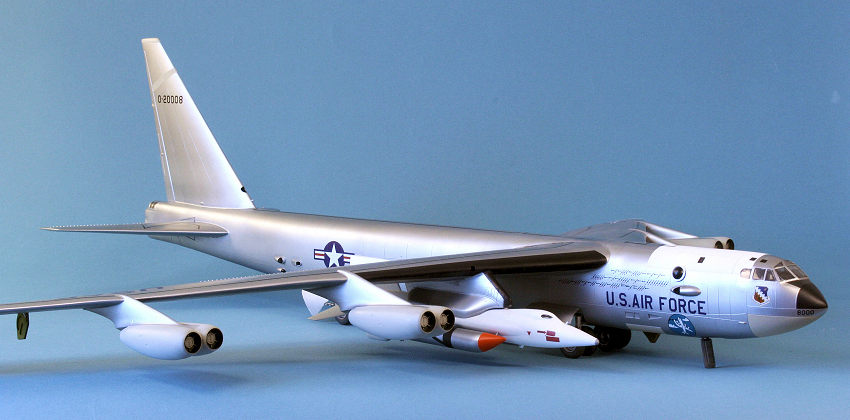
The mothership NB-52B “Balls Eight” (named for its
serial number 52-0008) was one of two B-52 bombers assigned to the
program beginning in 1959. It shared duty with NB-52A “Balls Three” in
executing 159 captive carry missions for the X-15 program. Balls Eight
remained in service with NASA for 46 years dropping all kinds of
experimental aircraft and is now on permanent display as a gate guard at
Edwards. Its contribution to aeronautical research cannot be
understated – this is one of the most historically significant airplanes
ever to fly.
The Monogram 1/72 scale B-52D kit was originally
released in 1968, with the X-15A-2 kit coming out in 1987. To backdate
the B-52D to NB-52B configuration, Revell modified the molds to add a
cut-out of the starboard wing with a filler plate to cover the space
between the wing top and bottom and added a cradle in which to mount the
X-15 between the starboard inner nacelle and the fuselage. The rear gun
turret is faired over, although the turret pieces themselves are still
on the sprues. Camera fairings and an observation blister are
provided. Some of the parts that were in the original B-52D bomber
version are no longer on the sprues, mostly the dozens of Mk 82 bombs
and a blanking plate
 for
the bomb bay. This means that the bomb bay doors will need to be glued
in the closed position unless one want to tackle fabricating an interior
completely from scratch. Unfortunately, one no longer gets the little
electric motor seen in the original 1968 issue of this kit that provided
a “realistic jet engine sound!”.
for
the bomb bay. This means that the bomb bay doors will need to be glued
in the closed position unless one want to tackle fabricating an interior
completely from scratch. Unfortunately, one no longer gets the little
electric motor seen in the original 1968 issue of this kit that provided
a “realistic jet engine sound!”.
This is an old kit and it shows. All the panel
lines are raised. Fit can be euphemistically called “challenging”,
which is a nice way to say that it’s dreadful. There is almost no
detail in the main wheel wells. The landing gear struts are simplistic,
as are the attachment pegs for the landing gear doors. Windows above
the cockpit are only represented by panel lines. One nacelle has an
option to display a very simplistic J57 engine. The air brakes are
separate pieces that can be posed in the open position, but these are
almost never deployed when the aircraft is on the ground. The cockpit
is minimally detailed, with a decal instrument panel and a couple of
seat backs (no bottoms, just pegs to mount the two pilot figures) and
control columns.
The X-15A-2 is nicely rendered, albeit with raised
panel lines and landing skids only depicted in the retracted position.
A ground trolley is provided for displaying the rocket airplane off the
mothership. The cockpit details are sparse but adequate because nothing
can be seen inside if the
 cockpit
hatch is closed. Two large external fuel tanks allow the modeler to
configure the X-15 for extended range missions, and there is a dummy
ramjet that can be attached to the underside of the lower tail piece for
those missions that occurred in 1967. The eyelid cover on the port
cockpit window is molded in place, so modelers depicting earlier
configurations of the X-15A-2 will need to modify the hatch to restore
the oval window beneath.
cockpit
hatch is closed. Two large external fuel tanks allow the modeler to
configure the X-15 for extended range missions, and there is a dummy
ramjet that can be attached to the underside of the lower tail piece for
those missions that occurred in 1967. The eyelid cover on the port
cockpit window is molded in place, so modelers depicting earlier
configurations of the X-15A-2 will need to modify the hatch to restore
the oval window beneath.
With a model kit that is nearly half a century old
in design, one has to go into this project with eyes wide open. Expect
poor fit, warped parts, and massive amounts of seams to be filled. One
also will need a large open space on the workbench to allow this model
to be worked on. Having built all of Monogram’s big models in the past,
I knew exactly what was going to be encountered with this kit as I
started on it, and I was not disappointed. This is one of the most
challenging models I have ever built.
I painted the cockpit Dark Gull Gray FS36231 and
added bottom cushions to the ejection seats with sheet styrene. I
fabricated some harnesses from paper and glued them to the seat backs.
More attention isn’t really needed as almost nothing can be seen once
the fuselage is assembled.
I painted the interior of the wheel wells Zinc
Chromate Yellow, and the landing struts were
 painted
with Floquil Old Silver and glued into each fuselage half. I glued the
bomb bay doors in the closed position and reinforced the joint with
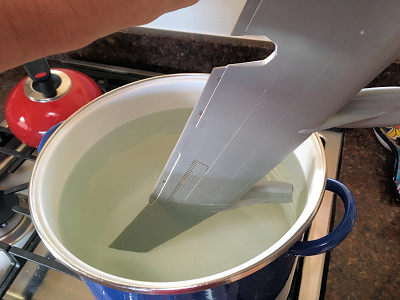
strips of sheet styrene. The two halves were glued together and large
major seams had to be filled down the entire length of the model. The
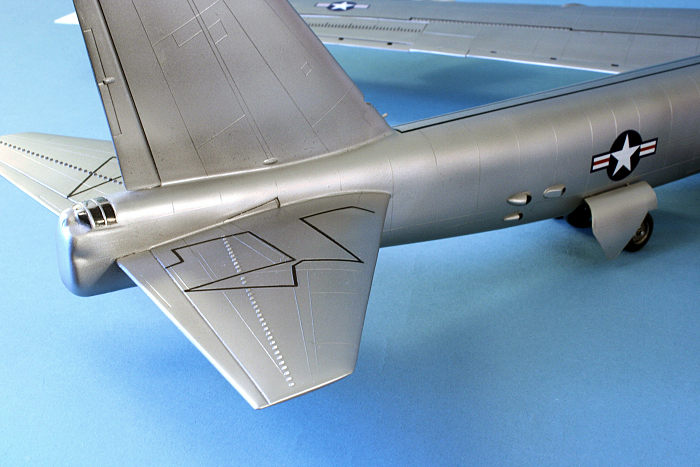
bomb bay door seams were particularly bad. The vertical stabilizer was
not adequately aligned so I repeatedly dipped that part into a huge pot
of near-boiling hot water and gently bent it back to the proper upright
position.
painted
with Floquil Old Silver and glued into each fuselage half. I glued the
bomb bay doors in the closed position and reinforced the joint with
strips of sheet styrene. The two halves were glued together and large
major seams had to be filled down the entire length of the model. The
bomb bay door seams were particularly bad. The vertical stabilizer was
not adequately aligned so I repeatedly dipped that part into a huge pot
of near-boiling hot water and gently bent it back to the proper upright
position.
I assembled all four engine nacelles and filled
those seams with CA glue. The wings were next and the fit of the flaps
can best be described as awful, with ¼ inch gaps evident. I bridged
these with sheet styrene and CA glue. The notched section of the
starboard wing was even worse, requiring significant sanding, filling,
and additional plastic added to make the area solid and seamless. I
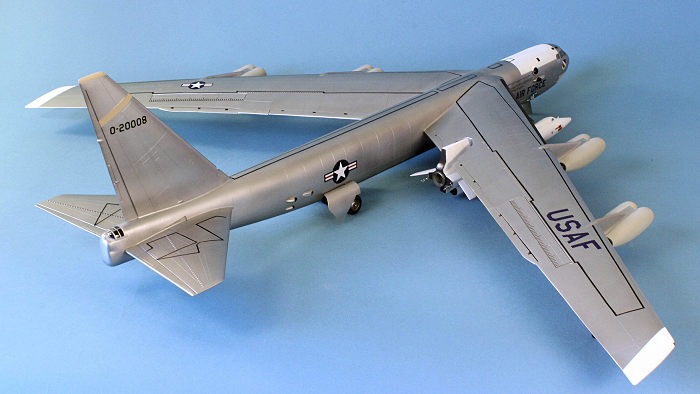
then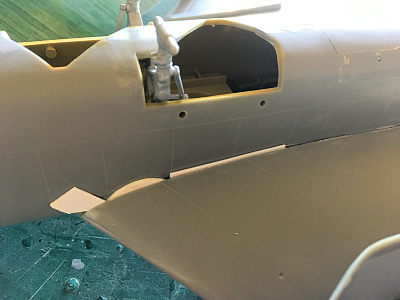 glued on each nacelle and filled those seams. The wings were glued onto
the fuselage but the dihedral was so off that I had to add shims under
the port wing to bring it into proper alignment. The starboard wing was
badly warped and twisted, so another round of dunking in a pot of very
hot water was required to make it passably straight. While not perfect,
I was at least hopeful that I could get the outrigger gear to touch the
ground during final assembly. As it turns out I came pretty close. I
added clear green and red resin pieces to cutouts I made at the front of
each wingtip to depict the position lights, sanding them smooth to the
contour of the wing.
glued on each nacelle and filled those seams. The wings were glued onto
the fuselage but the dihedral was so off that I had to add shims under
the port wing to bring it into proper alignment. The starboard wing was
badly warped and twisted, so another round of dunking in a pot of very
hot water was required to make it passably straight. While not perfect,
I was at least hopeful that I could get the outrigger gear to touch the
ground during final assembly. As it turns out I came pretty close. I
added clear green and red resin pieces to cutouts I made at the front of
each wingtip to depict the position lights, sanding them smooth to the
contour of the wing.
All the seams were checked with an application of
Mr. Surfacer 1000 and sanded smooth. I glued on the tail gunner’s
canopy as well as the cockpit canopy and confronted large, ugly gaps
that had to be addressed with more filler, endless sanding, and the
added step of polishing the clear portions back to clarity using a
tri-grit file and Novus Plastic Polish #3 and #2.
Since this model would receive silver paint, it
needed to make the surface as close to perfectly smooth as possible. I
sanded every rough area with progressively finer grits of sandpaper,
followed by a thorough polishing with Novis Plastic Polish. The model
was washed with warm soapy water in preparation for paint.
The X-15 went together fairly easily, with seams to
fill all along the fuselage and the underside of each wing. I glued the
cockpit hatch shut and glued on the landing skids and the engine bell.
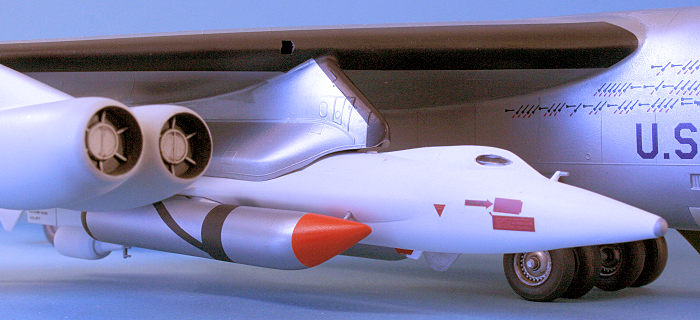
Balls Eight went through a myriad of paint schemes
during its nearly fifty-year career, so a modeler needs to establish at
what point in its life they want to portray. The decals in the kit are
of a configuration seen in 1967 during the highest altitude missions.
By that time, the bomber was painted all over with aluminum lacquer.
All the day-glo orange from the original paint scheme was eliminated and
only white paint remained on the wing tips and over the cockpit area for
heat abatement. The engine nacelles were painted in a light gray. Some
sources sate they were painted with ADC Gray FS16473, whereas the kit
instructions list them as flat white, which is clearly wrong. I started
with the ADC Gray but decided it was too brown in tone and ended using
Light Gull Gray instead. It’s probably n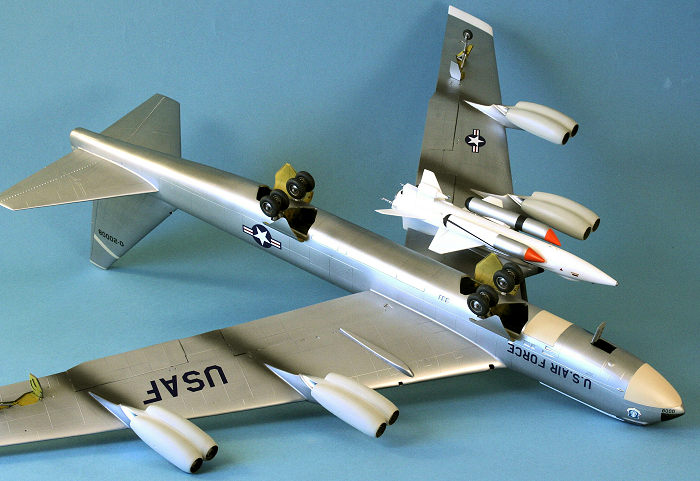 ot
exactly right but it matches the color photos of the aircraft much
better, in my opinion.
ot
exactly right but it matches the color photos of the aircraft much
better, in my opinion.
I masked the cockpit windows with cut pieces of
drafting tape and sprayed the entire model with Alclad Gloss Black
Primer. I meticulously masked off the walkway stripes on the horizontal
stabilizers, wings, and fuselage. Then I sprayed two entire bottles of
Alclad Lacquer in the aluminum shade. Polly Scale Reefer White (my last
bottle, sniff) was sprayed on the wingtips and fuselage area over the
cockpit. Testors Sand was used for the two radomes and the dielectric
areas on the vertical stabilizer. The anti-glare panels on the
starboard wing leading edges and in front of the windscreen were masked
and sprayed with Testors Flat Black. Finally, I added exhaust staining
under each wing, which is seen in some but not all of the period
photos. This aircraft was kept pretty clean between missions so other
than a dark wash added to the wheels and outrigger wells, no other
weathering was applied.
The X-15’s fuel tanks were first painted with
Floquil Bright Silver (also my last bottle), with a black rear portion,
stripe, white half on the port tank, and an International Orange nose on
both. The X-15 itself was painted with Reefer White to replicate the
ablative coating that was applied over the Inconel surface to deal with
the tremendous temperatures that were encountered at Mach 6. Flat black
was sprayed on the rear portions of the vertical stabilizers.
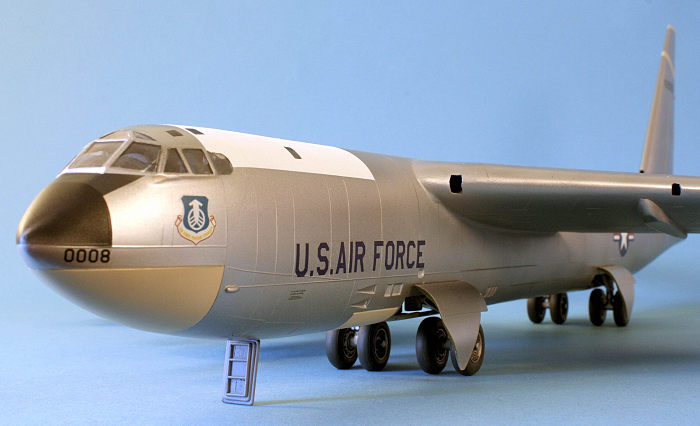
The decals are of excellent quality – something I
didn’t expect from a Monogram kit. They laid down on the model
beautifully with absolutely no issues whatsoever. Somebody did their
homework and printed the “USAF” and “U.S. Air Force” lettering in
Insignia Blue rather than the incorrect black seen in so many other
decal sheets.
The X-15 got a final coat of Testors Flat Clear,
while the NB-52B was given a light spray of Future floor polish.
I removed the masking from the walkway stripes and
had to do some cleanup in places where t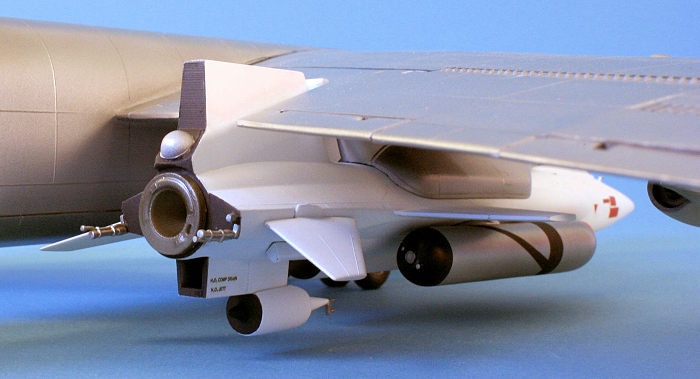 he
Alclad layer chipped away from the separation line. The window masks
were removed and the clear pieces polished to remove residual tape
residue. To replicate the four windows over the heads of the pilot and
co-pilot, I cut out appropriately shaped rectangles from a sheet of
black decal.
he
Alclad layer chipped away from the separation line. The window masks
were removed and the clear pieces polished to remove residual tape
residue. To replicate the four windows over the heads of the pilot and
co-pilot, I cut out appropriately shaped rectangles from a sheet of
black decal.
I glued on the wheels and made certain that all of them touched
the ground by sanding various tires to make flat spots, some more than
others. The outrigger gear required a bit more work. In real life, the
gear doesn’t necessary touch the ground at all times as it depends on
the amount of fuel in the wings at the moment. As it is, the port
wing’s outrigger gear is suspended in the air a few millimeters. Oh
well.
The X-15’s fuel tanks and the dummy ramjet were
glued on and the entire model was attached to the cradle under the right
wing using white glue. I wished that Monogram would have provided a
more secure attachment arrangement like some kind of pegs or perhaps a
hook, but it is what it is.
As I wrote in my review a couple of years ago about
the Monogram 1/48 scale B-58 Hustler, I continue to marvel that even
though Modeling Madness has been on-line for over twenty years, there
hasn’t been one single review of the Monogram 1/72 scale B-52. After
spending five straight months and 73 hours of effort on it, I completely
understand why: this kit will test the mettle of any modeler foolish
enough to tackle it. It’s not that anything was particularly difficult,
but the word that comes to mind is “tedious”. There are so many seams
to deal with, there is so much preparation to get the model ready for an
aluminum finish, there is so much masking to do to get the walkway
stripes, engine nacelles, and various radome and anti-glare panels
painted, that one often wonders if they have the intestinal fortitude to
press on.
 I did press on, mostly because I am stubborn when it comes to finishing
a kit that I have started but I suspect there is a significant number of
these models in various states of partial assembly festering away on
Shelves of Doom all over the world. In my fifty-plus years of building
models, I’ve only seen one of these built in person, a B-52D, and it was
hanging from the ceiling of hobby shop in Miami Beach that no longer
exists. I’ve never ever seen one at a contest and even gallery photos
are rare on the better-known scale modeling websites.
I did press on, mostly because I am stubborn when it comes to finishing
a kit that I have started but I suspect there is a significant number of
these models in various states of partial assembly festering away on
Shelves of Doom all over the world. In my fifty-plus years of building
models, I’ve only seen one of these built in person, a B-52D, and it was
hanging from the ceiling of hobby shop in Miami Beach that no longer
exists. I’ve never ever seen one at a contest and even gallery photos
are rare on the better-known scale modeling websites.
Still, I brought the project over the goal line and
I’m happy that I’ve got that experience behind me. I think the finished
model looks really cool and while it certainly has many flaws that stick
out to me like a sore thumb, it impresses all who see it in the way that
only a big model can. Would I recommend it to other modelers
considering building one? Probably not, unless they really understand
what they are about to get themselves into. This model is not for the
faint of heart but the reward of having a model of one of aviation’s
most historically significant accomplishments is something that will
provide a great deal of satisfaction if one gets to the end.
Jenkins, Dennis R. and Landis, Tony R: Hypersonic, The Story of
the North American X-15
Jenkins, Dennis R. and Landis, Tony R: X-15 Photo Scrapbook