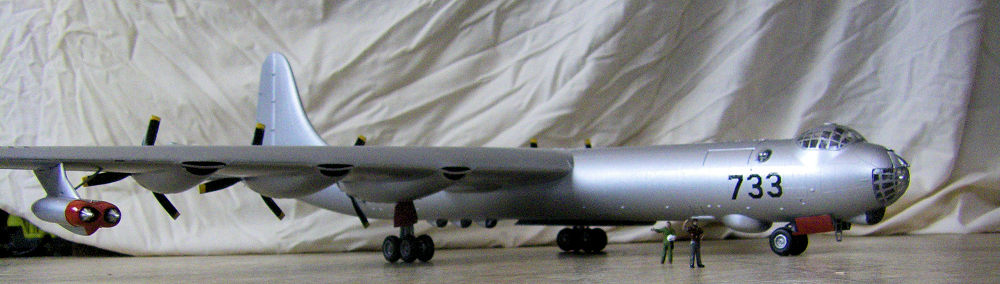
Revell Monogram 1/72 RB-36H Peacemaker
| KIT #: | 5710 |
| PRICE: | $ |
| DECALS: | Two options |
| REVIEWER: | Jacob Hendershott |
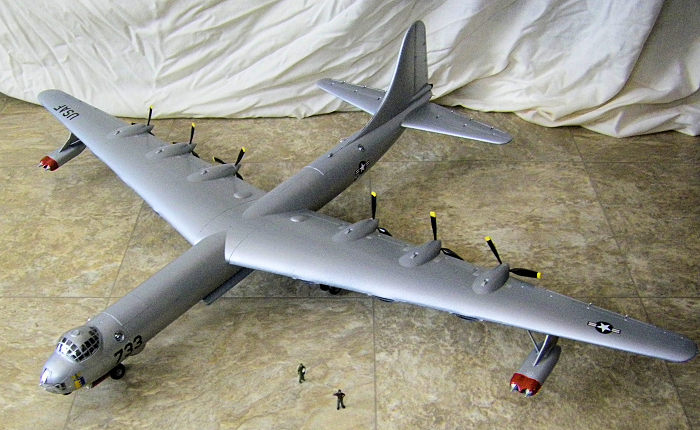
| NOTES: | This thing is HUGE. Make sure you have plenty of room for when you’re done. |
| HISTORY |
 The
Convair B-36 "Peacemaker" was a strategic bomber built by Convair and operated
solely by the United States Air Force (USAF) from 1949 to 1959. The B-36 is the
largest mass-produced piston-engined aircraft ever built. It had the longest
wingspan of any combat aircraft ever built, at 230 ft (70.1 m). The B-36 was the
first bomber capable of delivering any of the nuclear weapons in the U.S.
arsenal from inside its four bomb bays without aircraft modifications. With a
range of 10,000 mi (16,000 km) and a maximum payload of 87,200 lb (39,600 kg),
the B-36 was capable of intercontinental flight without refueling.
The
Convair B-36 "Peacemaker" was a strategic bomber built by Convair and operated
solely by the United States Air Force (USAF) from 1949 to 1959. The B-36 is the
largest mass-produced piston-engined aircraft ever built. It had the longest
wingspan of any combat aircraft ever built, at 230 ft (70.1 m). The B-36 was the
first bomber capable of delivering any of the nuclear weapons in the U.S.
arsenal from inside its four bomb bays without aircraft modifications. With a
range of 10,000 mi (16,000 km) and a maximum payload of 87,200 lb (39,600 kg),
the B-36 was capable of intercontinental flight without refueling.
Entering service in 1948, the B-36 was the primary nuclear weapons delivery vehicle of the Strategic Air Command (SAC) until it was replaced by the jet-powered Boeing B-52 Stratofortress beginning in 1955. All but five examples were scrapped.
| THE KIT |
 I got this
plane from a friend of my moms, who had gotten it from another guy who had
originally worked on this model a bit. It was about 50% assembled but nothing
was painted. The main fuselage, wings, and the cockpit were really the only
things assembled. For some reason though, either because he had new barrels or
what, he had clipped off the front gun barrels. Other than that though, all the
parts were still on their sprues, and had very little flash. There were about 5
sprues molded in a metallic silver and one for the clear pieces. The decals were
of two versions of the B-36. One was the regular B-36 bomber, or the B-36H recon
variant. Being that I already have a bunch of bombers, I decided to go with the
recon version.
I got this
plane from a friend of my moms, who had gotten it from another guy who had
originally worked on this model a bit. It was about 50% assembled but nothing
was painted. The main fuselage, wings, and the cockpit were really the only
things assembled. For some reason though, either because he had new barrels or
what, he had clipped off the front gun barrels. Other than that though, all the
parts were still on their sprues, and had very little flash. There were about 5
sprues molded in a metallic silver and one for the clear pieces. The decals were
of two versions of the B-36. One was the regular B-36 bomber, or the B-36H recon
variant. Being that I already have a bunch of bombers, I decided to go with the
recon version.
| CONSTRUCTION |
More like “deconstruction” due to the fact that I had to tear this beast apart so I could paint it and put in the pieces that the original owner hadn’t put in there. It took me a day and a half to get it apart. I managed to get the lower wing halves off of the plane and get the plane in half. After doing that I then proceeded to take apart as much as I could of the cockpit. Sadly though, the original owner had glued the engineers seats facing the wrong way, so I couldn’t get the engineers in. (More on that later though) When they had dried, as the instructions say to do, I installed the front landing gear.
 Being
that the cockpit was mainly assembled, I can’t list how well it went together. I
painted the cockpit and lower cockpit areas and glued them into the right half
of the plane. As those were drying I proceeded to work on the tire halves. And
there are so many of them. They went together nice, and being with this plane I
wanted to try to hide as many seams as I can, I then sanded the edge around
where the two halves meet. By the time the cockpit areas finished drying, I had
chosen my counterweight for the plane since if I don’t put weights in it, it’ll
tail sit. The weights I chose were a cut off bolt head, and a bushing from a
tractor starter (both of those weighed a couple pounds put together XD) I
epoxied those in right behind the cockpit.
Being
that the cockpit was mainly assembled, I can’t list how well it went together. I
painted the cockpit and lower cockpit areas and glued them into the right half
of the plane. As those were drying I proceeded to work on the tire halves. And
there are so many of them. They went together nice, and being with this plane I
wanted to try to hide as many seams as I can, I then sanded the edge around
where the two halves meet. By the time the cockpit areas finished drying, I had
chosen my counterweight for the plane since if I don’t put weights in it, it’ll
tail sit. The weights I chose were a cut off bolt head, and a bushing from a
tractor starter (both of those weighed a couple pounds put together XD) I
epoxied those in right behind the cockpit.
Since this is the recon version I’m doing, I loaded the racks with the flash bombs (which are on smaller racks of ten each) and glued these into the fuselage halves. After all those dried, I put the rear gun turret into the plane with the idea of keeping it movable (which it stayed movable. Much to my happiness). When the “radar antenna?” above the gun in the back finished drying, I glued the fuselage halves together.
I waited until the glue dried to put the bottom wing halves on (the top halves were still stuck to the plane). These went on without a problem and then I started to put the bomb doors on. I decided to have one door in the closed position and one in the open position as if they are doing bomb door checks. The door that I put in the closed position went on with no problems, though, it did fall of when putting the clear coat on. The other door had to be cut on a pre-molded seam and glued in the folded position. It wanted to be a little bugger and not glue right due to it being a little warped. After that dried though, I got the door on the plane and let it dry. This is then where I started masking stuff off.
| COLORS & MARKINGS |
 For painting the cockpit area, I painted it mainly a
mix of Testors gloss and flat black. I then did some dry-brushing with Testors
metal silver on the middle console and the rear wall/bulkhead. Then I smeared it
around on where the crew would normally be walking to give it the look as if
they’ve wore the paint away in areas. The tires were painted Testors flat black,
while the wheels were painted the metal silver (man I use that stuff a lot). The
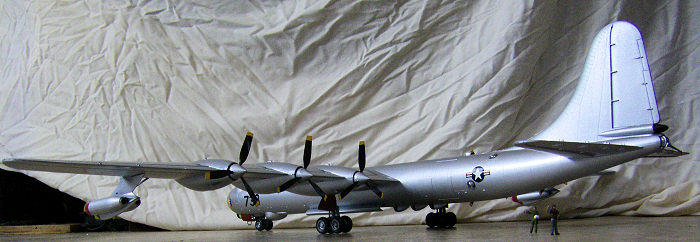
“props” were painted Testors gloss black with Testors gloss yellow tips and
Testors flat aluminum cones. When it comes to painting the props, it’s best to
just paint one blade and let it dry and then continue to the next one due to how
much of an angle the blades are at. If you have a runnier paint, it’ll run right
down and build up on the edge. I had this happen when painting the yellow tips
on.
For painting the cockpit area, I painted it mainly a
mix of Testors gloss and flat black. I then did some dry-brushing with Testors
metal silver on the middle console and the rear wall/bulkhead. Then I smeared it
around on where the crew would normally be walking to give it the look as if
they’ve wore the paint away in areas. The tires were painted Testors flat black,
while the wheels were painted the metal silver (man I use that stuff a lot). The
“props” were painted Testors gloss black with Testors gloss yellow tips and
Testors flat aluminum cones. When it comes to painting the props, it’s best to
just paint one blade and let it dry and then continue to the next one due to how
much of an angle the blades are at. If you have a runnier paint, it’ll run right
down and build up on the edge. I had this happen when painting the yellow tips
on.
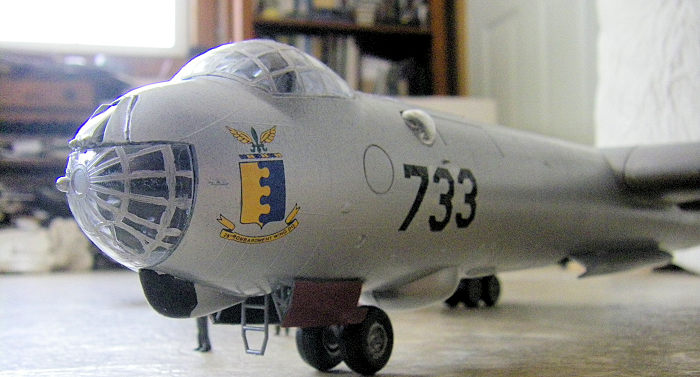
With the windscreen and the lower windscreen, I freehanded these with Testors flat aluminum due to not being able to mask them at all without scratching the plastic. For the plane, I first primered it with Model Masters Primer and then (this may surprise you) I used Dupli-Color Flat Aluminum engine paint from a spray can to paint the whole thing.
Since I chose the recon variant of the plane, I was going to use the big tail letters with the black lines and the big J on the tail. But, as I was putting them on, they started crumbling into a million little pieces. I did manage to get 3 of the Air Force Insignia markings on the plane. The only other markings I was able to get on it were the 28th Bombardment Wing emblem and only 1 U.S.A.F decal. Other than them falling apart like they were, they went down nice and snug and weren’t too bad.
| FINAL CONSTRUCTION |
 After the plane had finished drying, I then unmasked
all the sighting bubbles and the cockpit and bomb bay areas. I unmasked the
front landing gear in that time too, and thankfully no paint had leaked through.
When the unmasking was finished, I started attaching the rear landing gear which
went on without any major problems other than the instructions are a little
vague on where to place one of the support struts into the wheel well. Those
were attached and then I proceeded to attach the canopy and lower windscreen.
Those dried, and then I attached all the recon antennas which also hid some of
the seams that I couldn’t take care of. After everything else had been attached,
I glued the props and the jet pods on.\
After the plane had finished drying, I then unmasked
all the sighting bubbles and the cockpit and bomb bay areas. I unmasked the
front landing gear in that time too, and thankfully no paint had leaked through.
When the unmasking was finished, I started attaching the rear landing gear which
went on without any major problems other than the instructions are a little
vague on where to place one of the support struts into the wheel well. Those
were attached and then I proceeded to attach the canopy and lower windscreen.
Those dried, and then I attached all the recon antennas which also hid some of
the seams that I couldn’t take care of. After everything else had been attached,
I glued the props and the jet pods on.\
| CONCLUSIONS |
My thoughts on this kit are partially mixed. But that’s coming from it being partially assembled too. But all in all, I think it’s a fine kit with plenty of detail, though, it would’ve been nice if we could like build the hidden gun turrets and have them displayed open. Other than that though, I think it’s a fine kit that I would honestly recommend to modelers with some experience. If I were to rate the skill rating, I would choose more like a three. It says it’s a skill level two, but with painting the props, they weren’t the best to paint.
| REFERENCES |
https://en.wikipedia.org/wiki/Convair_B-36_Peacemaker
Copyright ModelingMadness.com
Thanks to
If you would like your product reviewed fairly and fairly quickly, please contact the editor or see other details in the Note to Contributors.