Airfix 1/72 O-1 Bird Dog
| KIT #: | 01058 |
| PRICE: | AUD$5.00 |
| DECALS: | Three options |
| REVIEWER: | George Oh |
| NOTES: |
A typical old Airfix kit without rivets. |
| HISTORY |
The Cessna Aircraft Company developed the L-19 to fill a US Army need for a spotting and forward liaison aircraft. It was named the 'Bird dog' after a suggestion by a Cessna employee, because the plane was to be used to seek-out, find and mark targets for combat aircraft. The Bird dog is a two-seater - it carries a pilot and a spotter. With a high-wing supported by struts, the L-19 had very good all-round visibility thanks to sloping side windows (that let the pilot & observer to look down), windows in the roof above the cabin and a car-style rear window between the fuselage and the wing's trailing edge.
 Bird dogs
started work with the US Army in 1949, and first saw combat in the Korean War.
In later service with the US Marines and the USAF, the Bird dog was designated
the O-1 Bird dog because each of the branches of the US Armed Forces have
different naming conventions.
Bird dogs
started work with the US Army in 1949, and first saw combat in the Korean War.
In later service with the US Marines and the USAF, the Bird dog was designated
the O-1 Bird dog because each of the branches of the US Armed Forces have
different naming conventions.
In the 1960s Vietnam War, Bird dogs were taking a pounding while doing their vital but unsung work, till they were replaced by Cessna Skymasters and North American Broncos. The surviving in-country Bird dogs were handed-over to the Air Force of South Vietnam. Bird dogs were involved in two notable incidents during that war. Resourceful Australian soldiers scrounged parts and repaired broken bits, then built one that they flew operationally for a while, before it was disassembled and smuggled back to Australia as "spare parts" where it was reassembled. The Captain of the aircraft carrier, USS Midway, ordered many perfectly-good Navy aircraft to be pushed overboard so that a South Vietnamese Major could land his Bird dog, carrying his family, on the deck. Both of these Bird dogs now reside in museums.
Bird dogs did further work with the US Civil Air Patrol and several are still at work in glider clubs where the rearward view is an added safety measure. Over 3400 Bird dogs were made.
| THE KIT |
 According to
Scalemates, there are quite a few Bird dog kits available in all of the popular
scales (32, 48 and 72-scale), and from several reputable kit manufacturers. But
this 72-scale Airfix kit hales from 1976, and had undergone several re-releases.
It had 30 parts moulded in standard Airfix light grey plastic, and 7 very-thick
clear parts - some of-which are marred by large sink dimples. Cockpit detail is
basic with only two seats, an IP (with a decal) and only one standard Airfix
bone-domed pilot.
According to
Scalemates, there are quite a few Bird dog kits available in all of the popular
scales (32, 48 and 72-scale), and from several reputable kit manufacturers. But
this 72-scale Airfix kit hales from 1976, and had undergone several re-releases.
It had 30 parts moulded in standard Airfix light grey plastic, and 7 very-thick
clear parts - some of-which are marred by large sink dimples. Cockpit detail is
basic with only two seats, an IP (with a decal) and only one standard Airfix
bone-domed pilot.
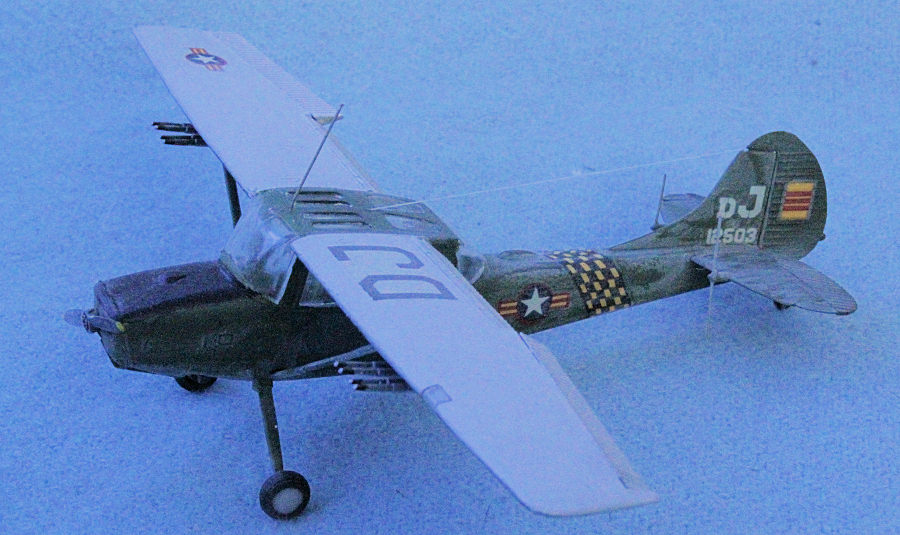
This kit was deep in my stash, so I've no real idea when or why I bought it. I started it because I wanted to support an on-line group build of 'subjects with a high-set wing supported by struts'. I decided to build it OOB so that the build would be quick. And I chose the SVAF markings because 1) I don't have a SVAF subject on the shelf, and 2) because its colours & markings are more-lively than the over-all grey of the US one. And I don't have the markings for blue 161 Recce Sqn one in the Australian Army Avation museum.
| CONSTRUCTION |
 The only
improvements to the kit I wanted to do was to 1) add the fine vertical radio
antennas into the projections on the leading edge of the tailplanes, (These are
for the radios the pilot uses to talk to ground and air assets. Thanks BT.), and
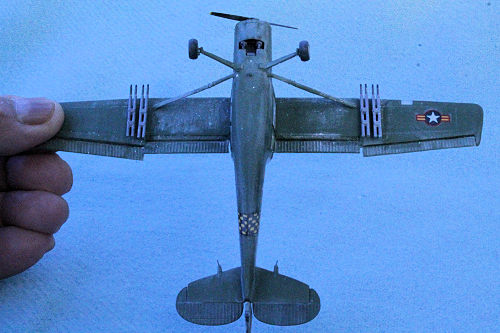
2) to fill the weapon pylons. See, the kit provides four pylons, but provides
pairs of target-marking/smoke rockets for only two of them. So I scanned my
local on-line shop, to seek another set/pair. Instead, I spied, and grabbed, an
inexpensive set of resin wheels and control surfaces. OOB - fail!!! In the end,
I received another two pairs of the same rockets from a fellow modeller's spares
box. Many thanks Joe.
The only
improvements to the kit I wanted to do was to 1) add the fine vertical radio
antennas into the projections on the leading edge of the tailplanes, (These are
for the radios the pilot uses to talk to ground and air assets. Thanks BT.), and
2) to fill the weapon pylons. See, the kit provides four pylons, but provides
pairs of target-marking/smoke rockets for only two of them. So I scanned my
local on-line shop, to seek another set/pair. Instead, I spied, and grabbed, an
inexpensive set of resin wheels and control surfaces. OOB - fail!!! In the end,
I received another two pairs of the same rockets from a fellow modeller's spares
box. Many thanks Joe.
OK - I started with the cockpit because the instructions recommended it. Fortunately, there is an instrument panel (with a decal) and a rear bulkhead to prevent a see-through effect. I left-out the pilot figure, but added a few bits & pieces inside to resemble seatbelts, map cases and radios, but none of that is visible though the thick distorted clear bits were Futured. The kit's design dictates that the cockpit side windows MUST be inserted before the fuselage, then the front and rear clear bit attached soon after. Then they had to be masked with tape.
At this time, I scribed-off the control surfaces from the wings and tailplanes. They would eventually be replaced by the bought resin parts. I fit the Wings and tail surfaces, paying careful attention to their relative alignments, and the undercarriage legs.
| COLORS & MARKINGS |
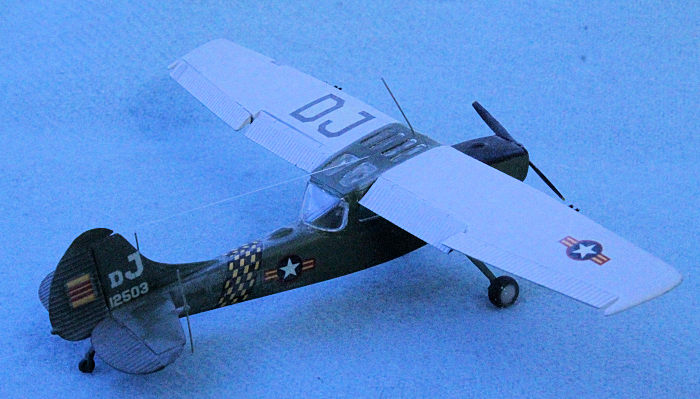
Now the model was painted. The whole model was sprayed Tamiya XF-13/J.A. green, and the top wing was brush-painted with Citadel Miniatures administration grey - the lightest I have of their greys. Coats of Future followed, as a foundation for the decals.
Only the kit decals were used, and they all settled-down well without resorting to settling solutions. The fuselage band was trimmed, then positioned, where it would fit. The only real problem was the yellowed carrier film showed-up well against the light-grey paint.
| FINAL CONSTRUCTION |
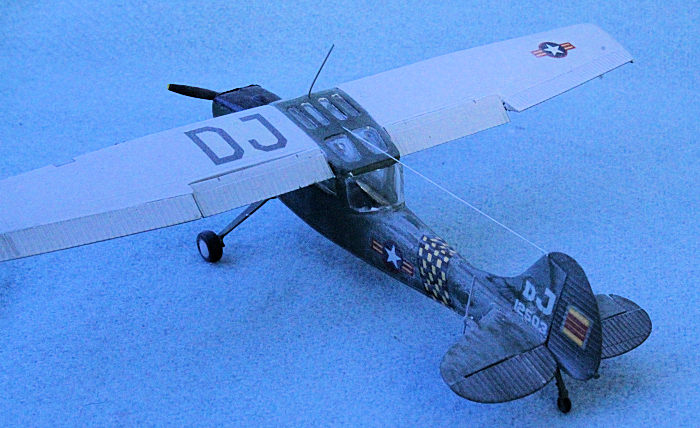
Two modelling colleges advised me on the antennas - where they went and what
they were for. I replicated them with long lengths of thin fuse wire (Do you
remember what that stuff was for?) that were insert into thin holes that I
drilled into the plastic at the co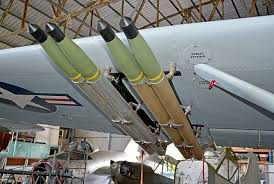 rrect
locations. Internet research gave me multiple colours of the carrier pylons
(black), the smoke rockets Olive drab) and their carrier tubes (metal). Wisely,
I selected one photo and stuck with it for my reference.
rrect
locations. Internet research gave me multiple colours of the carrier pylons
(black), the smoke rockets Olive drab) and their carrier tubes (metal). Wisely,
I selected one photo and stuck with it for my reference.
The last bits were the resin control surfaces and wheels, that were attached with Superglue Gel. The wing support struts were too long, and needed to be trimmed to fit correctly. I cut them in the middle so that I could adjust their lengths yet still retain the anchor points. The last parts to be added was the engine front and propeller. A length of EZ-Line was added to replicate an antenna wire.
I gave the model an all-over coat of clear-flat to blend the decals into the paint, and to remove the glossiness of the Future. But, unfortunately for me, the paint put a white powdery film over the model - Rats!!! I could removed only some of it by scrubbing the model with a soft toothbrush and warm soapy water. *Sigh!!* I guess that this one'll be a heavily-weathered aircraft.
| CONCLUSIONS |
This model is heavily handicapped by the poor moulding of the clear parts, but a vacformed replacement piece may be out of the question because such an after-market item would probably not provide the wings with solid attachment points. As an early Airfix kit, it is a viceless build, so I can recommend it to modellers of moderate experience. While it does have the potential for the super-detailer, there are other better Bird dog kits available. But, in the end, I have a model on my shelf that closely-resembles a Bird-dog of the South Vietnamese Air Force.
2 July 2021 Copyright ModelingMadness.com. All rights
reserved. No reproduction in part or in whole without express permission. If you would like your product reviewed fairly and fairly quickly, please contact the editor or see other details in the
Note to
Contributors.