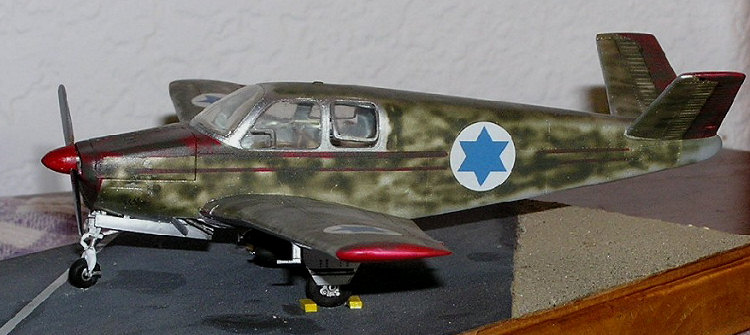
| KIT #: | 11609 |
| PRICE: | $13.96 |
| DECALS: | One option |
| REVIEWER: | Alan Staabs |
| NOTES: |

| HISTORY |
As the state of Israel began its
struggle for independence in1948, it had at its disposal a mix of non-combat
aircraft, (mostly general aviation), that had been on hand. The search was on
for military combat aircraft of all types, (many types would be used), and the
methods used to obtain some of these aircraft are legendary. While some true
combat aircraft were close to being operational, the initial fighting would have
to be done with the aircraft at hand. Among these civil aircraft were two, (soon
to be three), recently acquired Beechcraft Bonanzas.
These were a brand new American light aircraft that were an all metal design
with a 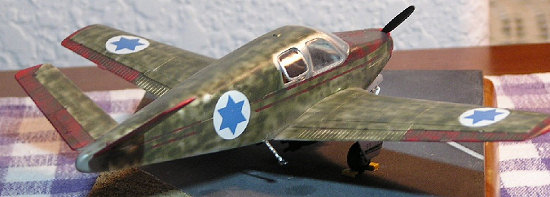 retractable tricycle landing gear. Their most distinctive feature is
their V-tails. Beechcraft used the V-tail design to save weight and reduce drag,
(but this also resulted in less yaw stability.) The V-tail combined the
function of the rudder and elevators to surfaces named “ruddervators.” Designed
to carry four people and cruise at 160 mph, V-tail Bonanza’s were produced till
1982 and out of the over 6,000 produced, many are still flying today.
There was an obvious need for attack aircraft, so two of the three Bonanzas were modified with a pair of bomb shackles found at a RAF dump site. These were mounted to the belly of the aircraft between the mains; thus the bonanza bombers were born. There were reports that the aircraft was also used for strafing by having someone lay on the floor in the prone position and shoot out the baggage compartment door! The aircraft were reportedly well liked due to their fast speed, (at least compared to the more numerous Austers), and their ability to conduct accurate dive bombing attacks. They are reported to have remained in service until 1952 and possibly to as late as 1953.
| THE KIT |
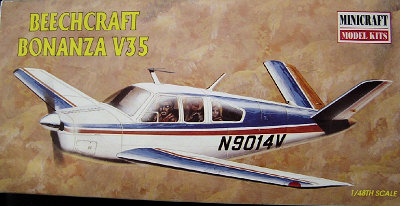 This conversion is relatively simple.
It’s based on a Minicraft 1/48 kit. I believed that these kits originated in
the 1970’s as a series of 1/48 scale general aviation aircraft (Cessna 172,
Cessna 150, Piper Super Cub, Cherokee 140, and a Mooney Mo20 were also
released); most of which Minicraft produces today. I have built two of the
aircraft in this series and I would say both are about the same. The other kit
I have built is the Super Cub. They are both surprisingly well detailed with
recessed panel lines. On the down side, lots of flash and some pronounced seem
lines on smaller parts. The amount of flash is not all that surprising
considering the age of the kit. The kit fits well if you take the time to clean
up the parts. The surface detail is nicely done and appears to be very accurate.
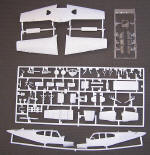 The aircraft the kit represents is a
V-35 bonanza of mid 70’s vintage. While quite a bit newer than the 1947 model
that the Israeli’s flew; the basic V-tail bonanza changed little over its life
in the area of major airframe changes. That makes most of the changes necessary
to back date it easily in the realm of most modeler’s skills. I was surprised
because I thought this was going to be a much simpler build then it turned out.
There are a lot of small detail changes, (and I kept finding more as I went),
that take time but most where not all that difficult. I found a number of photos
on airliners.net that showed beautifully restored early model bonanzas. This was
very helpful for the interior, (the area that requires the most changes), since
the 1947 model bears little resemblance to the later models in its interior,
seating, and instrument panel. It also proved very helpful on airframe details.
Finally, the pictures gave better detail of the original paint scheme. On a trip
to a local airport I was fortunate to find an early model bonanza. This aircraft
had seen better days but still provided some more supplemental photos of
details.
| CONSTRUCTION |
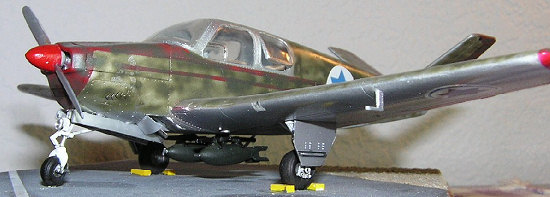 Adjusted the incidence on the
butterfly tails. - The angle of the kits tails just looked wrong
to me, (angled too much downward),
so I trimmed off the locating tabs and mounted them at a little less of an
angle.
Shortened and reshaped the tail cone. - The original aircraft had a much blunter tail cone. A little puttying and sanding to re-contour the shape.
Reshaped wing tips – the V-35 had concave style wing tips; the 1947 model had rounded wing tips. To reshape them I used a little milliput putty and filing to reshape.
Filled in the auxiliary fuel tank fillers - (outboards on the wings)
Filled in the aft most windows and re-scribed panel lines.
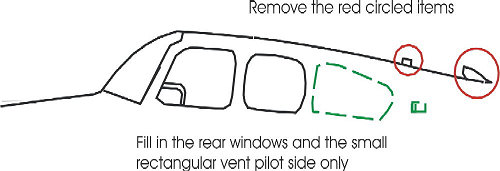 Removed
exterior antennas and vents – I removed all the antennas and rear air scoop
from the top of the fuselage. These sprouted out of the airframe over the years.
I have included a diagram of the changes.
Modify the interior. The most drastic change is in the interior. The original aircraft was a four seater with a completely different instrument panel and style of seats. Airliners.net photos really came to the aid in color, appearance and layout of the interior of the 1947 model.
Replace nose wheel. I did not like the look of the original nose wheel, so I replaced it with an outrigger gear off an old monogram 1/48 harrier kit and mounted it at an angle.
Added a center brace on the front window. I masked and painted the 1947 models center window brace.
 Passenger Windows - The kit
windows do not fit all that well but early bonanzas had operable passenger
windows, so I chose to show them open. The
windows were hinged at the top and opened outward to maybe 2 to 3 inches at the
bottom; this solved the fit problem on two of the five remaining windows.
Adding the bomb shackles and bombs – reportedly the Israeli’s used old ones found in a RAF dump, so I did the same. A quick trip to the spares “dump” box and I scrounged a pair of shackles from a 1/48 Tamiya Mossy and pair of 200 lb bombs from a Hasegawa Spitfire. Now I was ready to put the “bomb” in the Bonanza bomber. I used a couple of photos from books and from the internet for positioning the pair of bomb shackles on the fuselage. Alex Yofe’s web site (www.wings48.com) is the place to go for information on piston aircraft from the early years in the IAF. He has a lot of photos and artwork on various IAF and Arab aircraft as well as a nice chat forum.
| COLORS & MARKINGS |
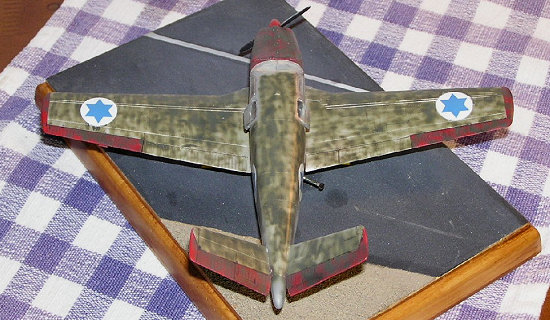
Once these mods were completed it
was time for the paint. The original aircraft were mostly bare metal with red
trim. The wing tips, ailerons, and ruddervators were painted red as well. First
I painted the red for the original paint scheme and then masked the strips,
control surfaces, and wing tips based on my restored airplane photos. Between
these photos and photos of Israeli Bonanza’s, and the profiles on w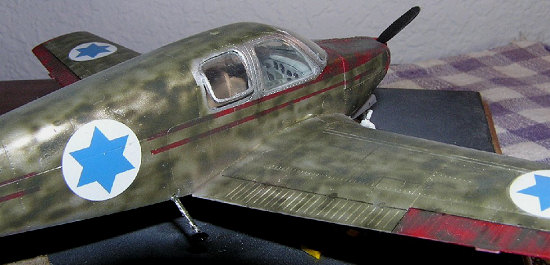 ings48, I was
able to get a pretty good idea how they were painted. Since I was planning on
covering the majority of it with green overspray, I settled on a simple silver
paint job using Gunze paints rather than a more complex metalizer natural metal
scheme. I also painted the tail cone light grey, this was also based on photos
of restored aircraft.
After removing the masks I was very satisfied with the paint job. Now came the hardest part, covering all that careful work with a rough overspray of green. Seems many of the paint details of these aircraft are uncertain, (understandable considering the circumstances of the times.) So, I sprayed the upper surfaces with a rough pattern, (based on what photos there are), of Foliage green color. These early aircraft did not have standardized markings so again using period photos and others best guesses as the rule; (Alex Yofe’s again to the rescue.) A coat of future was next and then on toward the finish line. There were not a lot of markings to apply, only the national insignia on the top of both wings, sides of each fuselage and blue outlined on the bottom. Reportedly, the butterfly tails were also camouflaged on their bottoms as well as the tops. After a little weathering, the black wash to bring out panel lines, and a coat of clear flat, and she is done.
| FINAL CONSTRUCTION |
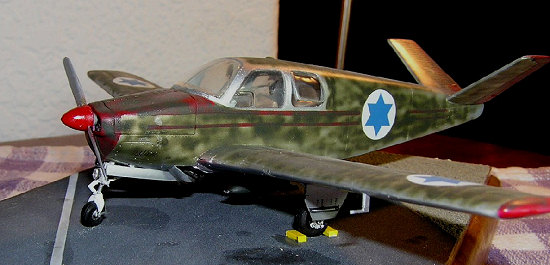 Early on I realized that there was
no good way to keep this aircraft from tail sitting as there was no way to put
enough weight in the nose. Mounting it to a simple base would be a good
solution. A quick search provided a suitable base. A sheet of sand paper cut to
fit was glued to the base. A small patch of sand on the tarmacs edge gives a
sense of these aircrafts natural surroundings. I splattered some thinned down
black and brown oil colors to represent stains on the asphalt. I had already
predrilled the Bonanza’s tires and glued in the pins, (cut off sewing pins), so
all that remained was to glue the aircraft to the base. I placed the Bonanza
where I wanted it then marked and drilled small holes in the base. I added a
pair of chocks for that extra touch.
| CONCLUSIONS |
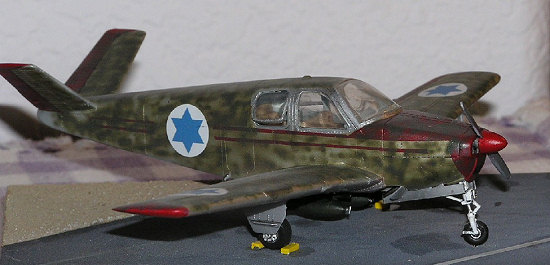 This build turned into more work
than I had originally thought, (but what one doesn’t). I liked the kit; it was
more work than I expected due to cleaning up the flash and mold lines and then
tracking down the small changes in the airframe. The most work needs to be done
in the cabin area, but is not difficult, just time consuming. I have always been
interested in the IAF especially the early years. With the recent work of Alex
Yofe and others, we have much better information to produce more accurate
representations of those Aircraft that fought during the early years in the IAF.
Now I’m eyeing that other V35 kit sitting on my shelf, thinking about what needs
to be done to modify it to the A-36 Series Bonanza, (Named Hofit by the IAF);
the Israel Air Force has been recently taking delivery of. Hmmmm…
| REFERENCES |
Air War On The Edge – Bill Norton (One of the best if not the best reference book on the IAF)
Markings and Camouflage No 3 Israel Air force, Part 1 1948 to 1967 – Scale Aircraft Monographs
WWW.wings48.com, a truly great web site for IAF enthusiasts, thank you Alex for all your hard work.
WWW.airliners.net, A tremendous resource of photographs for current military and civilian aircraft alike.
March 2007
Copyright ModelingMadness.com.
If you would like your product reviewed fairly and fairly quickly, please contact the editor or see other details in the Note to Contributors.