| KIT #: | Pt 41 |
| PRICE: | $ |
| DECALS: | Three options |
| REVIEWER: | John Summerford |
| NOTES: | 2008 boxing. Quickboost ejection seat. |
| HISTORY |
The Saab 35 Draken “Dragon” was a Swedish fighter aircraft developed and manufactured by Saab between 1955 and 1974. It was the first fully supersonic aircraft to be deployed in Western Europe and the first aircraft to do the Cobra maneuver.
 The Draken
was developed during the 1940s and 1950s to replace Sweden's first generation of
jet-powered fighter aircraft, the Saab J 29 Tunnan and, later, the fighter
variant (J 32B) of the Saab 32 Lansen. It featured an innovative double delta
wing. Developed in Sweden, the Draken was introduced into service with the
Swedish Air Force on 8 March 1960 under the designation J 35, the prefix J
standing for Jakt which translates to pursuit. Early models were intended purely
to perform air defense missions, the type being considered to be a capable
dogfighter for the era.
The Draken
was developed during the 1940s and 1950s to replace Sweden's first generation of
jet-powered fighter aircraft, the Saab J 29 Tunnan and, later, the fighter
variant (J 32B) of the Saab 32 Lansen. It featured an innovative double delta
wing. Developed in Sweden, the Draken was introduced into service with the
Swedish Air Force on 8 March 1960 under the designation J 35, the prefix J
standing for Jakt which translates to pursuit. Early models were intended purely
to perform air defense missions, the type being considered to be a capable
dogfighter for the era.
The Draken functioned as an effective supersonic fighter aircraft of the Cold War period. In Swedish service, it underwent several upgrades, the ultimate of these being the J 35J model. By the 1980s, the SAF's Drakens had largely been replaced by the more advanced Saab 37 Viggen fighter. The last Draken was retired in December 1999. The type was also exported to Austria, Denmark, Finland, and the United States; the last operated the type as a training aircraft for test pilots. [In Mojave, California, one can be found on display at the airport entrance. Yours truly]
| THE KIT |
Sealed in two bags are two sprues of 52 gray parts that are mostly the main frame parts. A second bag of seven smaller sprues hold the rest of the 47 parts. A third bag has the clear parts and decal sheet composed of markings and cockpit details. The kit does not have any photo-etch parts.
 An
after-market ejection seat might be worth purchasing since a harness is not
included. Drop tanks and weapon pylons are supplied, but the weapons have to be
purchased separately. Mounting holes for those stations have to be drilled out
of the bottom fuselage half. A nice note is a call-out for three grams of
ballast to add to the nose cone.
An
after-market ejection seat might be worth purchasing since a harness is not
included. Drop tanks and weapon pylons are supplied, but the weapons have to be
purchased separately. Mounting holes for those stations have to be drilled out
of the bottom fuselage half. A nice note is a call-out for three grams of
ballast to add to the nose cone.
A brief history in English and Japanese plus a parts map can be found on the first face of the three-fold, double-sided instructions. Assembly is completed in 12 steps. Painting and decaling instructions are for three aircraft. Color call-outs are referenced to Humbrol paints or FS codes with generic names for the hues. The camouflage scheme calls for two hues on the upper surfaces that appear to be too light. According to images in the book Swedish Jet Fighter Colours, it there was also a tri-color scheme of dark green, dark gray and dark blue upper with neutral gray and natural metal on the lower surfaces.
| CONSTRUCTION |
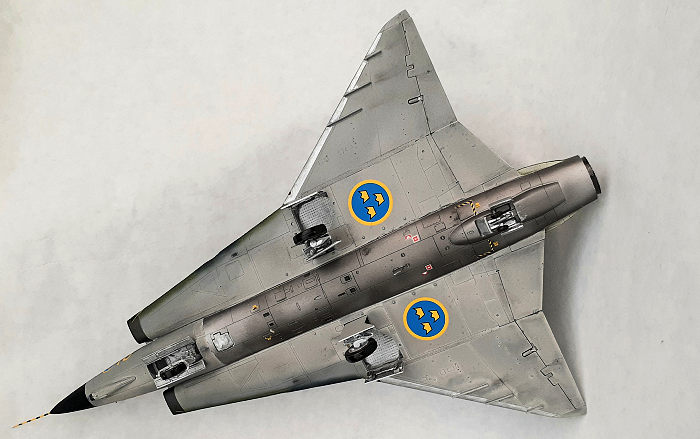
Before gluing any parts together, a descension must be made as to what underside stores to include and then which holes to drill out. I found just as many photos with Drakens fully loaded as well as clean. I like to admire the lines of an airplane, so I chose a clean look and left the holes flashed over.
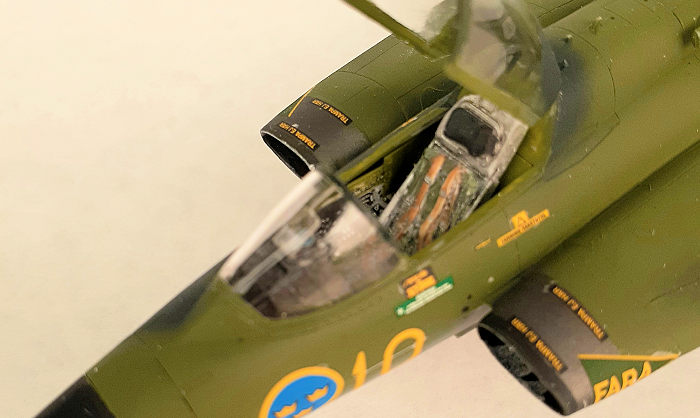 That done, I
painted and decaled the cockpit parts to start. The tub is trapped between the
upper and lower halves of the fuselage and is the only thing to install before
gluing the halves together.
That done, I
painted and decaled the cockpit parts to start. The tub is trapped between the
upper and lower halves of the fuselage and is the only thing to install before
gluing the halves together.
The tail cone sits a bit proud of the fuselage, so careful scraping and sanding is called for. The leading-edge gun port inserts are conversely a bit undersized and reducing the material on the wings is needed.
Moving on to the outer wings, the top and bottom halves were glued together. In step ten has the fences on the undersides are added, but I chose to glue them on at this point. Fit of the wings is good, but the seams need to be addressed to make it look more like a panel line. Trying to avoid obliterating the detail along those seams, I experimented with Tamiya putty thinned with their lacquer thinner and brushed the slurry into the seams. Excess was immediately cleaned up with a cotton swab. When dry, a bit of scraping and sanding with wet/dry paper eliminated the surplus. The tip of a number 11 blade cleaned out adjacent panel lines and rivet heads. The result was very tidy.
Intakes were attached next and a bit scraping and sanding was needed, but not filler for those seams. The fin/rudder came next and again very little work was need on the seams. The nose cone halves were glued together and those seams quickly cleaned up. A test fir revealed that a bit material needed to removal on the inside edge to get a good fit. Details along the spine plus the fuselage underside complete main airframe. The seat and canopy are added as the last step, so the model was ready for paint.
| COLORS & MARKINGS |
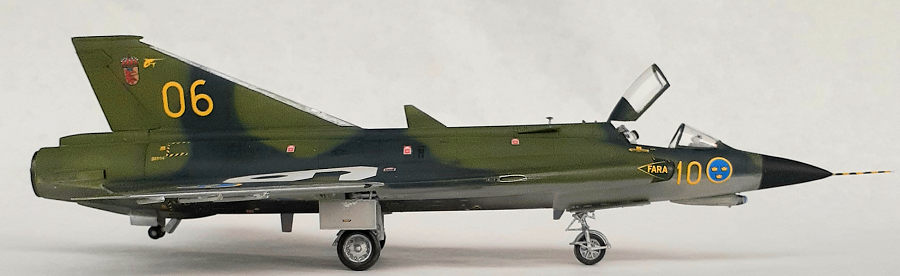
 There were
differences in color schemes between wing groups, which variant, and at what
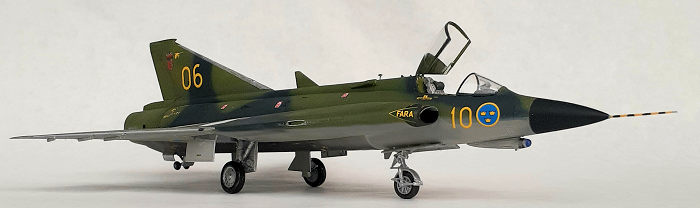
time. After a couple of hours of research, I settled on the first option of an
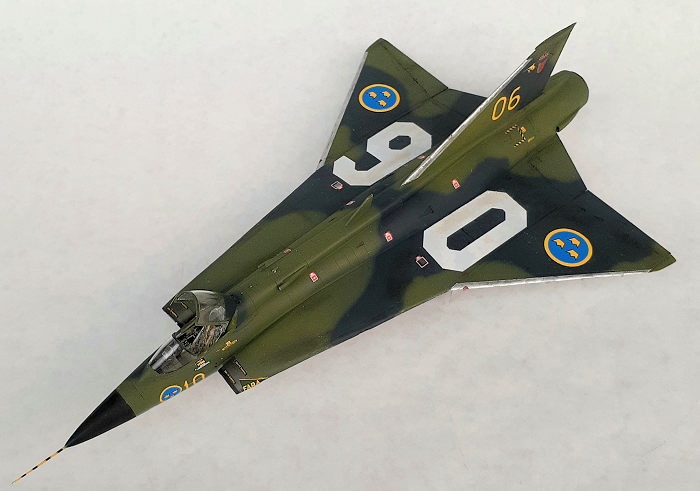
airframe in the third group circa 1980. The paint diagram shows a hard line
between the colors. Photographs reveal that the colors were not masked and the
upper colors wrapped around the leading edge of the inner portions of the wings.
There were
differences in color schemes between wing groups, which variant, and at what
time. After a couple of hours of research, I settled on the first option of an
airframe in the third group circa 1980. The paint diagram shows a hard line
between the colors. Photographs reveal that the colors were not masked and the
upper colors wrapped around the leading edge of the inner portions of the wings.
The cockpit was masked, and the underside, nosecone and intakes were given a coat of primer from a rattle can for automobiles since I had acrylic paint for those areas. About two thirds of fuselage underside is natural metal, so I masked around that area and sprayed on Vallejo duraluminum immediately followed by a misting of exhaust around the panel lines to add some weathering. The next day the metal area was masked and the rest of the underside sprayed neutral gray. When that had cured, the areas around the intakes plus the area aft of the nose cone were masked and painted steel and flat black respectively.
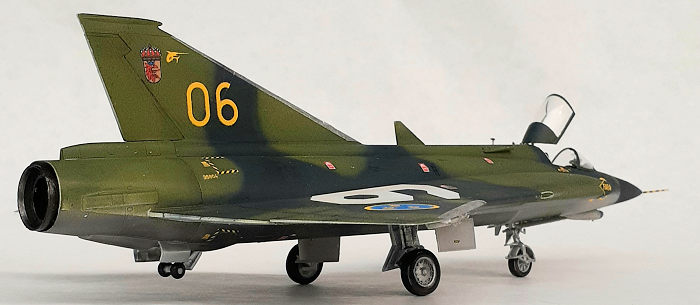
 Those areas
were masked and the upper fuselage was given a coat of Italian olive-green
enamel. That color seems to be a better match than olive drab. My airbrushing
skills were tested when it came to spraying the blue enamel freehand. I used
dark sea blue, again because I think it’s a better match. I felt good enough
about that step that I didn’t do any touch-ups with the green. I did have to go
back with the gray however at the nose and under the leading edges of the wings.
Those areas
were masked and the upper fuselage was given a coat of Italian olive-green
enamel. That color seems to be a better match than olive drab. My airbrushing
skills were tested when it came to spraying the blue enamel freehand. I used
dark sea blue, again because I think it’s a better match. I felt good enough
about that step that I didn’t do any touch-ups with the green. I did have to go
back with the gray however at the nose and under the leading edges of the wings.
It was at this stage that I realized that the leading edges of the fin and outer wings are chrome. More masking ensued and those areas were passed over with a liquid chrome marker. That didn’t work very well, so I brush a coat of Vallejo chrome over them. The last paint applied was the black on the lips of the intakes.
Two coats of clear gloss were sprayed on to prepare for the decals. Hasegawa decals have a reputation for robustness and these were no exception. I did have a few areas of silvering, but some slicing with a new razor blade and Solvaset took care of that.
A couple of coats of clear flat sealed on the decals. Light weathering was done with charcoal for lowlights and artist’s pastels for highlights. Light sand colored pigment powder was smudged on the white numerals on the wings to tone them down a bit. Another coat of clear flat was applied to preserve the weathering.
| FINAL CONSTRUCTION |
In between painting steps, the landing gear was built up and the pitot painted. A small amount of material needed to be filed off of the end of the scissor links of the main gear to get the legs to fit in the well. The exhaust can and tail bumper were also added at this time. Flipping the model over to complete the cockpit followed. The gun site and wind screen were added. A teat fit of the Quick Boost seat revealed that it was too wide by a couple of millimeters, so it was narrowed from the seat pan to the bottom. Unfortunately, I had a gap between the canopy and the wind screed, co I glued it in the open position. Adding the pitot completed the model.
| CONCLUSIONS |
I didn’t spend that much more time cleaning up seams than on sprue nubs. If you’re looking for a model that you can finish in a reasonable amount of time, this kit fills the bill. The paint scheme I chose is deceptively complex, extending the build a week. I spent about 14 hours building and about 5 hours painting and decaling – excluding drying time.
8 March 2021 Copyright ModelingMadness.com. All rights
reserved. If you would like your product reviewed fairly and fairly quickly, please
contact
the editor or see other details in the
Note to
Contributors. Back to the Main Page
Back to the Review
Index Page
Back to the Previews Index Page