Special Hobby 1/72 SAAB A-21R & A-21A
| KIT #: | 72207/215 |
| PRICE: | $30.00 apiece |
| DECALS: | Four options per kit |
| REVIEWER: | Torben Plesberg |
| NOTES: | Short run |
| HISTORY |
Flygvapnet – the Swedish Air Force – was in serious trouble during WWII since it was impossible to buy some much needed aircraft for the defense of Sweden. The SAAB Company had more or less to solve this problem by designing and producing new fighting planes. One of these was the B-17 light bomber and another was the B-18 twin engine bomber. A third was the J-21 fighter and attack aircraft, and the fourth was the J-22 lightweight fighter, which was designed around the Twin Wasp engine, the same as for the B-17.
The basic problem was getting the engines for the aircraft. Italy supplied Piaggio engines for the B-17 C, mainly because Sweden also bought a number of Reggiane Re 2000 fighter planes, spare engines for the Re 2000 of course. The good relations between Germany and Sweden were not enough for obtaining the new DB 605 E engines for the new Swedish fighters. The Swedes had to settle with the DB 605 B engine, which had been license produced for some time in Sweden. This engine was modified for 100 octane fuel, and the effect was raised from 1475 HP (87 octane) to 1700 HP.
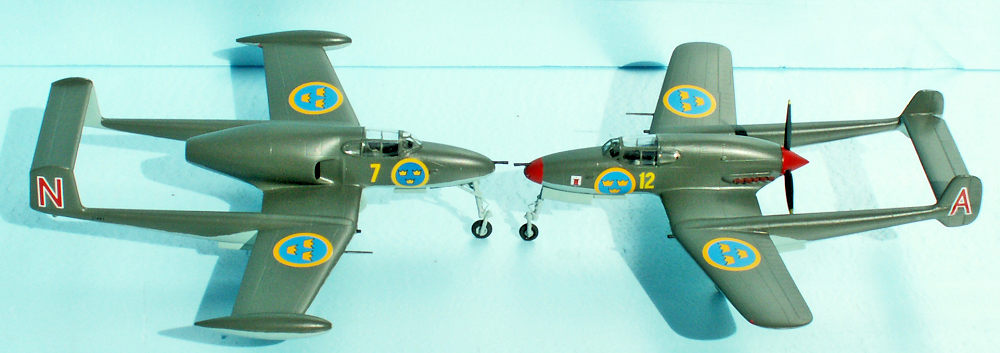
 The SAAB
J-21 was rather unique with a central fuselage with a pusher propeller and twin
booms and fins, just like the American Vultee XP-54 design. The American design,
however, did not fulfill the expectations and was not put into series
production. The Swedish design J-21 was more successful and produced in numbers,
more than 300 were delivered to Flygvapnet.
The SAAB
J-21 was rather unique with a central fuselage with a pusher propeller and twin
booms and fins, just like the American Vultee XP-54 design. The American design,
however, did not fulfill the expectations and was not put into series
production. The Swedish design J-21 was more successful and produced in numbers,
more than 300 were delivered to Flygvapnet.
The design had a pair of drawbacks: The engine cooling was insufficient on the ground, and if the pilot had to bale out, he would, almost inevitably be hit by the propeller. To deal with this problem, SAAB invented an ejection seat, using a powder charge large enough for the seat to clear the propeller. This system worked and saved the life of several pilots. Martin Baker took up the idea of using a powder charge for the launching of the seat, and they patented this method, what SAAB forgot to do!
The first prototype took to the air on July 30 1943 with Claes Smith at the controls. I have witnessed Claes Smith himself tell about this flight: The runway of the SAAB factory was a little too short, and the undercarriage hit a fencing pole during the take off. Then Claes knew that the landing would not be an easy one with a damaged undercarriage. Since the undercarriage broke down when touching the ground, it was more like a belly landing. Claes got some bruises, but was otherwise OK.
The J-21
turned up to be less suitable as a fighter, because the maneuvering was too
slow. However, the aircraft was a very stable weapons platform and thus a born
attack aircraft. The armament consisted of four 13.3 mm machineguns and a 20 mm
cannon. The cannon and two of the MGs were placed in the nose, and two MGs were
placed in the wing roots just at the outer side of the booms. This was a rather
heavy armament. The J 21 could carry up to a 600 kg bomb between the booms. It
could alternatively carry eight
 rockets –
80 or 145 mm. It could carry two 400 Liter wing tip tanks for extra range. These
tanks could be armed and used as incendiary bombs.
rockets –
80 or 145 mm. It could carry two 400 Liter wing tip tanks for extra range. These
tanks could be armed and used as incendiary bombs.
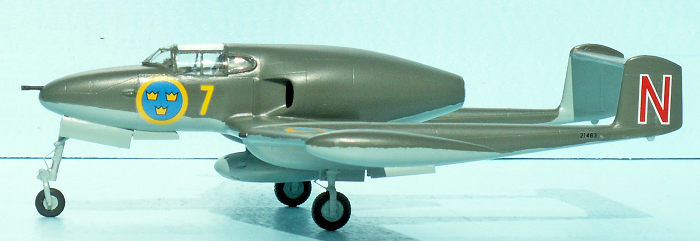
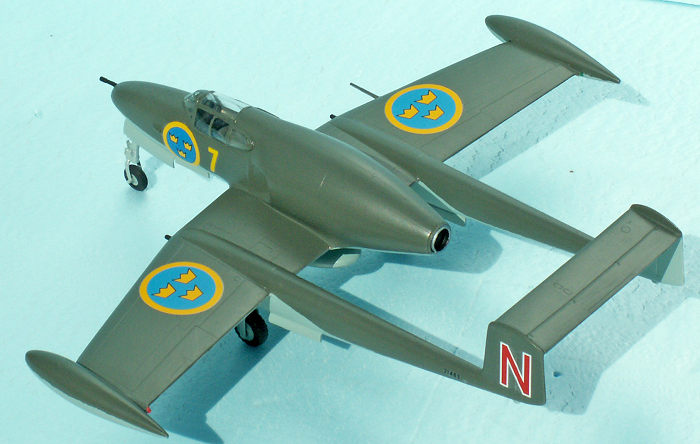
The J-21 was the last Swedish propeller driven fighter plane, and since the jet age had started, SAAB worked out a jet engine version of the J-21. This version got an R behind the J-21 designation. R was short for the old Swedish word “reamotor” before the word ”jet” was accepted. Thanks to the design of the J-21 with the engine in the rear of the fuselage, it was possible to change the Daimler Benz piston engine with a De Havilland Goblin jet engine. The engineers figured out that about 20 % of the J-21 should be modified to take the Goblin. However, in the end it was almost 50 %. The DB 605 B powered J-21 had a top speed of 650 km/h. This speed was boosted to no less than 930 km/h with the Goblin jet engine! The aircraft was so to say“overpowered”, as the pilots said.
Flygvapnet wanted 124 J-21 converted to Goblins. However, only 64 machines were actually converted. The reason for this cut was obviously that the SAAB J-29 “Flying Barrel” was on its way, and the J-32 “Lansen”, too, which both were far more potent machines. In the end, almost half of the J-21Rs were used only for pilot training, while they were waiting for the J-29 to get into service with the squadrons.
Only three J-21As were kept for preservation and no J-21R. The J-21R to be seen in the Flygvapen Museum at Malmen is in fact a J-21A, which was modified to J-21R by enthusiasts. Very odd that no one seemed to care about preserving just one example of Sweden’s first jet fighter!
| THE KITS |
 207: The
jet version was the first J-21 release from Special Hobby. It comes in a small
box with a picture of the J-21R on the lid. There are two sprues in a light grey
styrene, a sprue with clear parts, a small bag with resin parts and a fret with
photo-etched parts. The decals offer four options: Three with aircraft from The
F-7 wing, and one from F-10. The printing is first class, however the yellow
outlines of the national markings are about 50 % too wide, and the blue color is
too dark. The instructions is an A5 booklet of twelve pages. Page one is a short
story of the J-21R in Czech and English. Page two shows the sprues with numbers
of the parts. Pages three to seven show in 17 steps how to put the model
together and in what order. Page eight shows the position of the stencils –
there are thirteen of them on such a small model. Pages nine to twelve show how
to paint and decal the four options. The paint reference is for Gunze Sangyo.
There is no guideline for painting of the details: interior of the cockpit,
wheel wells and undercarriage legs.
207: The
jet version was the first J-21 release from Special Hobby. It comes in a small
box with a picture of the J-21R on the lid. There are two sprues in a light grey
styrene, a sprue with clear parts, a small bag with resin parts and a fret with
photo-etched parts. The decals offer four options: Three with aircraft from The
F-7 wing, and one from F-10. The printing is first class, however the yellow
outlines of the national markings are about 50 % too wide, and the blue color is
too dark. The instructions is an A5 booklet of twelve pages. Page one is a short
story of the J-21R in Czech and English. Page two shows the sprues with numbers
of the parts. Pages three to seven show in 17 steps how to put the model
together and in what order. Page eight shows the position of the stencils –
there are thirteen of them on such a small model. Pages nine to twelve show how
to paint and decal the four options. The paint reference is for Gunze Sangyo.
There is no guideline for painting of the details: interior of the cockpit,
wheel wells and undercarriage legs.
The quality of the parts is OK, or rather good actually, with no rivets and very fine recessed panel lines. The canopy comes in three parts because of the convex side windows. The quality of the clear parts is also good.
It would be a good and highly recommendable kit if it were not for a serious flaw: The rear fuselage is wrong: on the assembled model, the exhaust pipe of the jet engine is about five mm too high from the ground, if you compare the model with photos of the real thing! It is possible to correct this flaw, but only if you are prepared for it – and before the assembly of the kit! There is no easy way to correct this flaw on a finished model! I did not take the trouble to do it.
 However,
all parts fit well together and very little filling is necessary, not even in
the wing joints. Only a light sanding is a good idea to smooth the joints.
However,
all parts fit well together and very little filling is necessary, not even in
the wing joints. Only a light sanding is a good idea to smooth the joints.
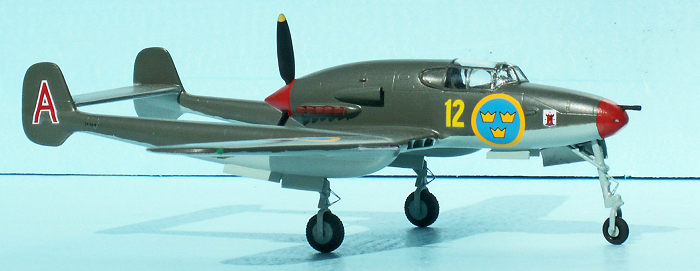
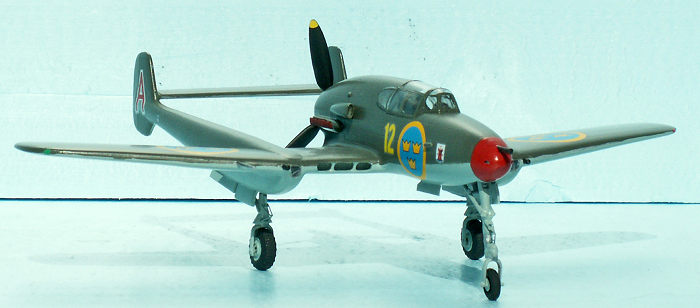
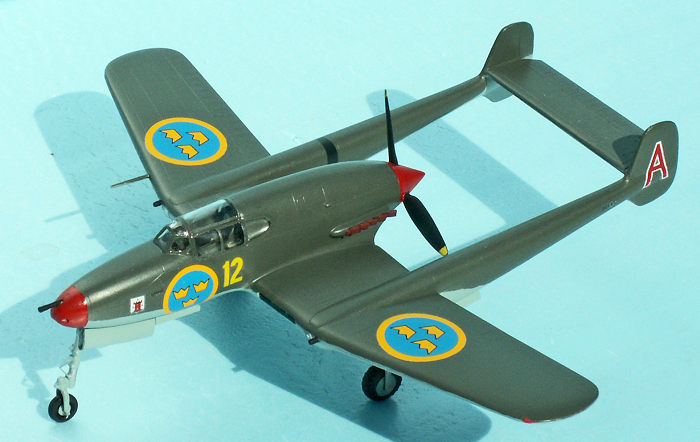
Kit 215 is the propeller version, J-21A. This kit is fundamentally a repeat of the J-21R. There are some differences of course, mostly connected to the different power plant. The main undercarriage is a little higher for the propeller to clear the ground sufficiently.
The 215 kit is a better kit than the 207, because it is a correct replica of the real thing. However, there is a serious flaw: the decal sheet with four options (F 8, F 9 and F 12) has useless national markings, because the blue discs are far too dark blue – actually night blue! You will need a sheet from Flying Colors with Swedish national markings 1/72 for the J-21A model. An improvement is the full color separate A4 sheet with painting and decaling schemes of the four options. The instructions has accordingly only eight pages.
| CONSTRUCTION |
The two kits are very much the same, the only difference being the power plants: the DB 605 B piston engine with exhaust racks and a pushing propeller and the large gauge De Havilland Goblin jet engine. I found it most convenient to glue the exhaust racks in place with white glue before the assembly of the fuselage. The engine intakes in the wing roots must also be glued in place before the assembly of the wing. The landing lights and the guns may be glued in place after the assembly, the landing light with white glue or clear varnish.
There
are lots of tiny photo-etched parts, and most of these are hidden inside in the
cockpit, hardly noticeable. I only applied the instrument panel and the small
oleo scissor links for the undercarriage legs. One could have wished that the
brake wires for the main undercarriage were parts of the kits, since they are
clearly visible on the actual aircraft. They can be m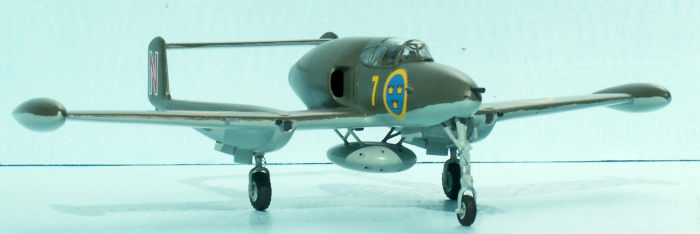 ade
of thin wire, gauge 0.5 mm or smaller. It is worth paying attention to the
windscreens: for the A-21A apply the one with the flat front and for the A-21R
apply the one with the convex front.
ade
of thin wire, gauge 0.5 mm or smaller. It is worth paying attention to the
windscreens: for the A-21A apply the one with the flat front and for the A-21R
apply the one with the convex front.
Parts no B7 –the bottom of the main wheel wells must be sanded a bit in the ends and the sides to fit smoothly into the wing and the booms.
The SAAB J-21 is a typical tail sitter, however, only the instructions of the J-21A deals with the problem, recommending a nose weight of 8 gram. This weight must be placed on the top of the nose wheel well before the assembly of the fuselage. I put as much lead as possible on the wheel well, and there was sufficient room for 9 gram of lead pieces, which were fastened with white glue. 9 gram showed up to be sufficient to avoid tail sitting. If you press the booms down to touch the ground, the booms go up again, when you remove your finger. The recommended 8 gram is also sufficient.
| COLORS & MARKINGS |
 The color
scheme of the J-21A/R is rather simple: dark green on the upper sides, RLM 71-
Model Master 4781, and light blue grey on the under sides, RLM 65- Model Master
4778. Wheel wells and undercarriage legs are also RLM 65. The J-21A has a red
spinner and red nose, Revell Aqua fiery red 31. Exhaust pipes are reddish brown,
Revell Aqua 37. Propeller blades and guns are engine flat black, Model Master
4888 Acrylic and tires are rubber black, Tamiya XF-85 Acrylic. Most difficult of
the paint work was to get the light blue wheel hubs circular. This was possible
by punching 5 mm holes in small pieces of Tamiya tape using these as masking for
the hubs.
The color
scheme of the J-21A/R is rather simple: dark green on the upper sides, RLM 71-
Model Master 4781, and light blue grey on the under sides, RLM 65- Model Master
4778. Wheel wells and undercarriage legs are also RLM 65. The J-21A has a red
spinner and red nose, Revell Aqua fiery red 31. Exhaust pipes are reddish brown,
Revell Aqua 37. Propeller blades and guns are engine flat black, Model Master
4888 Acrylic and tires are rubber black, Tamiya XF-85 Acrylic. Most difficult of
the paint work was to get the light blue wheel hubs circular. This was possible
by punching 5 mm holes in small pieces of Tamiya tape using these as masking for
the hubs.
The decaling was rather easy using the national insignia from Flying Colors, since they were too bad with the kits. I chose to make the J-21R as the Niklas röd (red) from the F 7 wing and the J-21A as Adam röd from the F 12 Wing. The decals were sealed with a layer of Satin Cote from HB for protection.
| FINAL CONSTRUCTION |
The
canopy parts were masked and the frames painted RLM 71. The canopy parts were
glued in place with a clear varnish, Revell 01 Aqua. This varnish looks like
white glue, but it gets very transparent and glossy, when it dries up. Actually,
it is poss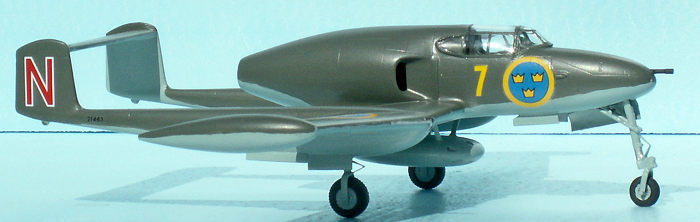 ible
to improve the clear parts with a layer of Revell 01 Aqua. They get more clear
and transparent by this treatment. When the varnish has dried up, the joints
between fuselage and canopy parts got some RLM 71 to close the tiny gaps.
ible
to improve the clear parts with a layer of Revell 01 Aqua. They get more clear
and transparent by this treatment. When the varnish has dried up, the joints
between fuselage and canopy parts got some RLM 71 to close the tiny gaps.
The cannon barrels were glued in place and painted black. The MG openings in the nose and the eight gun tray were drilled out with a 0.5 mm drill to create the small circular openings for the hardware leaving the planes.
Finally, the red and green position lights were marked with Posca pens, and the propeller tips were marked with a yellow Posca pen. These pens with a 0.7 mm tip are perfect for detail painting work and they are much simpler to use than paint and small brushes.
| CONCLUSIONS |
Both kits are recommended, the propeller driven version even highly. If you are interested in Flygvapnet planes - or just odd-looking fighters from the WWII years and shortly afterwards, don’t hesitate to try these kits. However, since they are short run kits, they are not for beginners.
| REFERENCES |
Wikipedia se articles
“SAAB 21” and “SAAB 21R”. Swedish text.
IPMSstockholm.se “SAAB J 21 in detail”. Many photos showing the details of the aircraft.
English text!
Björn Karlström: Flygplansritningar 3. Swedish Air Force Bombers 1926-86 in scale 1/72 and 1/50.
Drawings and photos of SAAB J 21A and J 21R.
My own photos of the Adam red from F 12 taken at Malmen in 1962 and Ängelholm in 1970.
18 September 2018
Copyright ModelingMadness.com
If you would like your product reviewed fairly and fairly quickly, please contact the editor or see other details in the Note to Contributors.
Back to the Main Page Back to the Review Index Page Back to the Previews Index Page