|
KIT # |
61043 |
|
PRICE: |
R$ 62.90 |
|
DECALS: |
See review |
|
REVIEW : |
Rodrigo Santos de Oliveira |
|
NOTES: |
Propagteam 48-103 decals used |
|
HISTORY |
The MiG 15´s history began when the Soviets captured several advanced
German projects, like Kurt Tank’s Ta-183. It was a swept wing, single engined
jet fighter with a T tail. It had an estimated speed of 590 Mph and a service
ceiling of 47,000 feet. It was scheduled to fly during August 1945 and would be
the most formidable opponent for the Allied jets, the Meteor and the P-80, had
the war gone well into 1946.
In January, 1946, the specifications were issued for the new fighter (Maximum
speed of Mach 0.9 and service ceiling of over 30,000 ft). MiG, Yako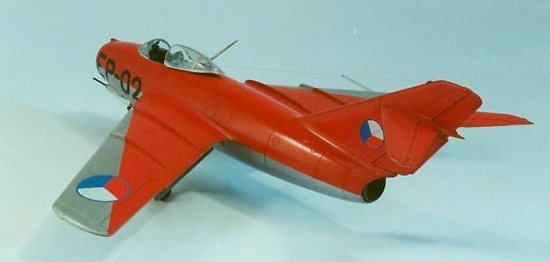 lev and
Lavochkin OKB´s were all given the specification. The MiG´s project was called
“S” (Strelowidnostji, or Swept). The development was long and difficult, with
TsAGI (Central Aero-Hydrodynamics Institute, modernized with German equipment
and know-how) handling the wind tunnel tests.
lev and
Lavochkin OKB´s were all given the specification. The MiG´s project was called
“S” (Strelowidnostji, or Swept). The development was long and difficult, with
TsAGI (Central Aero-Hydrodynamics Institute, modernized with German equipment
and know-how) handling the wind tunnel tests.
One of the problems MiG had to face was finding a suitable jet
engine. All the Soviets had was the RD-10, a copy of the Jumo 004. A development
of this engine, producing twice the thrust, was awaited for 1947, but this
didn’t happened, and the S project was further delayed. When was decided to use
the Rolls Royce Nene, the change for an axial flow to a centrifugal flow engine,
with greater diameter, led to more delays.
In early 1947, work began on the S-01 prototype. The first flight was on 30
December on that same year, using an original Rolls-Royce Nene engine. It was
armed with a single NS-37 37 mm and two NS-23 23 mm cannons. After a number of
changes, the aircraft was cleared for production under the
service designation of MiG-15, using the RD-45 turbojet, a copy of the Nene.
The MiG 15 bis was an improved version, using an improved VK-1 engine, and on
later batches, improved NR-23 cannons.
|
THE KIT |
This kit comes with the usual Tamiya quality. Great kit overall. Comes with a very nice engine, and the trolley for the rear fuselage, in case you decide to show your beautifully painted VK-1 engine. I heard some saying this kit isn’t accurate, but I don’t measure my models. Sure looks like a MiG-15 to me!
|
CONSTRUCTION |
The cockpit was painted with a shade of light blue, and I used masking tape to depict the seat belts. The cockpit detail is adequate, but there is room for improvement.
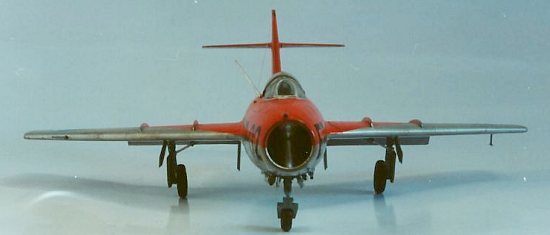 Tamiya provides a metal weight for the nose, but beware! This
wasn’t enough. I had to open the weapons bay and add more weight, or I would
have a tail dragger. Looks like Tamiya did the exact math on this. I closed the
fuselage, but also with the engine in there (kind of stupid, I know…). The kit
should be built with the engine left off, or the rear fuselage left off. Not
difficult to add more weight, and I think it would be better if Tamiya provided
more weight, just to be on the safe side. I’m only telling this before someone
discovers this after the model is painted. (Editor's Note: When building
my Mig-15, I found the weight to be
adequate and had no tail sitting problems. Like Rodrigo's, mine had the full
engine installed. This is a mystery.)
Tamiya provides a metal weight for the nose, but beware! This
wasn’t enough. I had to open the weapons bay and add more weight, or I would
have a tail dragger. Looks like Tamiya did the exact math on this. I closed the
fuselage, but also with the engine in there (kind of stupid, I know…). The kit
should be built with the engine left off, or the rear fuselage left off. Not
difficult to add more weight, and I think it would be better if Tamiya provided
more weight, just to be on the safe side. I’m only telling this before someone
discovers this after the model is painted. (Editor's Note: When building
my Mig-15, I found the weight to be
adequate and had no tail sitting problems. Like Rodrigo's, mine had the full
engine installed. This is a mystery.)
The rest of the construction was very easy. Great fitting kit!
|
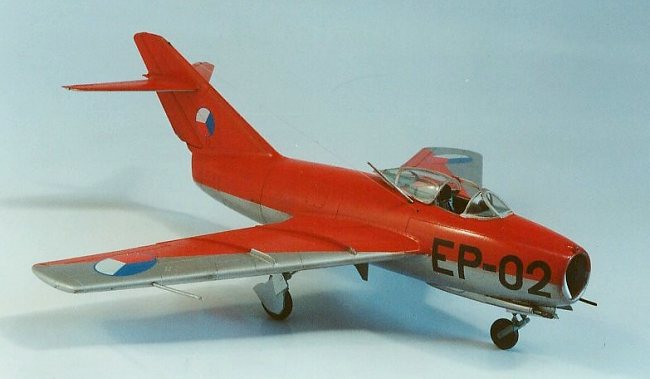
PAINT & MARKINGS |
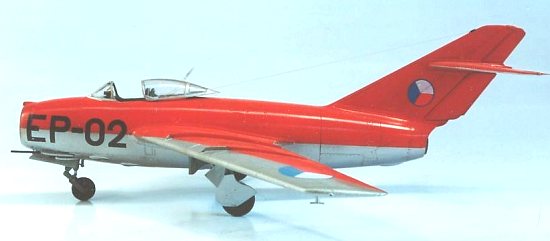 I used the 49103 sheet by Propagteam (reviewed
here at Modeling Madness). I decided to depict a plane of the Czechoslovak
Air Force acrobatic team in 1954. I had a difficult time to find the right shade
of red for this scheme. I even got to talk to some people who are experts on the
Czech Air Force, but came up short, with many conflicting info. So, I took Gunze
Aqueous´s pure red, added some yellow and shot the model. And I had no problems
sleeping at night!
I used the 49103 sheet by Propagteam (reviewed
here at Modeling Madness). I decided to depict a plane of the Czechoslovak
Air Force acrobatic team in 1954. I had a difficult time to find the right shade
of red for this scheme. I even got to talk to some people who are experts on the
Czech Air Force, but came up short, with many conflicting info. So, I took Gunze
Aqueous´s pure red, added some yellow and shot the model. And I had no problems
sleeping at night!
Weathering was kept to the very minimum, as this scheme was used
for a very short period. NMF was done with Testors Metalizer. I just got my
Alclad II paints, next time I’ll use them! The clear cover you have to use to
seal the Metalizer kind of takes away its shine, and I wanted a shiny finish on
this one... Well, next time!
Final bits: The canopy and antennas were added, no surprises here.
|
CONCLUSIONS |
Many don’t like the scheme I chose for this model. I don’t know about you, but I like it, and that’s what really matters, right? I recommend this kit for all skills, as it is very easy to build.
September 2003
Copyright ModelingMadness.com
If you would like your product reviewed fairly and fairly quickly, please contact the editor or see other details in the Note to Contributors.
Back to Reviews Page 2016