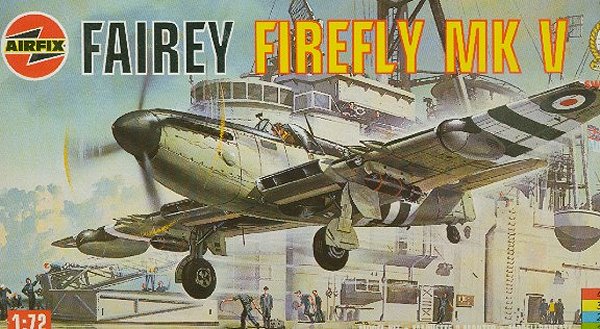
Airfix 1/72 Fairey Firefly V
|
KIT # |
2018 |
|
PRICE: |
$6.50 |
|
DECALS: |
Two Aircraft: Royal Navy and Dutch Navy |
|
REVIEWER: |
Michael Leduc |
|
NOTES: |
|
|
HISTORY |
The Fairey Firefly was designed as a two seat reconnaissance fighter to replace the Fairey Fulmar. It first flew on 22 December 1941 and of this first variant, a total of 459 were built. Several versions were built such as the Mk. V shown here and supplied to various Navies, most notably the Australian, Canadian and Dutch forces. The aircraft went on to serve admirably in Korea, apparently one even shot down a MIG!, but ultimately because of its size and the awkwardness of having a two man crew was never quite the fighter it could have been.
I have been attracted to this aircraft since I saw the fuselage of a AS.4 version undergoing restoration at the Victoria Airport in BC. To me the later versions minus the Typhoon like chin radiator are the most attractive it is somewhat like a Sea Fury-in that it has very beautiful lines and an aggressive stance that make it look very purposeful. Anyhow…I like it.
Flightpath makes what is apparently a very nice multimedia kit in 1/48th scale which unfortunately goes for over $100. I hemmed and hawwed over this option for a while but couldn’t quite get past the asking price. I saw this Airfix kit in the shop and decided—“6.50!, What the heck” it will be a nice quick little project and then I’ll have a Firefly in my collection—and thusly the die was cast.
Wouldn’t you know it, two weeks later I catch wind of the all new Mk1 kits from Grand Phoenix—ah well, c’est la vie.
|
THE KIT |
 The kit consists of 71 pieces of what most have now come to expect from Airfix;
Lots of overdone rivet detail that will need to be sanded down a bit. There are
also ejector pin circles and sink marks galore, as well as flash that needs to
be trimmed off the smaller pieces…but for me it is what it is, a quick and dirty
project so don’t mistake this for complaining. As for the interior detail, there
is none really to speak of, not even an instrument panel. This presents a bad
news/ good news scenario. The bad news is that the interior detail is absolutely
awful, the good news is the canopies are so thick that you can’t see anything
anyway!…(yuk,yuk—Somehow, I think that this joke has been told before.)
The kit consists of 71 pieces of what most have now come to expect from Airfix;
Lots of overdone rivet detail that will need to be sanded down a bit. There are
also ejector pin circles and sink marks galore, as well as flash that needs to
be trimmed off the smaller pieces…but for me it is what it is, a quick and dirty
project so don’t mistake this for complaining. As for the interior detail, there
is none really to speak of, not even an instrument panel. This presents a bad
news/ good news scenario. The bad news is that the interior detail is absolutely
awful, the good news is the canopies are so thick that you can’t see anything
anyway!…(yuk,yuk—Somehow, I think that this joke has been told before.)
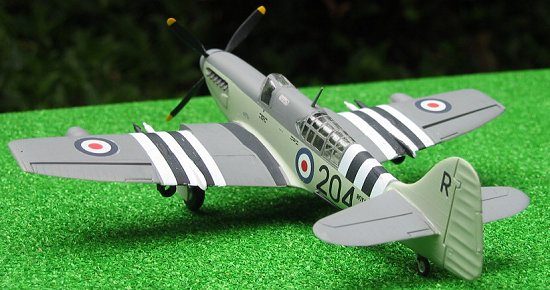
One feature on this kit that is very nice is that it offers the builder the option either to have the wings folded or in the flight position. Other than on the Airfix Seafire 46/47 This is not something you see on even the best of the 1/48th naval aircraft kits and I have often wondered why.
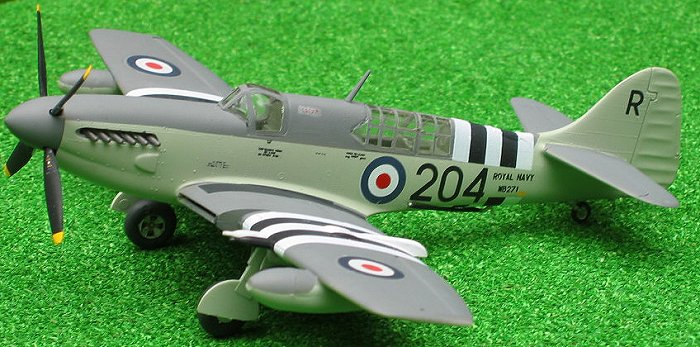
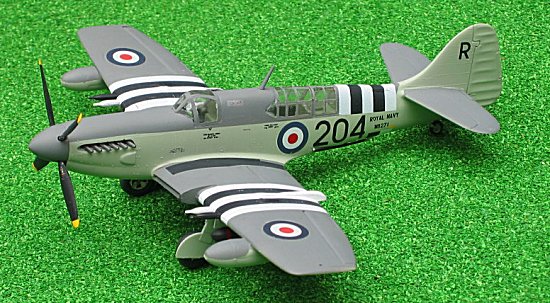
The decal sheet gives you two options, the first is for a Royal Navy machine which is applicable to both the Korea and the refurbished Firefly in the Royal Navy Historic Flight. The second option is for a Dutch Navy machine, which I would have considered doing had the roundels not been so badly out of register. (I discovered later once I got them that the RN roundels also had this problem, with the roundels having a tiny new moon crescent peeking out from under the blue. I went through my spares box and found some replacements from the Airfix DH Chipmunk.) Both options are in Extra Dark Sea Grey over Sky
All in all I figured that I would finish this project in about a week and it would function as a good palate cleanser for my next project….
|
CONSTRUCTION |
With a kit like this construction goes very quickly. I started out by sanding down all of the major parts--not to totally eliminate the raise detail, just to mute it a bit. As I mentioned the cockpit is very simple and is put together in about 30 seconds and sprayed “British Interior Green”, from the Modelmaster Acryl line. The fuselage actually fits together pretty well and I just needed a little bit of filler along the bottom. At this point one must decide whether to build it with the wings folded or in the extended position. I opted for the latter. The ailerons are offered as separate pieces. These had some very prominent ejector pin marks and sinkholes that needed to be filled.
 Once I had gotten to this crucial stage of “everything together” I started
wondering if there were any aftermarket decals available for the kit and so did
some searches on the various web-stores. I discovered that there are two
separate detail sets from Airwaves for this kit, one for the wingfold, and one
that covers the interior and landing gear covers, wheel wells etc. Purchasing
these and adding a bit of effort with re-scribing and such, no doubt those that
enjoy the folding of the brass could put together a miniature Firefly
masterpiece from what is available. That ambitious person is not me however--but
I thought it a good piece information to pass along.
Once I had gotten to this crucial stage of “everything together” I started
wondering if there were any aftermarket decals available for the kit and so did
some searches on the various web-stores. I discovered that there are two
separate detail sets from Airwaves for this kit, one for the wingfold, and one
that covers the interior and landing gear covers, wheel wells etc. Purchasing
these and adding a bit of effort with re-scribing and such, no doubt those that
enjoy the folding of the brass could put together a miniature Firefly
masterpiece from what is available. That ambitious person is not me however--but
I thought it a good piece information to pass along.
There only was the small matter of a little more putty for the wing roots before I could get on to the exciting business of canopy masking. As I have said, the canopies are thick, but they do fit reasonably well. I actually mucked up here with some unnecessary sanding and so needed some putty. I also filled in the hole for the aerial as it is much too large. (Regarding the thick canopies problem, there is a vacuform replacement available in the large Falcon “Fleet Air Arm” set so here again is a remediable situation to the kit deficiency)
Once the canopies were fitted into place. I was now ready to move onto the painting and decalling stage…
|
PAINT & MARKINGS |
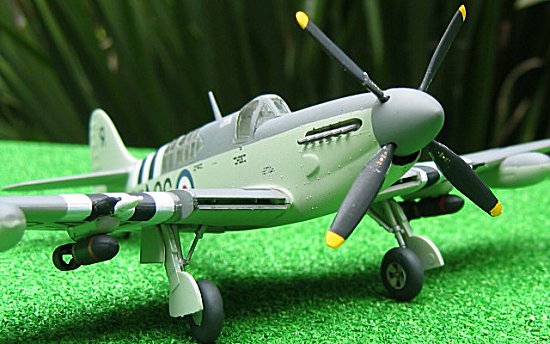 I had no luck tracking down alternate decals, so I decided on the Royal Navy
version. After painting the entire aircraft in Modelmaster Acryl “Sky” I masked
off the bottom and sprayed the top and wings with Tamiya “Dark Sea Grey”. After
letting it all dry and spraying it with Future I was ready to have a go at the
kit decals. As I mentioned earlier everything was slightly out of register, so
some trimming was in order on the ID stripes. Most of the smaller decals went on
OK and settled down without silvering. It was ultimately these stripes that gave
me the most problems. The decals themselves are fairly strong, but quite brittle
and once they are on the model do not want to float around into their proper
position. They also do not respond all that well to Solvaset. I ended up
shattering one of the ID bands and had to re-assemble it from about five or six
pieces. After a bit of touchup with some white and black paint all was happy
again.
I had no luck tracking down alternate decals, so I decided on the Royal Navy
version. After painting the entire aircraft in Modelmaster Acryl “Sky” I masked
off the bottom and sprayed the top and wings with Tamiya “Dark Sea Grey”. After
letting it all dry and spraying it with Future I was ready to have a go at the
kit decals. As I mentioned earlier everything was slightly out of register, so
some trimming was in order on the ID stripes. Most of the smaller decals went on
OK and settled down without silvering. It was ultimately these stripes that gave
me the most problems. The decals themselves are fairly strong, but quite brittle
and once they are on the model do not want to float around into their proper
position. They also do not respond all that well to Solvaset. I ended up
shattering one of the ID bands and had to re-assemble it from about five or six
pieces. After a bit of touchup with some white and black paint all was happy
again.
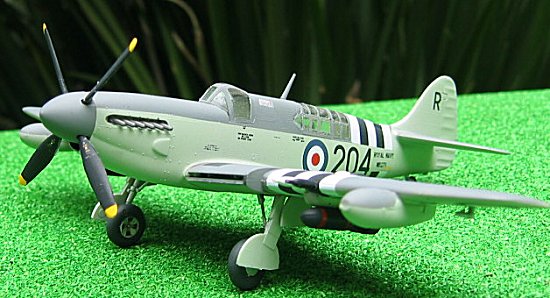
After this I went to work on the propeller and all the little bits like landing gear and ordinance and such and everything was soon completed in short order.
|
CONCLUSIONS |
 I liked this kit quite a bit. I built several Airfix kits when I was younger and
getting back into the hobby, I think every one has their favorites. Mine were
the Martin Marauder and the Savoia Marchetti SM.79. For me this kit is as good
as those two and gave me much pleasure. Although I’m sure the kit is pushing 30
or 35 years old, there is a possibility to bring it up to today’s standards with
an investment in aftermarket sets. Don’t get me wrong I do think the kit’s main
appeal is to the beginning modeler but the shape seems accurate so it is a good
basis for a more extended project and the super detailer could really go to
town. I could actually see an all new kit being released by an outfit like MPM
or Sword, which would be very welcome if it looked as good as the Fairey
Barracuda kit released recently. Fairey Fireflies of any mark would seem to be a
logical subjects. But why wait? This kit is pretty decent so, go out and snap
one up and have a few hours of fun.
I liked this kit quite a bit. I built several Airfix kits when I was younger and
getting back into the hobby, I think every one has their favorites. Mine were
the Martin Marauder and the Savoia Marchetti SM.79. For me this kit is as good
as those two and gave me much pleasure. Although I’m sure the kit is pushing 30
or 35 years old, there is a possibility to bring it up to today’s standards with
an investment in aftermarket sets. Don’t get me wrong I do think the kit’s main
appeal is to the beginning modeler but the shape seems accurate so it is a good
basis for a more extended project and the super detailer could really go to
town. I could actually see an all new kit being released by an outfit like MPM
or Sword, which would be very welcome if it looked as good as the Fairey
Barracuda kit released recently. Fairey Fireflies of any mark would seem to be a
logical subjects. But why wait? This kit is pretty decent so, go out and snap
one up and have a few hours of fun.
Copyright ModelingMadness.com. All rights reserved. No reproduction in part or in whole without express permission.
If you would like your product reviewed fairly and fairly quickly, please contact the editor or see other details in the Note to Contributors.
Back to Reviews Page 2015