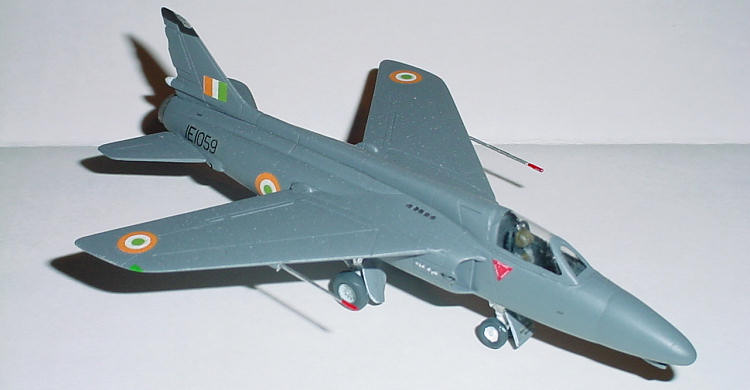
| KIT #: | R72-039 |
| PRICE: | $ |
| DECALS: | Two options |
| REVIEWER: | Randy Smith |
| NOTES: | Resin kit |

| HISTORY |
The Gnat was the creation of W.E.W. "Teddy" Petter, a British aircraft designer formerly of Westland Aircraft and English electric. Petter believed that a small, simple fighter would offer the advantages of low purchase and operational costs. New lightweight turbo-jet engines that were being developed enabled the concept to take shape. One of the hallmarks of the Gnat's design was its compact size. However, to achieve such a size, its systems were closely packed, making maintenance more difficult. Some of its systems were not noted for their reliability and the aircraft suffered from high operating costs. There were also issues that its cockpit was cramped and obstructed the instructor's forward visibility. Furthermore, the limited weapons load and reduced fuel capacity – both designed to reduce overall kerb-weight – meant that it could not operate for protracted periods. Despite the shortcomings, the Gnat and its predecessor the Folland Midge were praised by the RAF evaluation and the test pilots. The lower cost of the Gnat, its compact dimensions, as well as "good press" for the aircraft in air shows, were among the factors that prompted a spurt in its export sales.
 Serving
primarily with the Indian Air Force, the Gnat is credited by many
independent and Indian sources to have shot down seven Pakistan Canadair
license built F-86 Sabres in the Indo-Pakistani War of 1965. The
Pakistan Air Force (PAF) claims only three Gnat victories over F-86s in
air to air combat. Pakistan Air Force war claims two Gnats were downed
by PAF fighters. During the initial phase of the Indo-Pakistani War of
1965|, an Indian Air Force Gnat, piloted by Squadron Leader Brij Pal
Singh Sikand, landed at an abandoned Pakistani airstrip at Pasrur and
was captured by the PAF who first claimed that two Pakistani F-104
Starfighters forced the Gnat down, however, the Indians claimed the
pilot landed by mistake. Later, a retired PAF historian, Air Cmde Kaiser
Tufail, determined that the Gnat actually landed before the F-104s
arrived on the scene, giving credibility to the Indian version This
Gnat is displayed as a war trophy in the PAF Museum, Karachi Pakistan
Air Force Museum, Karachi. After the ceasefire, one Pakistani Cessna O-1
was shot down on 16 December 1965 by a Gnat.
 By
the end of 1971, the Gnat proved to be a frustrating opponent for the
technically superior Sabres, and had lived up to its Indian Air Force
nickname of "Sabre Slayers" since all its combat "kills" during the two
wars were against Sabres. The Canadair Sabre Mk 6 was widely regarded as
the best "dogfighter" of its era. Tactics called for Gnats taking on the
Sabres in the vertical where they were at a disadvantage. Moreover,
because the Gnat was lightweight and compact in shape, it was hard to
see, especially at low levels where most of the dogfights took place.
Apart from Air force air defence operations, the aircraft performed
multiple roles in the Bangladesh Liberation War being used in
anti-shipping operations, ground attack, bomber/transport escort and
close air support with "devastating effects" on the PAF. The success of
the indigenously produced Gnats against the more sophisticated
Pakistani-flown planes was viewed as a significant achievement.
By
the end of 1971, the Gnat proved to be a frustrating opponent for the
technically superior Sabres, and had lived up to its Indian Air Force
nickname of "Sabre Slayers" since all its combat "kills" during the two
wars were against Sabres. The Canadair Sabre Mk 6 was widely regarded as
the best "dogfighter" of its era. Tactics called for Gnats taking on the
Sabres in the vertical where they were at a disadvantage. Moreover,
because the Gnat was lightweight and compact in shape, it was hard to
see, especially at low levels where most of the dogfights took place.
Apart from Air force air defence operations, the aircraft performed
multiple roles in the Bangladesh Liberation War being used in
anti-shipping operations, ground attack, bomber/transport escort and
close air support with "devastating effects" on the PAF. The success of
the indigenously produced Gnats against the more sophisticated
Pakistani-flown planes was viewed as a significant achievement.| THE KIT |
See Scott's in box review on the Pro-Resin's 1/72 Gnat.
| CONSTRUCTION |
Construction was pretty
well straightforward for a Pro-Resin kit after the small amount of flash
sanded off and the resin pour tabs was razor sawed off, as always when
working with resin remember to wash all parts to remove all the mold release
agents so paint and glue with stick. I sanded all mating surfaces with a
sanding block to assure a straight gluing surface. Interior was painted and
all the great detail molded into the kit cockpit sidewalls was highlighted
the ejection set has a lot of detail to it and looked good when painted. I
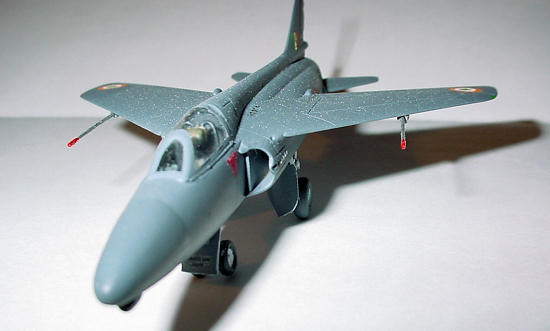
drilled out the solid resin nose cone before attaching it to add the weight
into that area so the plane would sit on t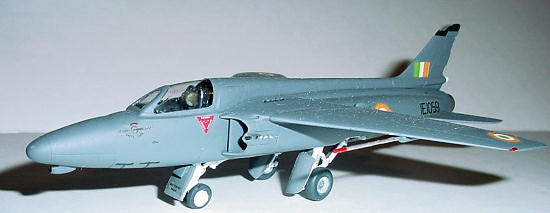 he
gear properly. The wings and tail planes was molded solid and was really
thin and was also straight so there was no need to repair any warped parts.
Light detailed panel lines and rivet detail was present on the resin surface
with only one chipped resin part to repair.
Little putty was used around the intakes, front of cockpit and by the wing root front on one side...just a dab, rest of the seems filled themselves with the super glue when gluing half's together. I did have a little trouble with the landing gear trying to figure out which way and what went where, pretty sure it was all me, in the end it did sit level without having to tweak anything which is a plus when working with resin kits. The vac-u-formed canopies was a ease to mask as you could see the frame work outline quite well when masking, I always mask my canopies off first before removing then from the sheet. Pro-Resin kits come with 2 canopies incase you mess one up. Attached the canopy with white glue then let dry before painting the interior frame work color first then after that mask the whole canopy off and prime the rest of the resin kit so there is no major paint build up near the canopy framework. I use alcohol prep pads always for a final wipe down of resin kits to remove any residue that is on the resin before I prime, the primer I used is lacquer spray can from the auto parts store as it dries fast and with very little shrinkage then sanded when dry with a 1000 grit paper wiped back down with paper towels airbrushed off with just the air then the overall canopy mask removed then tacked wipe off the entire model then painted. While the primer was drying it was time to paint the tires and the other little add on's. I did replace the two probes with metal pieces instead of the thin resin parts as they tend to break off when moving the kit around.
| COLORS & MARKINGS |
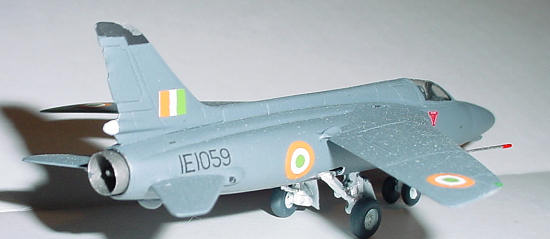
I chose to do the Indian Air Force version as
their Gnat's have a little history behind them being known as "Saber
Slayer's" . Paint used was the old Humbrol enamel line of paint, British
Sea Gray thinned with lacquer thinner. Always seems to go over the primer I
use nicely. When dry a coat of Testors Model Masters g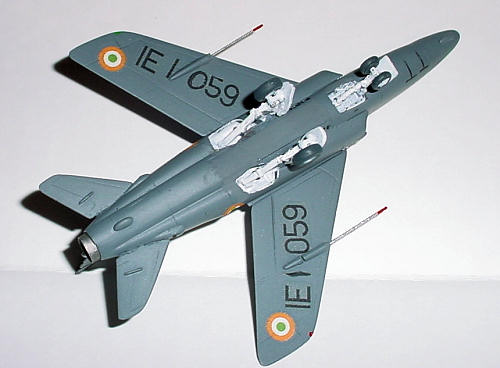 loss
clear, then next day applied the decals which are well registered and seems
to go down nicely with a little help of the blue bottled Micro-Set, when
that dried a couple coats of MM flat clear coat and was sitting pretty. I
had trouble with the painting guide trying to figure out what was what on
there gray scale as there was no color letter pointing at the airframe like
on the RAF version so I painted it the Sea Gray and hope that was right, or
at least close.
| CONCLUSIONS |
This is my second Pro-resin kit that I have built, first being the Curtiss XF-15C-1 early "Stingaree" which also was a pleasure to build. I have a few other Pro-Resin kits in the to do pile. And looking forward to getting there Bristol T.188 and the Fairy Delta 1, I am sure they will be up to there usual good standards. Highly recommended to the Folland Gnat, British jets, or if you like the fact that they slayed a few Saber fans. Making a great addition to your 1/72 scale collection.
| REFERENCE |
http://en.wikipedia.org/wiki/Folland_Gnat
December 2008
Copyright ModelingMadness.com. All rights reserved. No reproduction in part or in whole without express permission from the editor.
If you would like your product reviewed fairly and quickly, please contact the editor or see other details in the Note to Contributors.