Cyber Hobby 1/200 Vulcan B.2
|
KIT #: |
2011 |
|
PRICE: |
100 RMB |
|
DECALS: |
Two options |
|
REVIEWER: |
Richard F |
|
NOTES: |
This is smaller than it looks; the camera reveals
things my eyes can't see. So go easy! |
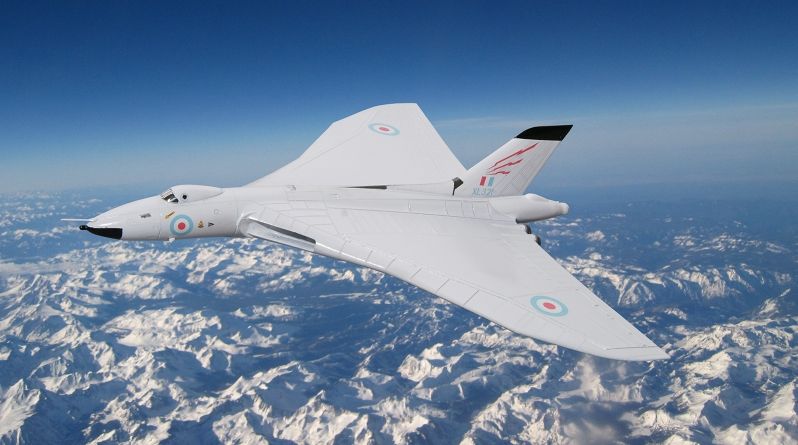
Unlike the US, the UK didn't keep a 24 hour airborne alert during the early
part of the Cold War. Instead, it had a Quick Reaction Alert (QRA) system
where its nuclear bombers could be set up to launch on very short notice, or
dispersed to smaller airfields ready to launch from there, depending on the
level of international tensions.
Vulcans were part of this system and if you've ever seen, even on video, a
group of them scrambling one after the other into a sky increasingly dirty
from their exhausts, you'll know it's an impressive, noisy and terrifying
sight. Even watching XH558, the last airw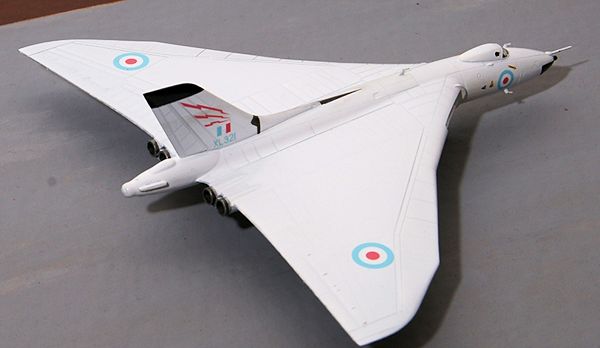 orthy
Vulcan, displaying on youtube is incredible (who knew such a big old plane
was so manouverable?)
orthy
Vulcan, displaying on youtube is incredible (who knew such a big old plane
was so manouverable?)
Anyway, one day in 1960, and again in 1961, a four-ship formation launched
out of Bermuda, and another out of Scotland, and headed towards the United
States. Flying very high, around 56,000 feet, and employing ECM and tactics,
the Vulcans succeeded in avoiding the F-101s and F-102s sent to intercept
them. Pressing home their advantage, the Vulcans were able to penetrate deep
into the US and simulate nuclear attacks on key targets.
These exercises, Operation Skyshield I & II, showed that at least in those
days, Vulcan bombers had a pretty good chance of completing their terrifying
mission - strategic nuclear attack on a highly defended target. And not just
the Vulcans. NORAD concluded that no more than one quarter of the attacking
bombers (the rest were B-47s and B-52s) had been "shot down".
Perhaps not surprisingly, the results of these tests remained classified
right up until 1997. Incidentally, until 11 September 2001, these exercises
were the only time all civilian aircraft were ordered out of American skies.
Thankfully there is no real need for that kind of activity these
days. Instead, XH558 displays fairly regularly in the UK and, rather
like the couple in "When the Wind Blows", we can all reminisce about
the good old days without focusing too much on how it really felt to
worry about the bomb, and how much it all cost!
 This
neat Cyber-Hobby kit has been previewed right
here on MM. A new boxing,
since this one came out, allows you to model the B.2 as it flew in the
Falklands war in 1982 (doing the Black Buck missions). That's previewed
here. (Alternatives include
the new Great Wall 1/144 injection moulded kit, the Anigrand resin kit in
the same scale, or the older Airfix 1/72 kit which is a notoriously labour-intensive
build).
This
neat Cyber-Hobby kit has been previewed right
here on MM. A new boxing,
since this one came out, allows you to model the B.2 as it flew in the
Falklands war in 1982 (doing the Black Buck missions). That's previewed
here. (Alternatives include
the new Great Wall 1/144 injection moulded kit, the Anigrand resin kit in
the same scale, or the older Airfix 1/72 kit which is a notoriously labour-intensive
build).
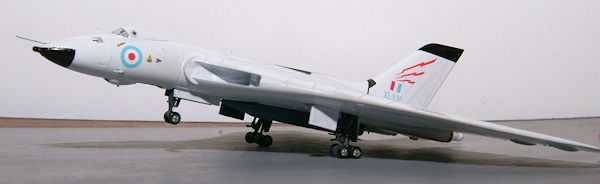
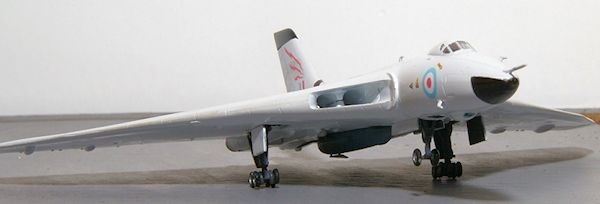
The two Cyber Hobby kits are slightly different, but both are very
nicely done. The upper and lower body and wings are one part each, so the
entire airframe is basically just two parts. It's well moulded with
fine panel lines and the rest of the kit adds some attractive detail.
There are even 2 pilots, pretty decently sculpted given their size.
Through the tiny windows you're unlikely to see them though. There is
a boarding ladder you can position down, or open, if you want.
The Blue Steel missile is three parts and looks nice too. Decals are for an
early-60s anti-flash white aircraft with pastel roundels, and a later
green-grey camouflaged aircraft.
This is a fairly simple build but as totally straightforward as you might
think for something so small. It takes a little bit of concentration to work
out how the cockpit parts go together. I didn't bother with the two tiny
pilots, given how small the window is. There's also an instrument panel with
two tiny control columns. I put a fair amount of nose weight in, after my
experience with the 1/200 XB-35 which was almost a tail-sitter. Prior to
putting the top and bottom halves together, you need to install the intakes
and a few other interior parts (especially the little window on the
underside beneath the nose). The intakes need wor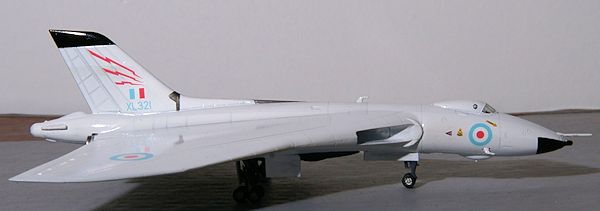 k
to get a smooth seam, or, like me, you can just live with it.
k
to get a smooth seam, or, like me, you can just live with it.
Fit is not as great as you might expect for a brand new kit. There are no
seams topsides, and the seam at the side of the nose is ok after a bit of
sanding. It's the seams under the wing that are troublesome. At the rear
end, it's not so bad, because the real thing has lines there where the wing
ends and the flaps begin. But at leading edge you need to do a bit of putty
and careful sanding work. Ultimately though it's well designed, because that
seam is underneath and therefore generally out of sight. I did what I could
here until I was happy.
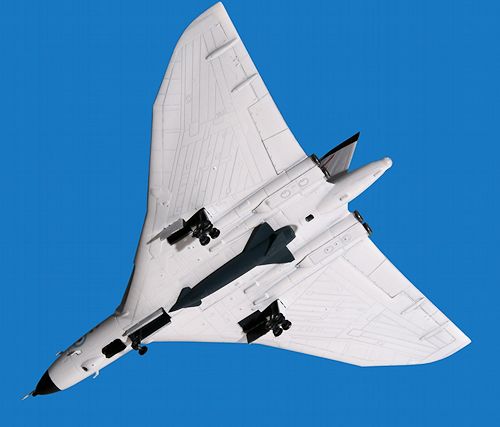
There is a panel to be inserted on the underside which becomes the missile
bay. It doesn't fit so well, being a little small. A bit of work is needed
there too. I managed to mislay the hatch for the cockpit entry (underneath).
Hopefully it will turn up soon. There's a little boarding ladder you can use
to display the plane on the ground.
All that said, construction is simple and fast enough. Before long you are
ready to choose a scheme and start painting.
Vulcans are probably best known in their classic green on grey camouflage.
They looked like this on Operation Blackbuck, their last hurrah in the
Falklands in 1982, and the only airworthy Vulcan is painted that way. When
they first switched to that scheme in the late 60s, the bottom was still
white, but later (so I gather) it was grey, and then they went to a total
wrap around camo because exercises showed that hard manouvering at low level
made them easy to see when the underside flashed into view.
But when they first came on line, Vulcans were meant to operate at high
altitude, just like in Operation Skyshield. They were covered in anti-flash
white, a paint covering meant to reflect the flash and heat of a
nuclear
blast to give the plane a chance of surviving the bomb it had just dropped
(so it could fly back to a base that had almost certainly already been
nuked...).
I really like that scheme, including its pastel markings, so I used (a lot)
of Tamiya gloss white spray paint. The plastic is a light grey, and so it
took some time for me to get a good coverage, building up light coats over
time.
The Blue Steel missile, which actually didn't have a huge range, was white
if it was a warshot, and a sort of grey blue colour if it was a training
round. Somewhere I read that the warshots were never mounted to the plane -
that would only happen if they were playing for real. So I used a suitable
blue grey to paint the missile.
The radome and tail fin area were done by paint brush with X-18 semi gloss
black, while the metallic bits were done with Mr Color metallic paints. I
managed to flick some on the tail fin on one side and wasn't able
to
fully clean it off. Clumsy!
After all that, I free-handed the cockpit panel lines (having masked off the
windscreen and side windows with blue tack for the spray job). Undercarriage
is a dark grey colour based on pictures I saw online.
The decals work well - simple and straightforward - and are easy to apply to
the glossy finish. I used a few drops of Mr Mark Softer anyway.
Once all that was done I installed the undercarriage. The instructions would
have you put 4 wheels on the nose gear, but it should only be two.
Meanwhile, the main gear is excessively complicated. You need three parts
just to build up the legs, and then add several tiny wheels. Somehow I
finished up with quite a few spare wheels. Add the wheel bay doors and a
couple of little air data probes here and there, and
you are done.
Huzzah for Cyber-Hobby. Huzzah! Huzzah!
Despite a few tricky bits (undercarriage...) this is thoroughly recommended,
especially if you live in a Hong Kong sized apartment, or if you've always
wanted a Vulcan but didn't want to build the old, difficult and enormous
1/72 Airfix kit or the expensive resin kit from Anigrand in 1/144 (or
you bought this before Great Wall released its new 1/144 injection moulded
B.2). I'm loving the new Cyber-Hobby range of 1/200 planes and this is no
exception.
http://www.airspacemag.com/history-of-flight/this-is-only-a-test.html
http://en.wikipedia.org/wiki/Avro_vulcan
Richard F
June 2013
Copyright ModelingMadness.com. All rights reserved. No reproduction in any form without express permission from the editor.
If you would like your product reviewed fairly and fairly quickly, please
contact
the editor or see other details in the
Note to
Contributors.
Back to the Main Page
Back to the Review
Index Page 2026