ProResin 1/72 Boulton Paul P.120
| KIT #: | R72-027 |
| PRICE: | $ |
| DECALS: | One option |
| REVIEWER: | Martin Pohl |
| NOTES: | Resin kit with vacuformed canopy |
| HISTORY |
 The
P.120 followed the earlier Boulton Paul P.111 delta-wing experimental aircraft.
It was produced for the Air Ministry to specification E.27/49 and differed from
the P.111 in having a swept fin and rudder with horizontal tail surfaces high on
the fin to improve longitudinal and directional stability. It had essentially
the same wing as the P.111 in the latter's greatest span configuration, an
unclipped delta; the wing tips of the P.120 were not removable or replaceable,
but they could be rotated differentially or together for lateral or longitudinal
trim. Just inboard of these tips the P.120 gained a pair of wing fences. The
fuselages of the two aircraft were also identical, except towards the rear.
(source: Wikipedia)
The
P.120 followed the earlier Boulton Paul P.111 delta-wing experimental aircraft.
It was produced for the Air Ministry to specification E.27/49 and differed from
the P.111 in having a swept fin and rudder with horizontal tail surfaces high on
the fin to improve longitudinal and directional stability. It had essentially
the same wing as the P.111 in the latter's greatest span configuration, an
unclipped delta; the wing tips of the P.120 were not removable or replaceable,
but they could be rotated differentially or together for lateral or longitudinal
trim. Just inboard of these tips the P.120 gained a pair of wing fences. The
fuselages of the two aircraft were also identical, except towards the rear.
(source: Wikipedia)
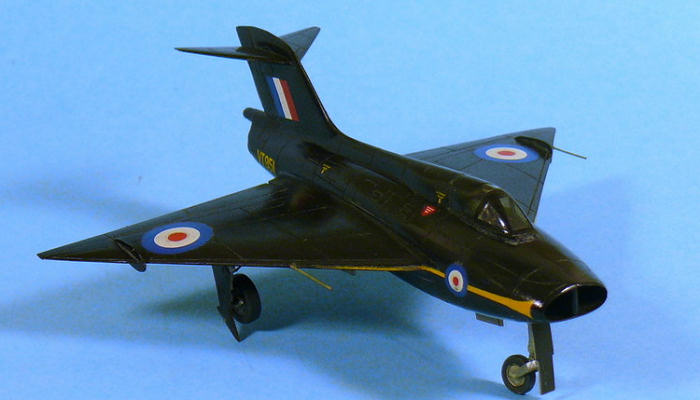
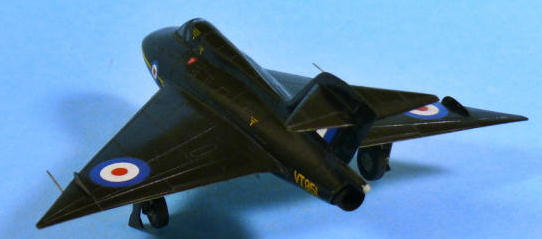
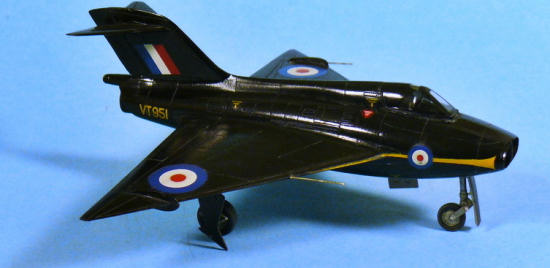
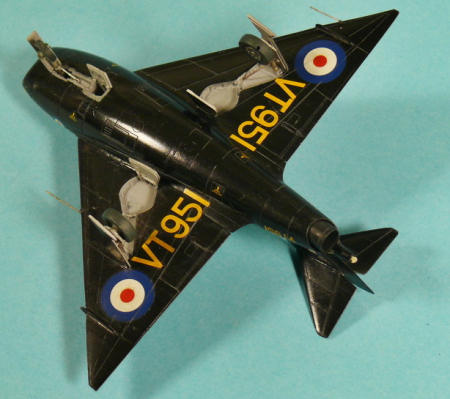
| THE KIT |
It is an all resin kit and that says it all I think. You get about 40 resin parts and mine had one vac formed canopy – all other Pro Resin I had did offer two canopies – ah well. It is a typical Pro Resin kit. I’ve done some so far and they are all the same. The detail is very good. If you carefully separate all parts those kits normally do fit quite well. The only thing I have to complain about them all is that the landing gear is resin too. It would be much better if they would do those in white metal as the resin landing gear begins to deform as time goes by. (Editor's Note: I built my ProResin P.120 back in 2006 and it shows no sign of deformation)
| CONSTRUCTION |
 After
removing the flash and separating the parts I put them into soapy water for a
while. This is my third or fourth Pro Resin kit and working on it was quite the
same as on the others. So there is not that much I can say on the construction
side. It does not fall together but the fit is quite good for a short run resin
kit. On this one the fin was a bit deformed but nothing some pressing and a
little hot hair couldn’t repair. The instructions are given in five steps and I
just followed them. Sure there were some areas I had to do some filling. As
always I used a Dentist milling wax as filler so filling and “sanding” is just
easy and quick. This kit also did have some more air-bubble-holes which also
very common to resin kits. Using wax here is also very easy and fast.
After
removing the flash and separating the parts I put them into soapy water for a
while. This is my third or fourth Pro Resin kit and working on it was quite the
same as on the others. So there is not that much I can say on the construction
side. It does not fall together but the fit is quite good for a short run resin
kit. On this one the fin was a bit deformed but nothing some pressing and a
little hot hair couldn’t repair. The instructions are given in five steps and I
just followed them. Sure there were some areas I had to do some filling. As
always I used a Dentist milling wax as filler so filling and “sanding” is just
easy and quick. This kit also did have some more air-bubble-holes which also
very common to resin kits. Using wax here is also very easy and fast.
| COLORS & MARKINGS |
 The
cockpit was painted mid gray. The ejector seat did get the eject handle in
yellow black and all other details I painted as given in the instructions. Well
if you close the canopy like me you could safe time and material here, because
you hardly see anything inside.
The
cockpit was painted mid gray. The ejector seat did get the eject handle in
yellow black and all other details I painted as given in the instructions. Well
if you close the canopy like me you could safe time and material here, because
you hardly see anything inside.
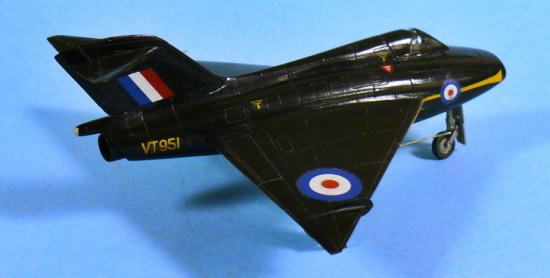
It got a base of Createx White Base and onto this went some a black coat
–
The landing gear bays were painted medium gray, as the instruction
stated. Some minor washing was done too, but not that much, as this bird never
get very dirty I guess just as much to highlight the panel lines.
The decals offered by the kit also went on without any complains. Even
the whites and yellows are working on black.
In the end a coat of a bit satin tinted Future went on it – and
finished.
| CONCLUSIONS |
All Pro
Resin kits I mistreated so far were fair good resin kits so I can recommend
them, but keep in mind resin kits are short runs so they can differ a lot from
box to box. This one did have some wrapped parts which is very common to resin
kits but with some hot water or air its quite easy to repair.
Well and for the subject, the Boulton Paul P.120 is for sure a seldom
seen bird. So if you like me in the rare subjects this one is for sure one for
you.
| REFERENCES |
 Internet
(Google for Boulton Paul P.120) and Wikipedia
Internet
(Google for Boulton Paul P.120) and Wikipedia
February 2012
If you would like your product reviewed fairly and quickly, please contact me or see other details in the Note to Contributors.