CMR 1/72 Boulton Paul P.111/a
| KIT #: | 145 |
| PRICE: | $ |
| DECALS: | Three options |
| REVIEWER: | Martin Pohl |
| NOTES: | Full resin kit with photo etch parts |
| HISTORY |
In the late 1940s and early 1950s the Allied aircraft industries were
engaged in many projects to confirm and develop the design ideas captured from
Nazi
 The
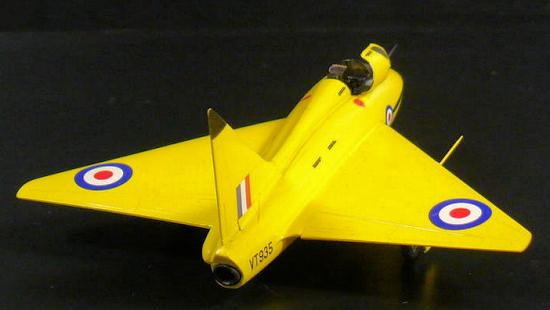
P.111 was designed as the smallest airframe which could couple an engine
(Rolls-Royce Nene), an ejection seat (Martin Baker), and a delta wing. The
latter was aerodynamically thin and had a sweep angle of 45°. Without tip
extensions the wing was strongly cropped at about 75% of the full delta. The
aircraft could be flown with these wings or with one of two pairs of extensions,
the larger ones making an almost perfect pointed delta shape. These extensions
allowed an investigation of the aerodynamic effects of the tip shapes of delta
wings. Unlike its contemporary the Avro 707, roll and attitude were both
controlled by a pair of elevons. The fin had an unswept trailing edge and its
tip also could be removed and altered, though it seems it always flew with a
very pointed tip.
The
P.111 was designed as the smallest airframe which could couple an engine
(Rolls-Royce Nene), an ejection seat (Martin Baker), and a delta wing. The
latter was aerodynamically thin and had a sweep angle of 45°. Without tip
extensions the wing was strongly cropped at about 75% of the full delta. The
aircraft could be flown with these wings or with one of two pairs of extensions,
the larger ones making an almost perfect pointed delta shape. These extensions
allowed an investigation of the aerodynamic effects of the tip shapes of delta
wings. Unlike its contemporary the Avro 707, roll and attitude were both
controlled by a pair of elevons. The fin had an unswept trailing edge and its
tip also could be removed and altered, though it seems it always flew with a
very pointed tip.
The P.111 was fitted with one of the first fully powered control
systems, hydraulically driven with electrical trim tabs. Because the Nene had a
centrifugal compressor, the P.111 had a rather tubby fuselage, with an oval nose
intake. The inward-retracting undercarriage had a noticeably wide track and a
tall nosewheel leg placed it at 17° on the ground The construction was all-metal
with the exception of the wing extensions and the fin tip, which were of
| THE KIT |
It is an all resin kit and that says it all – no it does not. CMR had
stuffed this kit with all possible versions and open doors and flaps and alike
which leads to the following list: two different fuselages, three different wing
pairs, two different canopies, two different sets of gear doors and two
different ejection seats. Besides this you also get a pre painted photo etched
set and a reinforced landing gear. So it’s a lot you get here almost enough to
built two planes. This is nice on one side but on the other this makes the kit
more expensive. So it would have been better to issue three boxes one box for
every version I’d say.
| CONSTRUCTION |
 When
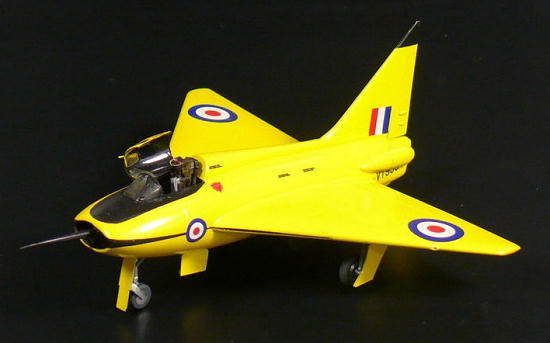
I saw this nice PE set I decided to build the canopy open, just it would have
been a shame to hide all those detail – well I should have looked better, as the
fuselage is more in a shape of a shark and the pit is all black and even with an
open
When
I saw this nice PE set I decided to build the canopy open, just it would have
been a shame to hide all those detail – well I should have looked better, as the
fuselage is more in a shape of a shark and the pit is all black and even with an
open 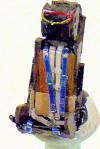 canopy
can't see much.
canopy
can't see much.
So I bend all the PE stuff for the pit and glued it in.
The two fuselage halves I used went together pretty well and the fin
also went on pretty smooth I only needed some very minor wax for filling some
seems.
The only problems I did have was the attaching of the main landing gear
and the doors. Those main gear doors consist of 4 parts and two the parts are so
small that that I really had problems to glue them in place.
| COLORS & MARKINGS |
The cockpit was painted black. The ejector seat did get all the PE stuff
and was painted as the instructions stated. At least the seat could be seen when
the canopy is open.
 It
got a base of Createx Gray Base (this is a mixture made form Createx Black and
White base) and onto this a mixture of Createx Cintron Yellow and Vallejo Yellow
was prayed – note to myself: next time when doing a yellow bird, use a white
base!
It
got a base of Createx Gray Base (this is a mixture made form Createx Black and
White base) and onto this a mixture of Createx Cintron Yellow and Vallejo Yellow
was prayed – note to myself: next time when doing a yellow bird, use a white
base!
The landing gear bays were painted black and the landing gear was
painted metal.
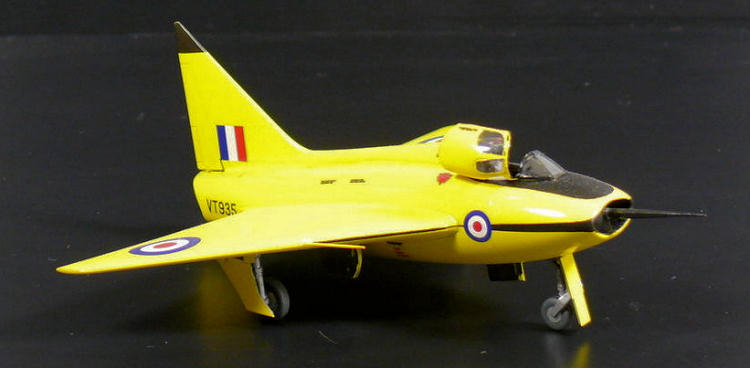
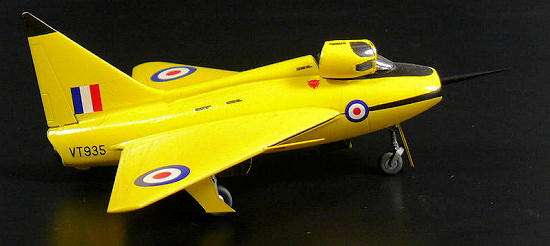
I wanted to do the P.111A version just it looks a bit more interesting
with this long pitot tube.
Before the decals a coat of Future was sprayed.
The decals you get are printed very well and are very thin – so I
managed to destroy the decals for the black stripes running from the intake to
the wings. Well so I had to mask and spray that. The rest of the decals went on
very good
In the end a coat of Future went on it – and finished.
| CONCLUSIONS |
With
this CMR kit you get everything you probably need for a kit.
This is very
nice as I said before but it also makes the kit very expensive. But I really
recommend this kit for all of you willing to build a
bird you don’t see that often.
My collection of British triangles is growing :)
| REFERENCES |
 Internet
(Google for Boulton Paul P.111) and Wikipedia
Internet
(Google for Boulton Paul P.111) and Wikipedia
January 2012
If you would like your product reviewed fairly and fairly quickly, please contact the editor or see other details in the Note to Contributors.