Lodela/Heller 1/72 Vampire F.3
| KIT #: | 2414 |
| PRICE: | $25 Mexican Pesos way back when |
| DECALS: | None |
| REVIEWER: | David Gonzalez Mendez |
| NOTES: | Discontinued kit |
| HISTORY |
 The
de Havilland Vampire was a British Jet-engined fighter, it was
commissioned by the royal air force during the WWII, however, it was never used
in combat this aircraft served in the RAF squadrons until 1955 and continued
used as a trainer until 1966.The Vampire was officially introduced to the British public on
The
de Havilland Vampire was a British Jet-engined fighter, it was
commissioned by the royal air force during the WWII, however, it was never used
in combat this aircraft served in the RAF squadrons until 1955 and continued
used as a trainer until 1966.The Vampire was officially introduced to the British public on
| THE KIT |
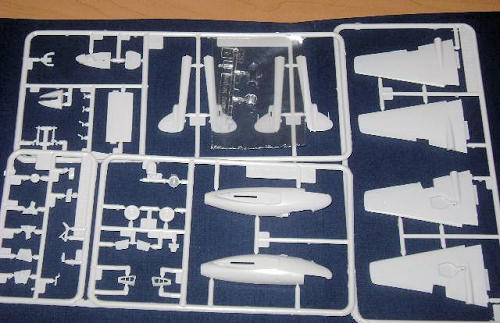 The kit was sold in
The clear parts are nice, and the whole model is well served by Lodela,
I used to buy my first models as a kid at the only one store in my city. Then it
closed 20 years ago, and there is no other hobby store available now, I feel
lucky for founding this lonely model at the supermarket, I also was amazed by
the price.
When you open the bag, you can realize that the kit is new, it smells and feels new, there are other models for sale at this store and I will show you later on in my next reviews, by the way, they are all in 1/72 scale, for now my dedication to this little nice airplane model.
| CONSTRUCTION |
The construction of this kit requires average skills, it is not too
difficult, the model itself is easy to build, however you must study the
instructions carefully.
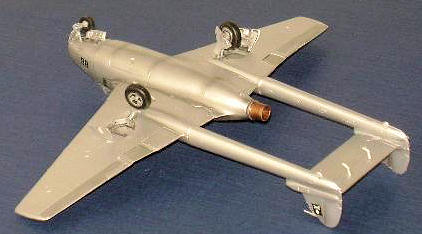 Take care when assembling the booms and tail, in my case, I decided to
glue the tail and booms first and then to the main wings, of course, these are
previously assembled to the main fuselage.
Take care when assembling the booms and tail, in my case, I decided to
glue the tail and booms first and then to the main wings, of course, these are
previously assembled to the main fuselage.
The cockpit is well detailed, however, due to the scale, this is too
small to be seen from outside, anyway, I like to work on the cockpit as much as
I can even if it’s too small due to the scale.
Once the cockpit is done, it’s time to join the main fuselage to seal
the cockpit, but before I do this, I have to add small fishing weights to the
nose in order to balance the airplane.
After joining the wings, I had to use a little bit of my homemade filler
between the joints of the main wings and fuselage, I put cyanoacrylate into the
gaps and then a little bit of baking soda powder.
This mixture dries fast and can be sanded with a fine sand paper; the
results you get with this mixture are acceptable.
| COLORS & MARKINGS |
After that it’s time for the model to be primed, first I used light gray
primer in spray, I bought a Mexican brand in a local store, I have had good
results by using this primer paint, the paints adds well to this primer.
I don’t have an air compressor that’s why most of my models are spray or
brush painted.
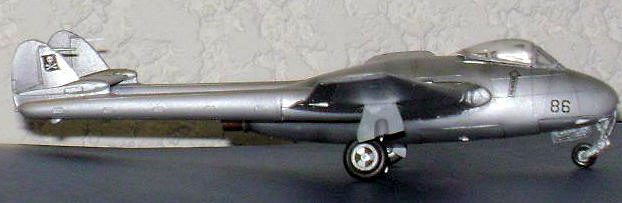
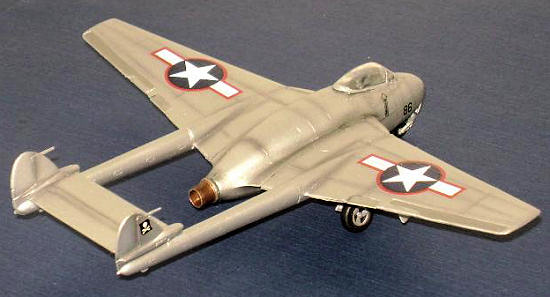 This vampire was painted with silver metal spray; the result you get
with this spray paint is quite acceptable and looks very similar to an airbrush
paint result.
This vampire was painted with silver metal spray; the result you get
with this spray paint is quite acceptable and looks very similar to an airbrush
paint result.
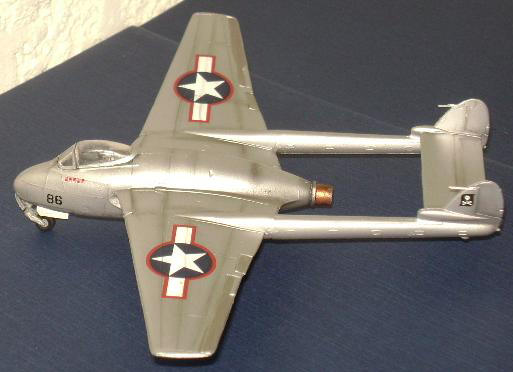
I took some spare decals from other models, as I said before; this kit
has no decals so I applied the most suitable decals for this model.
The panel lines were shaded by using flat black make up powder, remember
I didn’t use an airbrush to paint this model; you can apply this make up shades
with a soft cotton pad.
Do it as long as you are happy with the effect.
There are no limits and rules when you build plastic models, you can do
whatever you want for your model to make it look nice, even if you don’t have
decals, you can print them on your own by using a computer and water-slide
paper.
That’s why every plastic model is different because it carries the builder’s signature and technique.
| CONCLUSIONS |
I was satisfied with this model, although the resources are limited to me, I always try to achieve my goals for my models by using different alternatives, I liked this model a lot, it seems to me well done, it wasn’t too difficult to build , the price was very cheap and don’t forget to create your own techniques.
June 2009
If you would like your product reviewed fairly and quickly, please contact me or see other details in the Note to Contributors.