| KIT #: | ? |
| PRICE: | $ |
| DECALS: | Two options |
| REVIEWER: | Michael Rohde |
| NOTES: | Short Run |
| HISTORY |
The prototype ( RR 915) was built on a private venture basis and flew for the first time on 28th July 1944. The design was based on the very successful wooden construction principals of the DH Mosquito. Boscombe Downs flight trials revealed that the Hornet ( powered by a pair of 2070 HP Merlin engines driving opposite- handed propellers) was capable of an astonishing speed of 458 mph at 22000 feet altitude. Like the Hornet's big sister – the Mosquito- the type also possessed superb handling characteristics,particularily in respect of its high rate of roll.
 The Hornet was initially
conceived for operations in the Pacific Theatre of War against the Japanese, but
the conflict ended before the aircraft reached operational status. Two main versions saw
service with the RAF Fighter Command: The F Mk 1 and the F Mk 3 with the latter
having increased fuel capacity and a larger dorsal fin. Armament consisted of 4 x20
mm cannons and wing hard points to carry eight 60lb rockets or a pair of 1000 lb
bombs. As an alternative , two 200 gallon drop tanks could be carried.
The Hornet was initially
conceived for operations in the Pacific Theatre of War against the Japanese, but
the conflict ended before the aircraft reached operational status. Two main versions saw
service with the RAF Fighter Command: The F Mk 1 and the F Mk 3 with the latter
having increased fuel capacity and a larger dorsal fin. Armament consisted of 4 x20
mm cannons and wing hard points to carry eight 60lb rockets or a pair of 1000 lb
bombs. As an alternative , two 200 gallon drop tanks could be carried.
The F3 saw active service in the Far East as a strike fighter during the Malayan Emergency in 1951, replacing Bristol Beaufighters and Supermarine Spitfires. The Royal Navy had Hornets in service, initially as single seat fighters ( Sea Hornet F 20). Main modifications to enable the aircraft to be used on aircraft carriers were a wing folding mechanism and arrester hook. Provisions were also made to accommodate a oblique camera in the rear fuselage. Subsequently the type was adapted as a two seat night fighter ( NF 21) , with aradome in the nose section and a seat for the radar operator/observer in the the rear fuselage. The final naval variant was an unarmed reconnaisance version, the Sea Hornet PR 22.
There are currently no survivors anywhere , but The Pioneer Aero Company, based in Auckland New Zealand, announced in 2017 that they have acquired the substantial remains of DH Sea Hornet ( TT 193) and will rebuild a Sea Hornet to flying condition. The company has already quite substantial experience with having built 2 airworthy DH Mosquitos.
| THE KIT |
 A typical CA kit . Moulded
in grey plastic containing 46 parts plus a collection of( 21) resin parts to
build the cockpit (the exhausts , gun ports ,oil coolers, main wheels and small
parts of the landing gear ( torque braces) are also made of resin) and two vac
formed canopies.
A typical CA kit . Moulded
in grey plastic containing 46 parts plus a collection of( 21) resin parts to
build the cockpit (the exhausts , gun ports ,oil coolers, main wheels and small
parts of the landing gear ( torque braces) are also made of resin) and two vac
formed canopies.
There are no locator pins and great care is required for the alignment of the wings and tail plane/ fin. Surface details are acceptable.The overall fit is not bad either and did not require much putty to get things right.
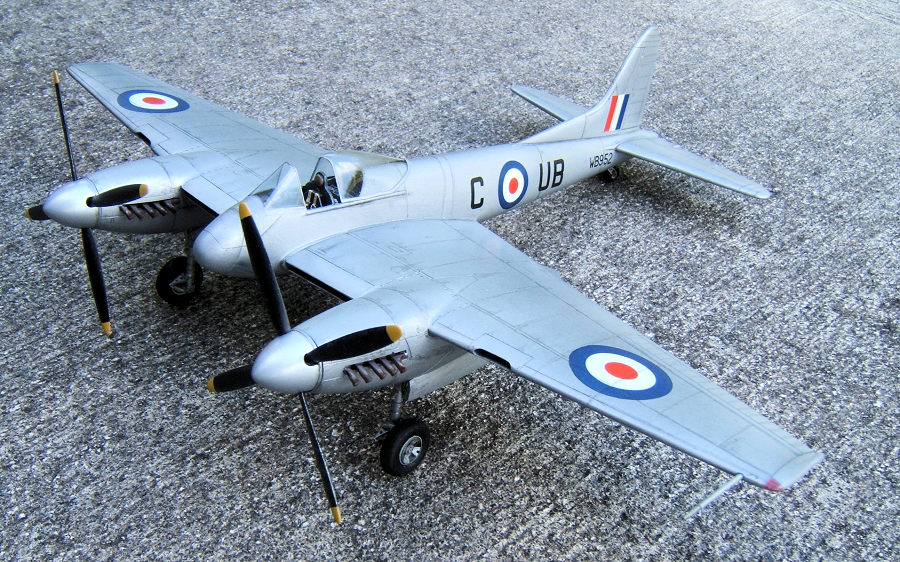
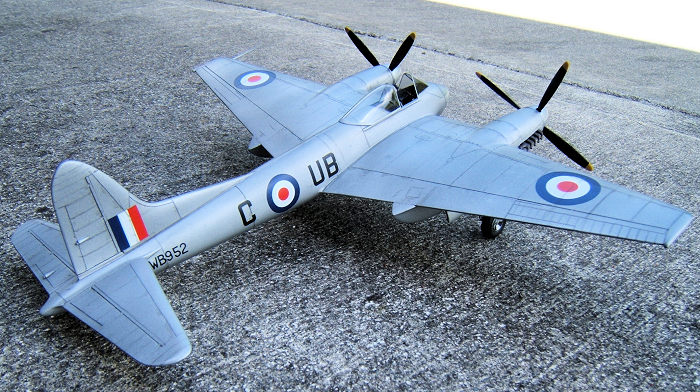
My kit gave me the parts to do either a F 1 or an F 3 ( meaning I had two different sets of horizontal tail planes and fins.) and a decal sheet with two options. Hornet F 1 Sqn Leader Haw 65 Sq. Linton on Use 1947, and Hornet F 3 No 80 Sq.Kai Tak Hong Kong 1954. I did not use either of these options , but instead did a bare metal / high speed silver scheme of an F3 with letter codes based in England in the early 1950,s.
| CONSTRUCTION |
 I went to task by removing
all the plastic parts from their respective sprues , arranged these in sub
assembly lots and started cleaning up any flash and the odd sink mark. The same was done with the
all the resin parts and I found that there were no airbubbles which had to be
filled and sanded. Lucky me!!
I went to task by removing
all the plastic parts from their respective sprues , arranged these in sub
assembly lots and started cleaning up any flash and the odd sink mark. The same was done with the
all the resin parts and I found that there were no airbubbles which had to be
filled and sanded. Lucky me!!
The instrument panel, ammo boxes , control column, cockpit side walls and oxygen tanks were painted separately . All the other parts like cockpit floor ,the bulkheads and seat support were glued together and painted as one item. The cockpit interior was painted with Tamiya Tank grey toned down with a few drops of flat black . Dry brushing using flat aluminium highlighted surface details. After adding the seat with the photo etch seat harness and all the other items to the cockpit floor I glued the cockpit side walls into place using CA glue. Then followed the rest of the cockpit assembly. The overall fit of these parts was actually very good and this step in the build went smoothly.
To utilize the resin gun ports some surgery is required and you have to carefully remove this section from the lower front fuselage. Before I did this I taped the fuselage shells together in such a way that I could be sure they could not move while I was starting to cut out the section for the resin insert. Again, this was actually a rather simple thing to do and later on ( after closing up the fuselage)I managed to fit the resin base with a minimal gap easily filled with thin CA glue. Sanding and rescribing panel lines was done in no time.
Before you can start assembling the wings and the tailplane , one has to remove injector pins first , otherwise you will not be able to mate the halfes properly. Once that was done , this step was very easy indeed and the alignment was such that very little putty had to be used to remedy small imperfections along the leading and trailing edges. The oil coolers were inserted after the wings were together. The instructions tell us to install these first , but I figured it would be as easy to slot the resin parts in afterwards due to very good access at the wing roots.
 The engine nacelles had
also injector pins , which had to be removed first. Assembly was – again
-straight forward . One had to insert the exhaust stacks and the firewall first
before the halfes could be glued together. The nacelles fitted well
onto their respective locations and there was little remedial work necessary
except cleaning up the trailing edge extension of the nacelles. Instructions say you are to
install the propellers at this stage but I skipped that stage to avoid having to
work around the installed propellers. So I made sure that the pin holding the
propeller fitted into their respective holes with a bit of a press fit which
would enable me to add the propellers later by simply 'sticking them on'!!
The engine nacelles had
also injector pins , which had to be removed first. Assembly was – again
-straight forward . One had to insert the exhaust stacks and the firewall first
before the halfes could be glued together. The nacelles fitted well
onto their respective locations and there was little remedial work necessary
except cleaning up the trailing edge extension of the nacelles. Instructions say you are to
install the propellers at this stage but I skipped that stage to avoid having to
work around the installed propellers. So I made sure that the pin holding the
propeller fitted into their respective holes with a bit of a press fit which
would enable me to add the propellers later by simply 'sticking them on'!!
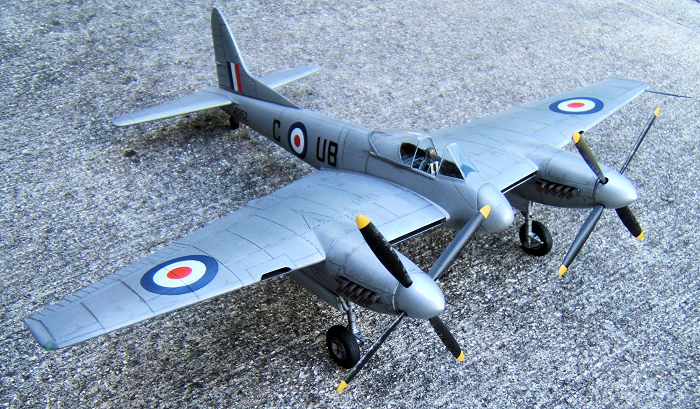
I was a bit nervous about cementing the wings and horizontal tail planes . As I said , no locator aides at all. Just the interface on the fuselage as a guide to align the wings etc. I made sure that these surfaces were as even as possible by first checking these areas on a glass plate .To mark any high spots I used a felt pen and rubbed the marked area agains the glass plate. High spots appeared where the colour wore off and these were the main areas where the adjustments took place. Small and very careful corrections on a 800 grit sheet of sandpaper on a even surface were still necessary. It is a bit of a touch and go and you have to entirely rely on your eyes and trust you are on the right track as far as the angles are concerned. We must also take into account the dihedral on the main wings. In the end there is only so much one can do and finally it is time to ' stick 'them on.
Well-- what can I say – I pretty much got that right and there was a bit of a gap to deal with but nothing major. The fin was- in comparison- a ' nothing to write home about' affair. Sooo- We have arrived at that stage where this does look like an aeroplane. Time to paint and assemble the main landing gear.
A fiddly bit indeed. I had
to start with adding the resin torque braces and the support for the rear center
landing gear brace . For good measure I added the brake lines to make it look
more realistic.( stretched sprue did the job)That done , the rear
supports ( 3 each) were glued to the main landing gear and painted with Tam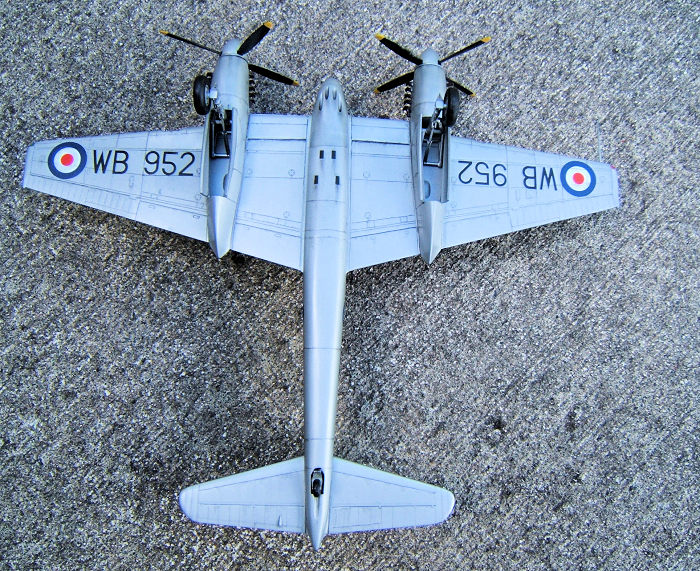 iya
Flat Aluminium. The visible part of the shock absorber was painted with Humbrol
11 ( chrome). A thin coat of Clear gloss was airbrushed over the lot and Tamiya
Accent panel liner ( brown and black)was used to highlight surface detail and
give it a bit of a weathered look at the same time. The main wheels were
painted and the tail wheel unit was finished at the same time.
iya
Flat Aluminium. The visible part of the shock absorber was painted with Humbrol
11 ( chrome). A thin coat of Clear gloss was airbrushed over the lot and Tamiya
Accent panel liner ( brown and black)was used to highlight surface detail and
give it a bit of a weathered look at the same time. The main wheels were
painted and the tail wheel unit was finished at the same time.
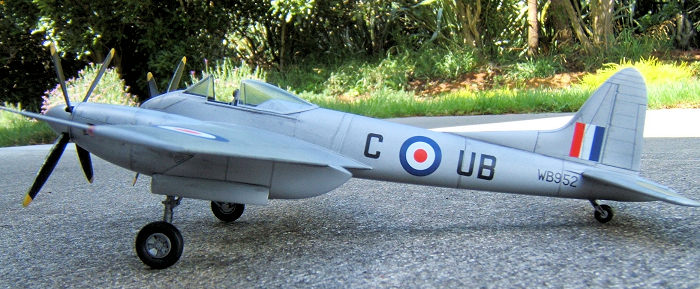
The kit supplies us with 2 vac formed canopies. I wanted to do the model with the canopy open and to do this it is necessary to separate the wind shield and main canopy . I used a pair of fine and sharp scissors to do that and-- hey presto --I stuffed up my first attempt ( although I could use the windshield allright). So there is always a second chance they say and with this in mind I gave it another go at the second canopy. That did pan out as far as the rear part of the canopy was concerned. Without further ado I dryfitted the windshield and – after being satisfied with the fit – glued this part into place. The rest of the canopy was test fitted in an open position after that and put aside for the canopy fram to be painted. The windshield portion was masked off inside out and at the same time the cockpit interior received a good layer of masking tape to protect from overspray. The complete main landing gear units ( minus main wheels ) and the complete tail wheel unit was glued into place and carefully masked off.
| COLORS & MARKINGS |
As already mentioned, I decided to do an ' high speed silver' finish and bare metal panels( mainly around the engines and oil cooler panels). The overall 'silver ' was done with Tamiya flat aluminium and the panels were painted with Tamiya chrome silver. All surfaces received a overall coat of clear gloss as a base for the decals. I left the model to dry overnight and moved on to the decals.
Since CA does not give us any stencils and only the main markings , this part of the build was done quickly. The decals are very good and did settle well. The decals received a overall seal of Humbrol satin clear.
All the panel lines and other surface details were highlighted and weathered with Tamiya Panel Line Accent colour . Finally , last but not least , the painted sliding canopy was glued into place in the open position.
| CONCLUSIONS |
All in all--- that build was rather easy and the result is a nice model of one of the fastest piston powered fighters there were. I can recommend this kit to all modellers out there who want to do a multi media kit for a change.
28 January 2019
Copyright ModelingMadness.com
If you would like your product reviewed fairly and fairly quickly, please contact the editor or see other details in the Note to Contributors.
Back to the Main Page Back to the Review Index Page Back to the Previews Index Page