Amodel 1/72 DH Vampire F.1
| KIT #: | 72207 |
| PRICE: | $18.00 |
| DECALS: | Three options |
| REVIEWER: | Torben Plesberg |
| NOTES: | Short run kit |
| HISTORY |
| THE KIT |
 T
T
The six sprues are in a medium grey styrene, the clear parts are two different canopies, and two different types of navigation lights, depending on the shape of the wing tips. The nose weight problem is not mentioned, and the air intakes are without the fins. The fuselage has the right shape, in contrast to the Vampire 1/48 from Trumpeter, see here.
| CONSTRUCTION |
If you follow the instructions you will end up with a reasonable model of the first Vampire version, the Mk 1 – in Sweden called the J 28 A. However, some of the steps need some attention to avoid problems:
 Step 2:
the engine exhaust pipe. Such plastic parts are always too thick, and seen from
behind, the exhaust does not look right. A caliber .22 spent cartridge will do
the job much better. The gauge is very close to be quite right.
Step 2:
the engine exhaust pipe. Such plastic parts are always too thick, and seen from
behind, the exhaust does not look right. A caliber .22 spent cartridge will do
the job much better. The gauge is very close to be quite right.
Step 3: The nose wheel tire has a notch in the center – to avoid aqua planing. This can be made with a thin needle file or on a lathe.
Step 5 & 6: When the boom halves are glued together, the boom needs some filling and sanding beneath the fin and rudder on the outer sides.
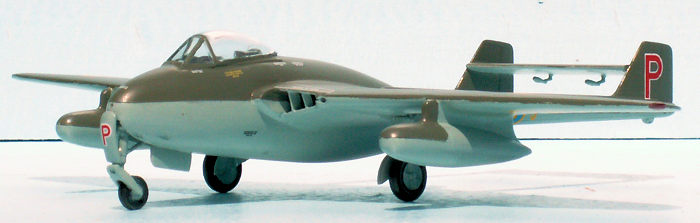
Step 7: The angle of the air intake on the upper wing as seen from above is wrong. About 2 mm should be removed against the fuselage, tapering to nil at the base. The two fins in the intake are not with the kit, and must be scratch built from 0.25 mm plastic card. The assembled wings have a bad fit to the fuselage.
Step 8: The navigation lights are almost impossible to handle. I drilled a 0.5 mm gauge hole in each of them and filled the holes with transparent red and green paint. A glue Stix is the right tool to handle the tiny items and glue them in place in the wing tips with some gloss varnish.
 Step 9:
The nose – part 3 – must be filled with lead. However, this may not be enough!
To secure the booms being glued properly in place, it is a good idea to put a
piece of sprue into the openings of the booms, and sand the part to go into the
wing opening for a proper fit. Don’t forget to glue the tail plane in place
before the booms, and be sure the fins are vertical!
Step 9:
The nose – part 3 – must be filled with lead. However, this may not be enough!
To secure the booms being glued properly in place, it is a good idea to put a
piece of sprue into the openings of the booms, and sand the part to go into the
wing opening for a proper fit. Don’t forget to glue the tail plane in place
before the booms, and be sure the fins are vertical!
Step 10 & 11: I filled the front end of the two wing tanks with lead, just to be sure there was enough weight to avoid tail sitting.
Step 12: The mass balances (part 24 x 2) are rather difficult to glue in place, because they are tiny items. It is a good idea to move the wing tanks a couple of millimeters outwards in order to get properly clear of the main undercarriage.
| COLORS & MARKINGS |
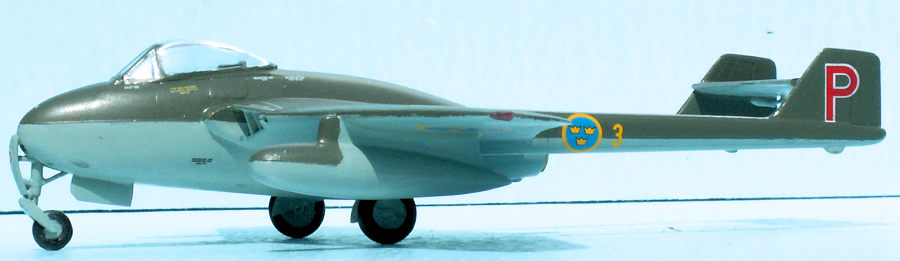
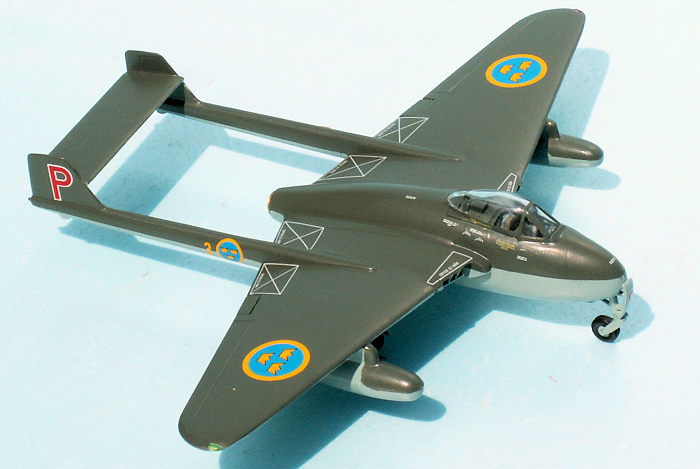
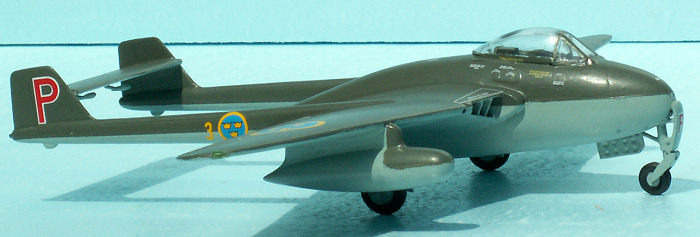
 A
Flygvapnet J 28 A is dark green on the upper sides of the wings, fuselage, booms
and fins, Model Master RLM 71 acrylic. The under sides are light blue grey,
Model Master RLM 65 acrylic. The tires are Rubber Black, Tamiya XF-85 Acrylic.
A
Flygvapnet J 28 A is dark green on the upper sides of the wings, fuselage, booms
and fins, Model Master RLM 71 acrylic. The under sides are light blue grey,
Model Master RLM 65 acrylic. The tires are Rubber Black, Tamiya XF-85 Acrylic.
The national insignia roundels are from a Flying Color Sheet 1/72 with Swedish markings. The white “no step” markings came from a Special Hobby kit: Vampire FB 52 In Northern Skies. The decal sheet of this kit had a complete set of decals for Sweden, Norway and Finland. Since I decided for a Norwegian Vampire, I could use the Swedish markings for my J 28 A model.
| CONCLUSIONS |
The A model short run kit of the Vampire Mk 1 is recommendable to all who fancy early jet fighters – or twin boom aircraft. It is a nice kit without serious flaws. Most Vampire models have problems about the correctness of the air intakes, seemingly a difficult item to get right on a small model. I was happy to add a J-28 A to my J-28 B and J-28 C, the Swedish trio is now complete!
| REFERENCES |
My photos of the J-28 A, which happens to be the very first Vampire (28001) in the colors of Flygvapnet, and this aircraft is preserved, and can be seen to day in the Flygvapen Museum at Linköping.
Back to the Main Page Back to the Previews Index Page
Back to the Previews Index Page