Testors/Hawk 1/72 Supermarine Swift
| KIT #: | 943 |
| PRICE: | $ |
| DECALS: | One option |
| REVIEWER: | George Oh |
| NOTES: | Very basic kit |
| HISTORY |
After continually producing and improving Spitfires during WWII, Supermarine was keen to produce the next British fighter. And it was to be propelled by the new-fangled jet engine. Their first attempt was the straight-winged Attacker. By substituting-in a swept wing, then other details, it evolved into the Supermarine Swift.
 The Swift
was the first swept-wing aircraft in-service with the RAF, but there were soon
several accidents involving Swifts, which cast dispersions on the reputations of
the Swift, the RAF and the British Aircraft Industry. Despite a few PR
successes, including attaining a record speed of 737mph, the Swift was removed
from RAF service after only 6 years, being replaced by the successful Hawker
Hunter.
The Swift
was the first swept-wing aircraft in-service with the RAF, but there were soon
several accidents involving Swifts, which cast dispersions on the reputations of
the Swift, the RAF and the British Aircraft Industry. Despite a few PR
successes, including attaining a record speed of 737mph, the Swift was removed
from RAF service after only 6 years, being replaced by the successful Hawker
Hunter.
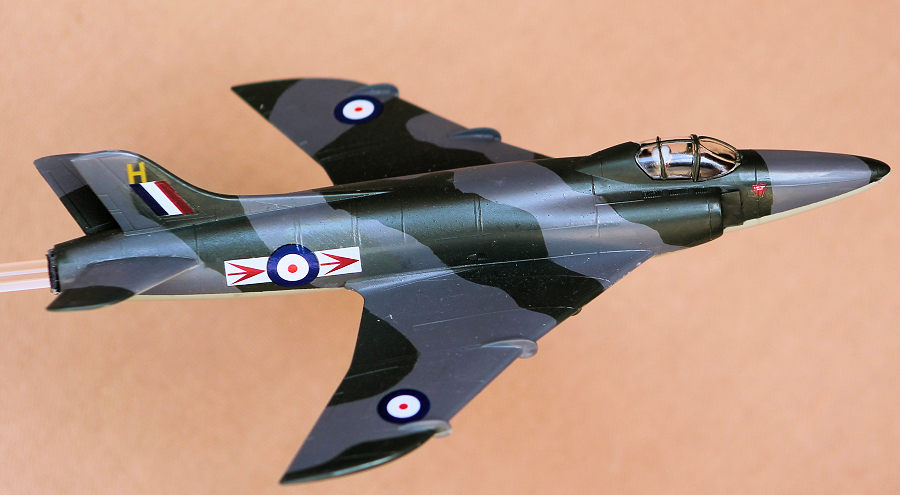
My research revealed that there were several iterations of the Swift. This one had two short wing fences on each wing. Another seems to have a single long one. Other Swifts (the first?) seems to have a straight leading edge to the wing, while others seem to have a 'dog tooth.'
| THE KIT |
 A fellow
modeller was down-sizing his stash, and I bought over a dozen kits from him. So
he gave me this as a thank-you. I hadn't realised how basic a kit it was till I
examined it next day, and IF I was uncharitable, I might suspect that it was a
'dump-n-run'. This kit has only 19 parts though with some surprisingly-good
cast-in details. But it is still a basic kit with a plate immediately under the
canopy and one-piece wings. The wheel wells have undercarriage doors mounded-on
in the closed position, but wheels, legs and separate undercarriage doors are
also provided.
A fellow
modeller was down-sizing his stash, and I bought over a dozen kits from him. So
he gave me this as a thank-you. I hadn't realised how basic a kit it was till I
examined it next day, and IF I was uncharitable, I might suspect that it was a
'dump-n-run'. This kit has only 19 parts though with some surprisingly-good
cast-in details. But it is still a basic kit with a plate immediately under the
canopy and one-piece wings. The wheel wells have undercarriage doors mounded-on
in the closed position, but wheels, legs and separate undercarriage doors are
also provided.
I started it because it looked like a quick build, which suggests that I might be able to finish it for a December Competition deadline. Because of its simplicity and the moulded-closed undercarriage doors, I decided to build it in an in-flight mode.
| CONSTRUCTION |
Now, what I know about the Swift, I can write on a pea. The intakes and the tail-pipe were moulded with incredibly thick lips, but this was easily fixed with a good knife and some patience. But what I perceived to be the splitter plates, were poorly moulded-on as a raised plate on the sides of the fuselage. To fix this, I shaped the moulded-on plates into triangles, then stuck pieces of thin plastic card out through the intake aperture and glued it over the old plate on the outside, and the sides of the fuselage on the inside (to stop the inside of the fuselage being visible through the intakes). How was I to know that the Swift didn't have modern splitter plates!! The insides were painted a dark grey.
 Each
one-piece wing went into the fuselage via a large locating tab. Fortunately,
there are blocks inside that help to hold the wings horizontally, and flat, so
this job was easy. But this left gaps at the upper wing roots because the
moulded-on fairings don't touch the fuselage side. Heavy-duty filling with
Perfect Plastic putty was the go. The tailplanes went-on with equal ease,
tightly and without the need for much filler - even if they did stick-up at an
angle (ie, a dihedral).
Each
one-piece wing went into the fuselage via a large locating tab. Fortunately,
there are blocks inside that help to hold the wings horizontally, and flat, so
this job was easy. But this left gaps at the upper wing roots because the
moulded-on fairings don't touch the fuselage side. Heavy-duty filling with
Perfect Plastic putty was the go. The tailplanes went-on with equal ease,
tightly and without the need for much filler - even if they did stick-up at an
angle (ie, a dihedral).
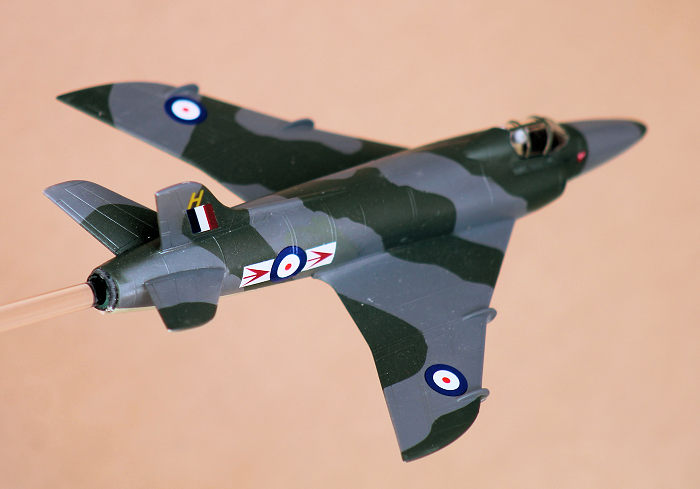
To build it as an in-flight model, I'll have to use the kit-supplied bust of the pilot. And because it's a jet, I'll mount it on a piece of clear acrylic rod poked up its tail pipe. If I mounted it on the kit stand, it would look like a model, and if I mounted it on a fabricated block, it would look like a Gate Guard. I filled-in the sockets for the 3 undercarriage legs and the slot in the belly (for the stand) - first with plastic (sprue or card), then with Mr Surfacer.
| COLORS & MARKINGS |
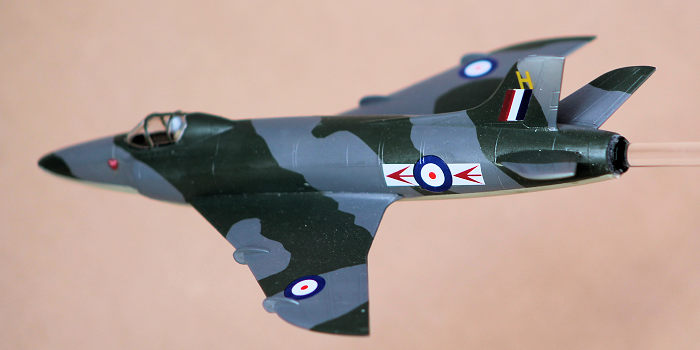
The first coat was an underbelly coat of Tamiya XF-21 Sky. After masking, the top was painted XF-66 light grey. More masking followed, then I used XF-81 RAF dark green as the camouflage.
The last areas to be painted was the black for the cockpit plate and then the pilot's bust. And because he would be clearly visible, I tried to do a believable job on him (I stink at figures), including, for a splash of colour, his white bone-dome (Isn't that an American term?) Dark washes were used to delineate the various control surfaces (and I stink at washes, too).
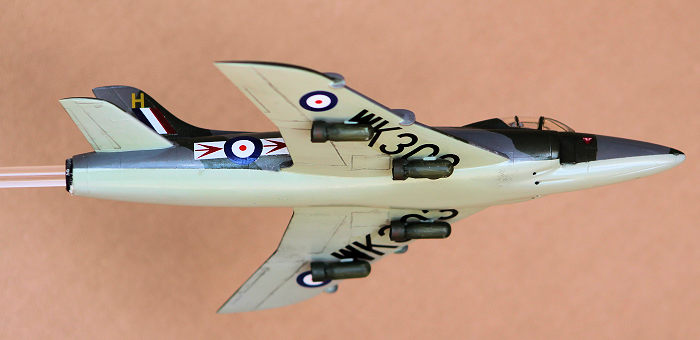
The fin has engravings for
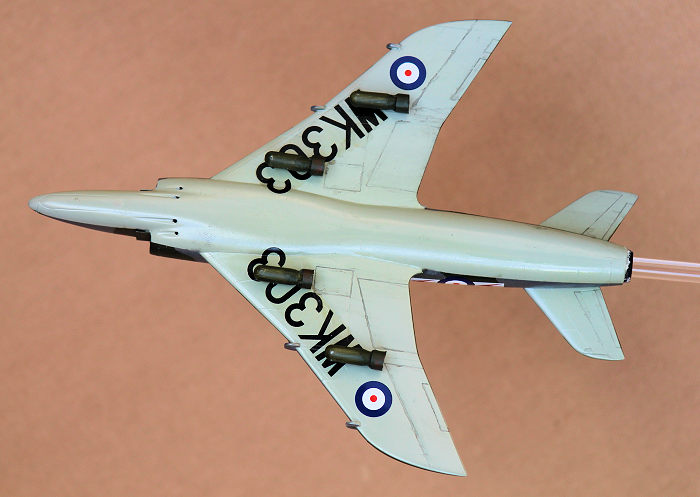
the fin-flashes, so applying them was easy. The underwing registration number
decals are complicated because each is in three pieces because of the separate
undercarriage doors, and because some have clear areas to go over moulded-on
tabs that represent the bomb racks. I cut through the carrier film of the clear
slots to ease their positioning
 over the
'bomb racks'. Fortunately, the parts fit together with jigsaw precision. The
out-of-register roundels were replaced by slightly-incorrect ones from the
Xtradecal generic pre-war (X72111) set.
over the
'bomb racks'. Fortunately, the parts fit together with jigsaw precision. The
out-of-register roundels were replaced by slightly-incorrect ones from the
Xtradecal generic pre-war (X72111) set.
All that was needed now, was to position the pilot (on a pin, so that it wouldn't come adrift later), then the clear canopy. The clear acrylic rod was bent in a hot oven (BEFORE my Lady put the chicken in to roast), then a length of brass tube was slid over the rod and positioned so that when the rod was slid up the Swift's tail-pipe, just enough projected out to simulate the after-burner can. Did the Swift have one of those? The brass was superglued inside the tail, and the acrylic rod's tip was tapered to ease its insertion into the brass tube, and to allow it's fit into the nose of the model. The model needs to be removable for transport.
I hadn't cut-off the 'bomb rack / tabs' so I was committed to using the bombs. Moulding-wise, they were also quite basic. The mould-seams were filled and filed, and the thick tail fins had their forward and trailing edges thinned. I elected to fit each bomb with a WWII-style bomb-ring in-order to hide the remaining thick edges. They were cut from a plastic straw of a convenient diameter. When each was glued in-place, I was careful to ensure that the bomb fins formed a neat X. With the last bomb, the model was complete.
| CONCLUSIONS |
Testors admit that they've modelled the 4th prototype (F.Mk.4), but the decals are for a more-photogenic FR. 5 (R for Reconnaissance). Because of the bombs, I left-off the two nose decals that represent the recon variant's camera ports.
I tried to do justice to this simple kit because it bears the proud name of Testors, and because the aircraft was one of the last to bear the proud name of Supermarine. In the end, it looks like a Swift. Another modeller might open the cockpit and fit it with a detailed cockpit tub. But me, and younger builders, will be happy with her as she is.
George Oh
6 March 2023
Copyright ModelingMadness.com. All rights reserved. No reproduction in part or in whole without express permission.
If you would like your product reviewed fairly and fairly quickly, please contact the editor or see other details in the Note to Contributors.