Airfix 1/72 Supermarine Swift FR.5
| KIT #: | A04003 |
| PRICE: | $18.99 SRP |
| DECALS: | Two options |
| REVIEWER: | Dan Lee |
| NOTES: |
| HISTORY |
 The Supermarine Swift (the
backup in case the Hawker Hunter failed) was based on the Supermarine Attacker
which was a straight wing carrier based strike fighter. It had some serious
issues/flaws that included afterburner failure at high altitude, engine failure
due to ingestion of gases from 30mm cannons and handling issues caused by the
mass of two extra 30mm cannons (the original design had only two.)
The Supermarine Swift (the
backup in case the Hawker Hunter failed) was based on the Supermarine Attacker
which was a straight wing carrier based strike fighter. It had some serious
issues/flaws that included afterburner failure at high altitude, engine failure
due to ingestion of gases from 30mm cannons and handling issues caused by the
mass of two extra 30mm cannons (the original design had only two.)
It turned out to be rather successful as a high speed low altitude recon plane, but that wasn't enough to keep the Swift in service past 1961.
| THE KIT |
Airfix released this 1/72
kit in late 2014. Our editor has done an excellent job of
previewing this kit as I have no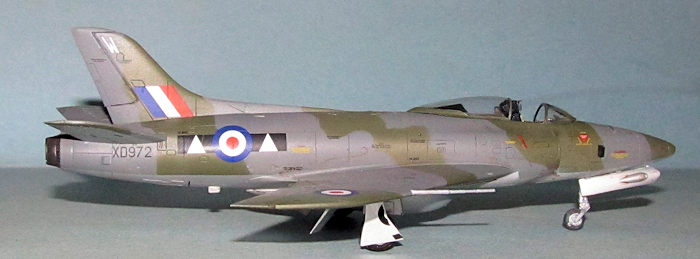 thing more to add
The reason I got this kit is that I grew up reading British aviation magazines and action comics as a kid (in large part because they were available and I loved planes.) The Swift was one of those plane designs that intrigued me in my youth despite its actual well earned short lifespan and disappointing performance (and for nostalgia.) I have wanted to build one since then, but never had the opportunity to. I purchased the Falcon Vaccuform, but do not have the experience, skills or courage to tackle such a project so when I had the opportunity to get the 1/72 Airfix kit, I did.
| CONSTRUCTION |
I began assembling the tailpipe and intakes because I wanted to fill and sand them without dealing with the dreaded phantom seam. After waiting a couple of weeks, I filled and sanded them without too much of a problem. I didn't fill/sand the interior of the tailpipe because it was too small for me to do and it would be mostly painted black/burnt iron.
The cockpit was next.
Fortunately, the whole area was painted NATO black which covers up the fact that
I ruined a couple of the side console decals and one was placed in the wrong
location. I managed to not sc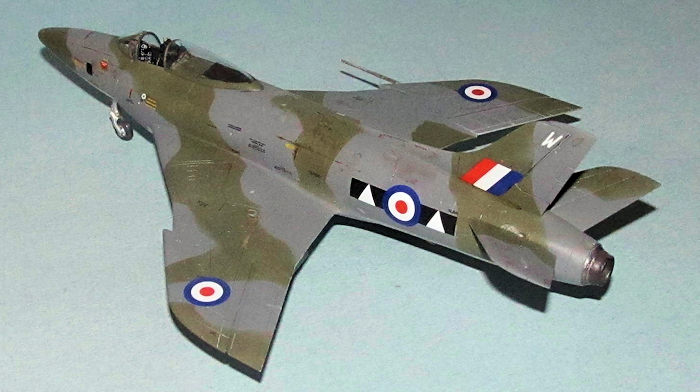 rew up the instrument panel decal (barely). It
attaches to the nose wheel well. The nose wheel well had some gaps that needed
to be filled, but difficult to do thanks to all the detail so I just covered the
gaps with cut sections of 10 thou plastic card. The wheel well interior was
spray painted Tamiya Silver Leaf (TS-30.) I did not follow the instructions and
left off the clear gunsight until after everything was assembled.
rew up the instrument panel decal (barely). It
attaches to the nose wheel well. The nose wheel well had some gaps that needed
to be filled, but difficult to do thanks to all the detail so I just covered the
gaps with cut sections of 10 thou plastic card. The wheel well interior was
spray painted Tamiya Silver Leaf (TS-30.) I did not follow the instructions and
left off the clear gunsight until after everything was assembled.
The various interior subassemblies were added to the fuselage halves and then glued in place. I added some lead shot to the nose based on Tom Cleaver's earlier review to keep the nose down. The fuselage and wings were then glued together. I didn't line things up as well as I could have as I had a step where the rear of the wing assembly meets the fuselage. The excellent detail was covered with tape to prevent it from being sanding away and then carefully filled and sanded. I lost some of the detail, but did not have any major issues rescribing most of it. The underside was carefully polished because it was going to be painted silver. The topside seams weren't as problematic though.
The last thing I added before painting was the underside fuel tank and fill the gaps with Vallejo plastic putty.
| COLORS & MARKINGS |
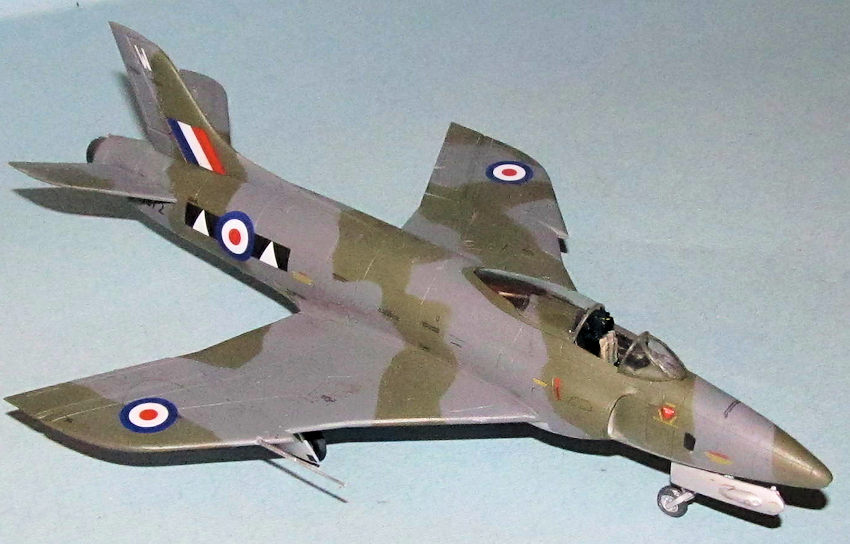
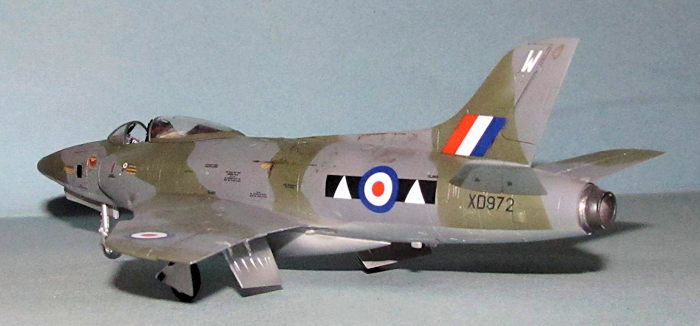
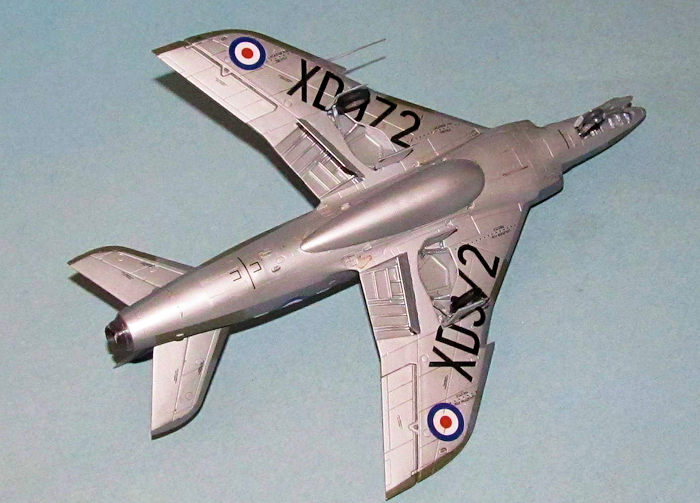
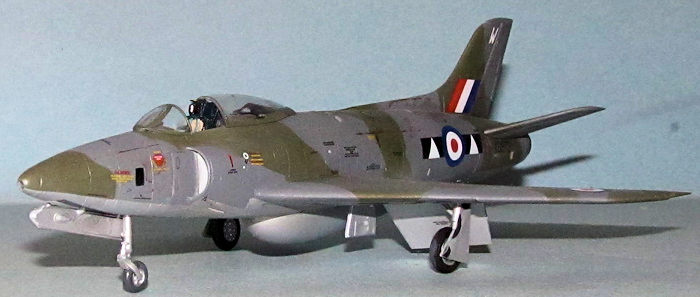
The color scheme was the late 50s RAF scheme of dark green and dark sea grey. I used the Tamiya colors XF-24 and XF-70 for that. The underside was painted Tamiya Silver Leaf straight from the spray can.
As you can imagine there was a lot of masking required as the camo pattern was hard edged and required a fair amount of low tack tape especially the underside where the camo wraps around the leading edge of the underside wing. Overall, I didn't have any issues with overspray or leaking, but I did make one mistake and forgot to paint a small starboard aft section next to the tailpipe dark green.
 The canopy, was masked and
painted at the same time (the interior of the canopy frames was painted flat
black first before I painted on the main colors.) Also the tailplanes and
landing gear/doors.
The canopy, was masked and
painted at the same time (the interior of the canopy frames was painted flat
black first before I painted on the main colors.) Also the tailplanes and
landing gear/doors.
I masked off the area surrounding the tailpipe and sprayed the tailpipe burn iron and then hand painted trailing edges Titanium Silver.
Once everything was dry I sprayed on two fine coats of Tamiya gloss in preparation for the decals.
I had no issues adding the Airfix decals to the model as I used the No 2 Squadron markings. Even in 1/72 scale there were a fair number of stencils to be added. Everything went down with a bit of Micro Sol/Set.
Considering that these planes had a short life and were kept in very good condition, I only used a diluted black watercolor wash solution to highlight panel lines. The excess wash and decal solvent were wiped off for the final coat.
I sprayed on two thin coats of Xtracrylix Satin for the final coat.
The landing gear, canopy and other fine parts were added. I had to keep the Swift upside down so that it gave the glue a chance to cure and keep the landing gear straight.
| CONCLUSIONS |
 The Airfix Swift is a fine
little kit that requires a little bit of TLC for the fuselage wing assembly but
otherwise makes a fairly straight forward build. If one wants a decent 1/72
build or are a fan of this plane then this is the kit to get.
The Airfix Swift is a fine
little kit that requires a little bit of TLC for the fuselage wing assembly but
otherwise makes a fairly straight forward build. If one wants a decent 1/72
build or are a fan of this plane then this is the kit to get.
I have to admit that I will probably get the 1/48 version if Airfix decides to make one.
Dan Lee
30 January 2017 If you would like your product reviewed fairly and fairly quickly, please
contact
the editor or see other details in the
Note to
Contributors. Back to the Main Page
Back to the Review
Index Page
Back to the Previews Index Page