
| KIT #: | A10101 |
| PRICE: | $56.00 |
| DECALS: | Two options |
| REVIEWER: | Francisco Santoro |
| NOTES: | Bought the kit as a bundle that included Argentinian decals plus the paints. |
| HISTORY |
The history of the EE/BAC Canberra in Argentina dates back to the 1950s. In those years, Argentina was a major military power in South America, its bomber arm having over 50 Avro Lincoln and Lancaster bombers.
 Meanwhile, in England and in the same years,
the EE Canberra made its maiden flight, and the company soon toured the aircraft
through South America in order to gather orders, which came soon. In 1953, the
Venezuelan Air Force ordered six Canberra B.2s, and the Ecuatorian Air Force
ordered the Canberra B.Mk.6 in 1954. The Canberra, which could fly higher and
faster than the Gloster Meteors, left the Argentinian Air Force´s propeller
driven bombers outclassed, which was keen on retaking its edge on air power.
Meanwhile, in England and in the same years,
the EE Canberra made its maiden flight, and the company soon toured the aircraft
through South America in order to gather orders, which came soon. In 1953, the
Venezuelan Air Force ordered six Canberra B.2s, and the Ecuatorian Air Force
ordered the Canberra B.Mk.6 in 1954. The Canberra, which could fly higher and
faster than the Gloster Meteors, left the Argentinian Air Force´s propeller
driven bombers outclassed, which was keen on retaking its edge on air power.
Treaties with England for the acquisition of the Canberra began at the end of 1955, with the reunion of the Argentinian Air Minister Brigadier Ramón Abrahin with an emisary from the British Embassy. It seemed there wouldn´t be any issues in buying the Canberras, since the Argentinian Air Force was mostly formed with British aircraft (Gloster Meteors, Avro Linconls and Lancasters, Vikers Viking, Bristol 170, etc...). The Foreign Office, however, oposed vehemently to the idea of selling Argentina the Canberras, since they'd be a threat against the British controlled Malvinas Islands (Falklands). Other sectors of the British government did look at the deal with good eyes, not only as way to earn money (the deal was for 10 aircraft, mislabelled as 100 in some documents), but as a way to reinforce the British presence in South America against American influence.
 Fast forward to 1965, the British government
made an offer for an undisclosed number of Canberras, as a way to get Aerolíneas
Argentinas to buy the Vickers VC-10. The buy of the Boeing B707-320B by the
airline grounded the deal. In 1966, the propeller driven bombers were removed
from service and replaced by the A-4P Skyhawks, which were inadequate for the
role of heavy bombers. In 1967, the BAC made an offer to the Argentinian Air
Force for 12 Canberras B.Mk.2s, and another offer for 7 B.Mk.2s and 5 Canberras
PR.Mk.3s. Any attempts by BAC to get a deal were, again, grounded due to the
border conflicts with Chile, where England was asked to act as a neutral
negotiator. It was only in 1968 that the Argentinian Air Force decided to
re-establish talks with the BAC for the acquisition of 6 Canberras B.2 and two
TMk.4s. An agreement was reached on August 14th of 1968, and it was decided that
the Air Force would get 10 B.2 bombers and 2 TMk.4 trainers. The deal is
formalised on January 9th of 1969, the aircraft receiving the designation of
B.62 for the bombers and TMk.64 for the trainers.
Fast forward to 1965, the British government
made an offer for an undisclosed number of Canberras, as a way to get Aerolíneas
Argentinas to buy the Vickers VC-10. The buy of the Boeing B707-320B by the
airline grounded the deal. In 1966, the propeller driven bombers were removed
from service and replaced by the A-4P Skyhawks, which were inadequate for the
role of heavy bombers. In 1967, the BAC made an offer to the Argentinian Air
Force for 12 Canberras B.Mk.2s, and another offer for 7 B.Mk.2s and 5 Canberras
PR.Mk.3s. Any attempts by BAC to get a deal were, again, grounded due to the
border conflicts with Chile, where England was asked to act as a neutral
negotiator. It was only in 1968 that the Argentinian Air Force decided to
re-establish talks with the BAC for the acquisition of 6 Canberras B.2 and two
TMk.4s. An agreement was reached on August 14th of 1968, and it was decided that
the Air Force would get 10 B.2 bombers and 2 TMk.4 trainers. The deal is
formalised on January 9th of 1969, the aircraft receiving the designation of
B.62 for the bombers and TMk.64 for the trainers.
After being trained in the factory, Argentinian pilots began flying the Canberras in three flights of four machines between the first half of the 1970s and the beginning of 1971. On March 4 of 1971, the first instruction flights in Argentina began to take place.
| THE KIT |
 Airfix's Canberra was released originally as a
new tool model in 2008, with options to build the kit as a B.2/B.20/B.62 and
B.(I).6. The kit was last re-released between 2008 and
2009 with new parts to build a Canberra B.(I).8, a PR.9 and a B-57. The kit went
then out of production until 2016, when it was released with parts for a B.2 and
a B.(I).6.
Airfix's Canberra was released originally as a
new tool model in 2008, with options to build the kit as a B.2/B.20/B.62 and
B.(I).6. The kit was last re-released between 2008 and
2009 with new parts to build a Canberra B.(I).8, a PR.9 and a B-57. The kit went
then out of production until 2016, when it was released with parts for a B.2 and
a B.(I).6.
The kit is moulded in light grey plastic with heavily done panel lines and clear parts. They come inside a single bag and protected by an even bigger box, which is quite sturdy. At first glance, the kit is devoid of detail aside from the cockpit, whose details won´t be seen after it's painted in black. The other detailed part of the aircraft is the bomb bay, which can be modelled open or closed. The parts are attached to their sprues by thick sprue gates.
The kit comes with two decal options (Canberra WT313 of RAF's 213th Squadron and Canberra 205 from the RAAF). Also included is a painting guide in full colour.
| CONSTRUCTION |
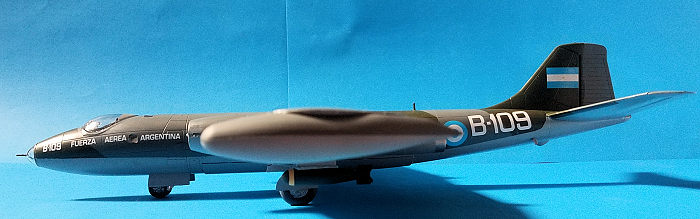
 I bought this kit from Argentina's scale
models importer, Dukel Hobbies, in a bundle that included the kit, a set of
decals and the paints, all for 56$. Before beginning the actual build, I began
looking for reference pictures of the Argentinian Canberras during Malvinas. I
was between Canberras B-105 (the one included in Airfix's original release of
the aircraft in 2006), or B-109 (the one preserved in Museo Aeronáutico de Morón
in Buenos Aires). I chose B-109 in the end, since I was able to find many
reference photos of the aircraft. Together with the photos, I decided to also
use Airfix's instructions of the original release.
I bought this kit from Argentina's scale
models importer, Dukel Hobbies, in a bundle that included the kit, a set of
decals and the paints, all for 56$. Before beginning the actual build, I began
looking for reference pictures of the Argentinian Canberras during Malvinas. I
was between Canberras B-105 (the one included in Airfix's original release of
the aircraft in 2006), or B-109 (the one preserved in Museo Aeronáutico de Morón
in Buenos Aires). I chose B-109 in the end, since I was able to find many
reference photos of the aircraft. Together with the photos, I decided to also
use Airfix's instructions of the original release.
I began the aircraft by building the wings and other parts. The wings need to have the main gear wells glued first before closing them, but before doing that, I opened the holes so I could glue the underwing stores for the bombs. With the holes opened, I glued the gear wells into place. While I waited for that to dry, I assembled the exhausts, the engines (formed by a face and the cowlings), and separated the flaps from their sprues. All that was joined later, and had a two completed wings. The wings are quite heavy, and will need help when drying to avoid them falling and getting an incorrect dihedral.
While the wings were drying, I began building the cockpit. This is formed by three seats, a floor, the control column, the rudder pedals and some instrument panels. I painted everything in black as indicated by the instructions, with the seat cushions being painted in yellow. I glued the control column, rudder pedals and instrument panel to the cockpit floor. While test fitting the cockpit into place, I realised the only detail visible of the cockpit would be the pilot's seat, so I left the other two seats off and used the empty space for weight. While also test fitting, I found out there weren´t any alignment tabs for it, so I decided to glue the nose gear well into place and use that as an alignment help for the cockpit.
 The instructions call for 100g of weight
minimum in order for the aircraft to nose sit. This weight has to be added above
the nose gear well. With the cockpit in place and dry, I began adding the
weights. After this, the instructions call for the gluing of the bomb bay,
pieces that I left out in order to be able to glue more weight, in case the ones
already added weren´t enough. With the weights dry, I glued the fuselage halves,
taped them, and moved on to build the rudder, ailerons and horizontal
stabilizers.
The instructions call for 100g of weight
minimum in order for the aircraft to nose sit. This weight has to be added above
the nose gear well. With the cockpit in place and dry, I began adding the
weights. After this, the instructions call for the gluing of the bomb bay,
pieces that I left out in order to be able to glue more weight, in case the ones
already added weren´t enough. With the weights dry, I glued the fuselage halves,
taped them, and moved on to build the rudder, ailerons and horizontal
stabilizers.
With the fuselage fully dry, I test fitted both wings. These had big gaps on the undersides, with either the top or bottom parts of the wings making contact with the fuselage. Since the wings didn´t make contact fully with the fuselage, I decided to use a thick tube glue, which would dry as hard as a rock once it was fully cured. I glued both wings and used tape to force them to achieve the correct dihedral. The model was then left to dry for some hours.
After the wings were dry, I glued the horizontal stabilizers and the rudder into their place. Once all the pieces were dry, I removed the landing gear from their sprues in order to test if the weight was enough for the aircraft to sit on its nose. Luckily, the weight had been enough, and I didn´t need to add anything more into the nose of the model. The model was then ready to be painted.
| COLORS & MARKINGS |
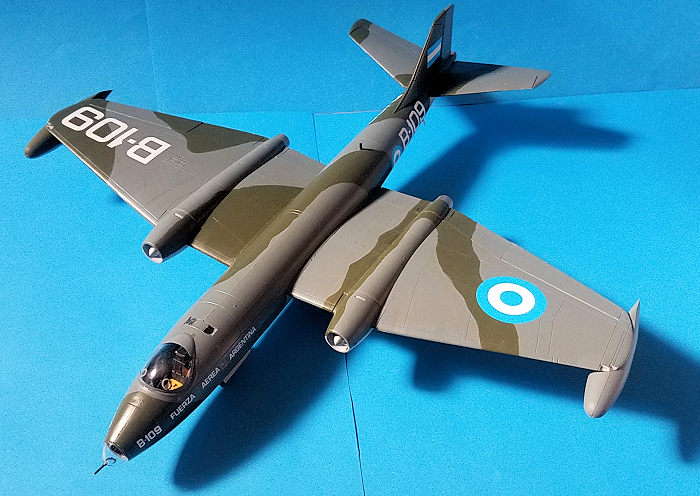
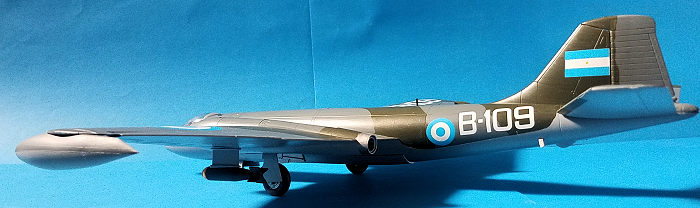
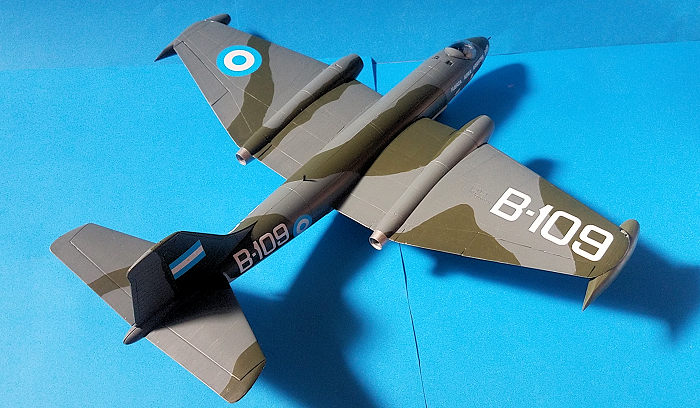 Argentinian Canberras were finished in the
original British camouflage of Extra Dark Sea Grey, RAF Dark Green on the upper
surfaces, and Light Aircraft Grey on the lower surfaces.
Argentinian Canberras were finished in the
original British camouflage of Extra Dark Sea Grey, RAF Dark Green on the upper
surfaces, and Light Aircraft Grey on the lower surfaces.
I cleaned the entire model with alcohol to remove any grease from my fingers and any paint that had been incorrectly painted into the surface.
I then outlined the camouflage with a pencil, and began painting by applying the RAF Dark Green (Revell 68). Once that was done, I applied the Extra Dark Sea Grey (Revell 79). Once the paint fully covered the surface of the aircraft, I touched up any areas that had been incorrectly painted. Once the upper surfaces were finished, I masked them and began painting the lower surfaces with Light Aircraft Grey (Revell 76). Once everything was dry, I gloss coated the entire model with Revell's Gloss varnish.
Decals are produced by Dukel Hobbies, the importer of scale models in Argentine. They were of excellent quality: thin, can be moved from the backing paper seconds after being sunk into warm water, and can be moved freely on the model's surface if it's flooded with water first. Once all the decals were in place, I found out I had miscalculated and wrongly masked the demarcation line on the right side of the nose. With a big "sigh," I left it as is. I left the decals dry overnight, and coated with Revell's Matt varnish the next day.
| FINAL CONSTRUCTION |
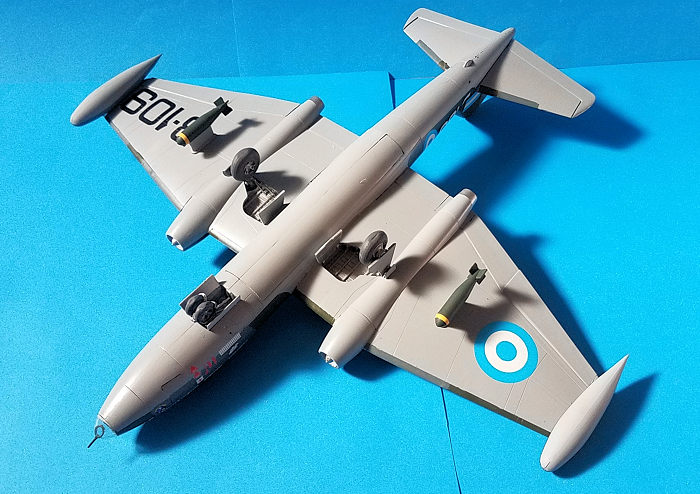
With the model matt coated, I began painting the final bits: Landing gear, wheels, bombs, fuel tanks and clear parts. The landing gear was painted in a metallic colour, the wheels were painted with Revell 78 Tank Grey with steel hubs, the bombs were painted with RLM 70 with yellow rings. The fuel tanks were painted with camouflage colours, together with the clear parts.
 I first glued the landing gear struts, left
them to dry, and then glued the wheels. I had to open holes on the main landing
gear wheels for them to fit properly into their struts. Every other part was
then glued into place.
I first glued the landing gear struts, left
them to dry, and then glued the wheels. I had to open holes on the main landing
gear wheels for them to fit properly into their struts. Every other part was
then glued into place.
The clear parts were glued as the final parts. The main canopy fitted more or less OK, but the bomb aimer's window had to have the mounting peg on the fuselage shaved so it could be fitted properly.
You may think this is the end, however, I wasn´t able to leave the aircraft with different demarcation lines, so with a fine brush, I painted the area with the upper camouflage colours. I used a new brush in order to surround the areas were the decals were.
| CONCLUSIONS |
Airfix's Canberra makes for an imposing model once built, and will look good with whatever decal option you choose to paint it. The issue where the wings won´t meet the whole fuselage is troublesome, but can be solved easily.
25 June 2019
Copyright ModelingMadness.com
If you would like your product reviewed fairly and fairly quickly, please contact the editor or see other details in the Note to Contributors.
Back to the Main Page Back to the Review Index Page Back to the Previews Index Page