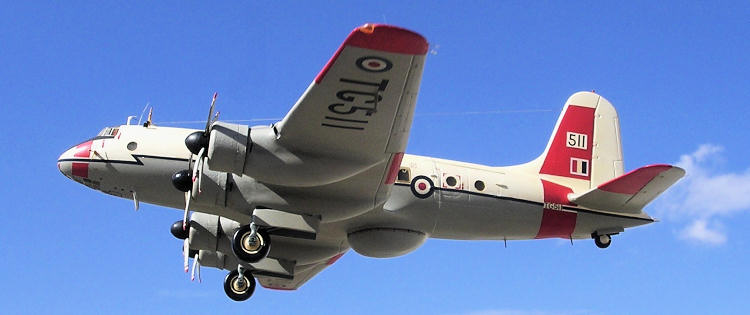
Formaplane 1/72 Hastings
| KIT #: | ? |
| PRICE: | EUR 11.70 |
| DECALS: | None |
| REVIEWER: | Carmel J. Attard |
| NOTES: | Vacuformed kit |

| HISTORY |
Designed to meet the
requirements of the Air Ministry’s specification C3/44, the H.P. 67 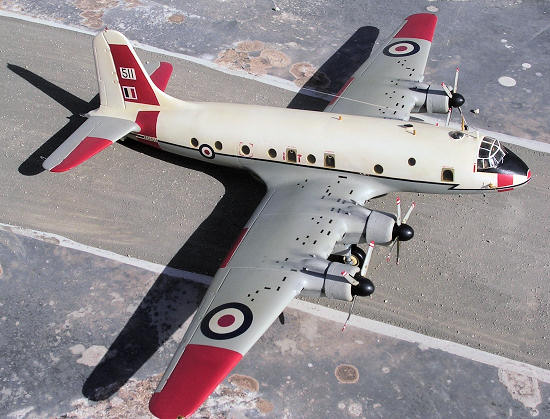 service
with the RAF’s No 47 Squadron of Transport Command at RAF Dishforth, UK in
October 1948. Superseding the aging Avro York of the Royal Air Force Transport
Command the Hastings was truly one of the all time greats of the mid 50s.These
were operated by a crew of five and could accommodate 30 paratroops with
supplies or 32 litters plus 28 sitting casualties, 50 fully equipped troops or
freight.
The
| THE KIT |
One of the
interesting vacform kits I made that brings back many happy memories of a
time before the C-130 took over is the Hastings and ‘Formaplane’ comes in
with their release of the type some decades ago. With the release of the
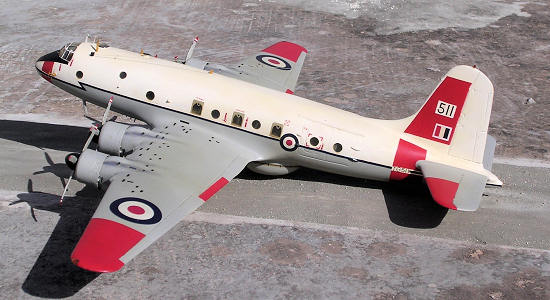 long before
they appeared in injected form. The release of the
The kit brings the roundness of fuselage and nose and tail fin contours quite effectively. At time of release the kit cost LM5 (today equivalent to EUR 11.7), with clear moldings, clear canopy transparency and a piece of plastic rod to assist building the undercarriage. The instruction has an exploded view of how the parts were to fit together; and useful 1/72 scale plans. The engine cowling and propeller hubs are accurate but have very thin section plastic that can easily get damaged particularly at the corners where the section thickness is thinnest. I do not recall having a decal one can use as sheet to complement the kit. There is a line side view on the box cover only as an indication of the type of aircraft kit inside.
| CONSTRUCTION |
Just like the
Nimrod model that I made before by same kit make, the 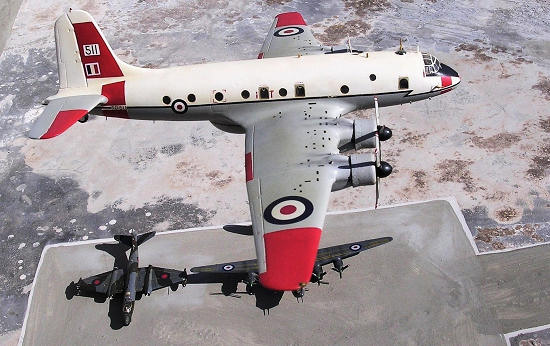 more than the rudimental 2 crew seats, instrument panel, console and control
handles. This certainly was proving not to be a kit that one could rush over
a weekend but more the type that one could make a little progress at a time
during construction.
The parts are first scribed with a sharp pointed Exacto blade and separated so that each component is then sanded down one at a time and storing the small pieces in a container to avoid getting them lost. Ailerons and rudder hinges are lumpy and needed cleaning out with a scalpel and a triangular needle file. A sheet of wet and dry, medium grade was glued to a large board using a double-sided tape. I often prefer to do the sanding down of large components such as the fuselage and wing parts in a dry procedure, thus avoiding a messy wet workbench. Whilst sanding down one needs to watch out for uneven sanding due to varying amounts of pressure at different points, and this is easy to happen with large components. Before items like wing parts are glued together I found it necessary to rescribe the surface paneling, hinge lines etc, while molding ‘pips’ are removed and their place sanded even.
Each wing half
had air intakes cut and undercarriage well cut open using a pair of
scissors. The wing parts were then checked for fit and glued together using
liquid cement but using tube cement for thick sections. Tail plane parts
were attended to and assembled making sure that the end joining section was
flat and straight, ensuring a good butt joint. The fuselage halves were
sanded to bring to correct round section checking with plan and side views
as I went along and checking also with section gauges at different stations
provided. The window apertures were cut out by drilling a small hole
followed by another using a larger diameter twist drill until filed to the
final shape using a set of round files. Windows are accurately positioned
but those containing escape hatches outlets are of the wrong shape and were
corrected using needle files. These windows are left open until the final
stage where they are filled with Kristal Klear in preference to the clear
strip of plastic that was intended to be bonded
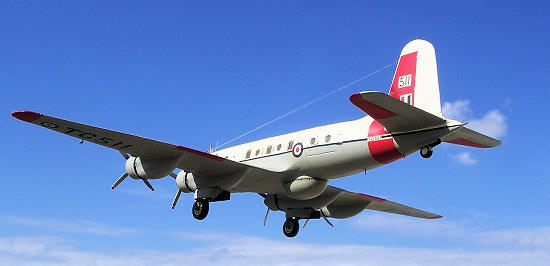 on the inside of the
fuselage in the way of windows .An astrodome opening was also cut at the
forward roof top. The interior was painted medium gray and attention was
then given to the tail wheel well, glazed ventral panel opening under nose,
and the cockpit canopy ensuring the right fit in each case. Bulkheads for
the fuselage interior were cut, trimmed and fixed in different places
inside. Wing roots recesses in form of slots were cut and plastic card
strips reinforced the slot outer sides. A tail wheel attachment point made
from scrap plastic sheet was fixed on the inside. The two fuselage halves
had the cockpit arrangement added and short tabs added to the inside of
joint to act as guides as the two halves were brought close together and
bonded. These were held together with masking tape as the cement set. Revell Plasto filler was applied to wherever there is a joining part principally at
fuselage seam, wing roots etc.
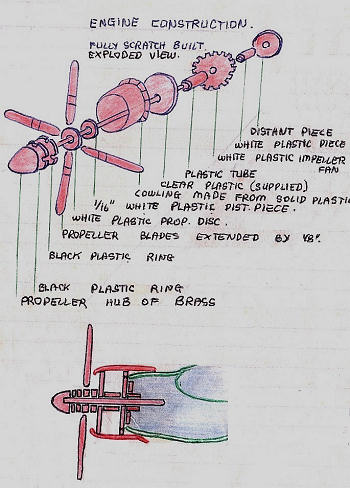 The radial engine
cowlings that come with the kit were unsuitable. They are small in diameter,
short in length and poorly produced and I replaced with four accurate ones
turned from solid Teflon. If one has not this facility one could use four
radial cowlings from an Airfix Halifax kit. Spinners are badly attenuated
and replaced with solid ones were turned from brass. The propeller blades
were undersize and were extended by 1/8 inch by inserting a central piece
made from plastic card. Since the blades had a concave back, as these were
vacform single blades, 16 in number, and was filled with putty. The final
stage involved fitting the radial engines, propeller sub assemblies depicted
in the drawing and the assembly was repeated for all 4 engines.
Undercarriage wheel wells were built out of plastic card and doors were
added. Transparencies, tail wheel, various antennae, and astrodome were
glued in place on the fuselage and at the roof. Leading edge air intakes
were carefully trimmed and added at their respective places.
Any areas
requiring more filler were attended to particularly around the canopy and
nose Perspex. I also added a belly radome as I converted my Hastings into a
T5. The radome was shaped from a solid piece of yellow pine and treated with
sanding sealer and sanded smooth. The assembled model was finally given a
coat of matt light gray so that any scratches, undercuts, or uneven surface
patches will show up and treated again with more filler. The Mk 5 also had
one less window on the fuselage. This was the first window at the front of
the fuselage, which was therefore left blank. Finally a bacon light was
added to top of tail fin and Kristal Kleer added to tail fin and wing tip
lights. A clear plastic tail cone was added from shaped stretch sprue. A
nylon thread was added to represent the wireless carried on the fuselage.
Crewmembers to 1/72 scale added detail to cockpit and at the same time gave
indication of the shear size of the Hastings aircraft.
| COLORS & MARKINGS |
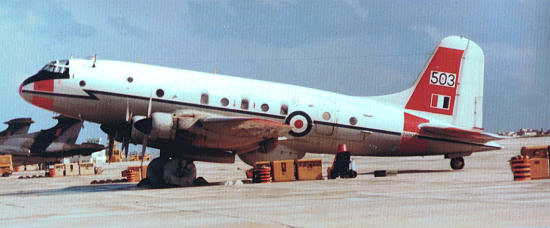 Photos of the
Hastings T5 that I took at Luqa airfield were carefully studied. These
showed the aircraft having light aircraft gray fuselage and wings with upper
fuselage in white. Areas on wings, fuselage forward and aft, fin and tail
planes were airbrushed in Humbrol Post Office red. The two main fuselage
colors being separated by a dark blue cheat line running along the length of
the fuselage. I have used decal strip from a micro scale post war RAF
insignia sheet, the fin flashes had a white border added. While Model decals
provided the serial letters and numbers under the wings and side of fuselage
aft. Roundels came from a Frog Canberra sheet. Other surface markings on
wings and fuselage came from ‘Runway’ black decal sheet making reference to
photos for their correct placements. The kit was finally given an overall
coat of semi gloss Micro varnish.
| CONCLUSIONS |
| REFERENCES |
http://en.wikipedia.org
November 2009
If you would like your product reviewed fairly and quickly, please contact the editor or see other details in the Note to Contributors.
Back to the Review Index Page 2022