| KIT #: | ? |
| PRICE: | ? |
| DECALS: | Three options |
| REVIEWER: | Carmel J. Attard |
| NOTES: | Resin kit with vacuformed canopy |

| HISTORY |
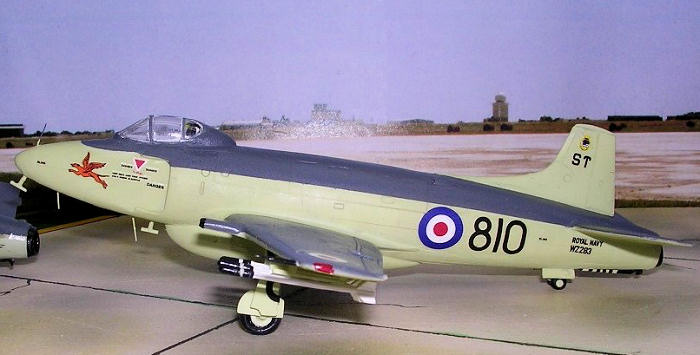
The Supermarine Attacker was the first operational jet aircraft to enter the Fleet Air Arm in squadron strength some time after the war years. It was developed from the Seafang, from which it inherits the wings and undercarriage. The first of three prototypes flew in July 1946. By that time the tail wheel landing gear was already out dated and it also led to severe airfield erosion during taxying. The second prototype flew in June 1947 and was fitted with a Martin Baker Mk1 ejection seat. During the same year it carried out a series of carrier deck landings trial and in October the British test pilot Eric Brown carried out sea trials and developed the constant power/constant angle approach that is practiced these days in landing jet aircraft in deck of carriers.
| THE KIT |
 1950s
and re-released under the Novo trade name. The CMR kit made in resin
represents the ideal Attacker in all the details at this small scale. The
kit comes with four A4 size pages in black and white and another page with a
side view in colour representing one of the colour schemes on offer. In fact
one can do any of the three Fleet Air Arm squadrons: an FB Mk1 of 800 Sq
based on HMS Eagle 1952, an FB Mk2 of 1831 Sq. RNVR based at Stretton,
| CONSTRUCTION |
The
construction of the kit begins with the removal of the thick runners from
parts like the undercarriage, ejection seat, cockpit office, jet pipe halves
etc. The rough edge of the fuselage halves also needs some smoothening. This
is a careful stage not to spoil the otherwise fine surface detail that come
on every resin part. While I emphasize on the cleverly done fine impressed
surface detail I also noticed that the fuselage were not of the same overall
length and width. The left fuselage half in my sample was 1mm shorter than
the other half and also1mm wider in sec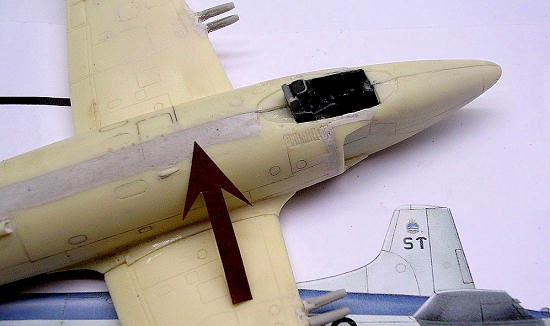 tion
at mid fuselage. This could of course be rectified however the remedial
action using putty to build up the difference in stagger will cover also
some of the surface detail and it is not a simple task to recover by
re-scraping the lost panel lines.
Also the interior engine detail consists of two long half tubes that are to be made into one whole tube and at the middle of which is what it looks like a rear turbine stage which is intended to fit half way down the tube. This component is quite oversize and definitely needs some careful reducing in diameter by filing down to fit inside. Fitting the additional separate nozzle which partly protrudes from the rear may be quite a headache until you centralize this exactly leaving the same clearance all round. Care is taken not to use too much super glue as the tendency would be to have the tiny components stuck to the finger instead. The trailing and leading edges of all wing parts appear to be of correct thickness and these parts only needs some careful cleaning up at the edges.
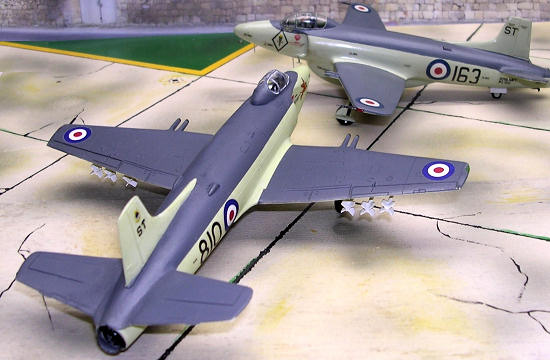
There are a pair of guns integrally cast at the leading edge of each wing. These happened to be of very odd shape instead of representing the smooth round guns of the Attacker. Reshaping by filing caused me to break the parts and I found it was much easier to make four guns from stretch sprue made to the required diameter and then cut to the correct length and fixed in place of the resin ones. I have found that once the initial stage of construction is complete the rest is more or less straightforward and careful assembly of all the components should make a good representation of the Attacker you desire to build. One also has to decide if one should fit the belly tank or the choice of rockets and bombs. Having fixed the undercarriage in position and the choice of ordinance, in the end I added all the tiny antennae and aerials on and around the fuselage.
| COLORS & MARKINGS |
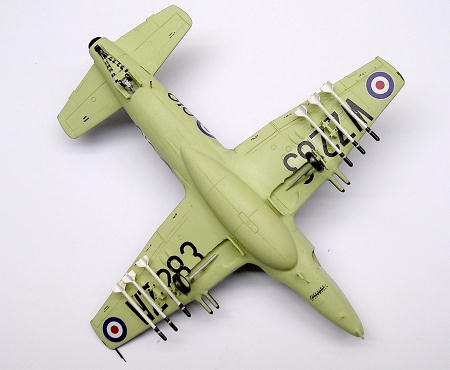 The
cockpit interior paint was done during the construction of the kit. This was
medium grey with black instrument panel. The type of vacform cockpit to go
with the version of Attacker made was cut to conform to the aircraft cockpit
area.
This was carefully fixed in place using white glue and a little superglue;
the former glue will prevent the superglue from misting the interior of the
canopy. Whereas the Pakistan AF version had no arrestor hook fitted and the
seam marking the fold of the wings was to be faired with putty and
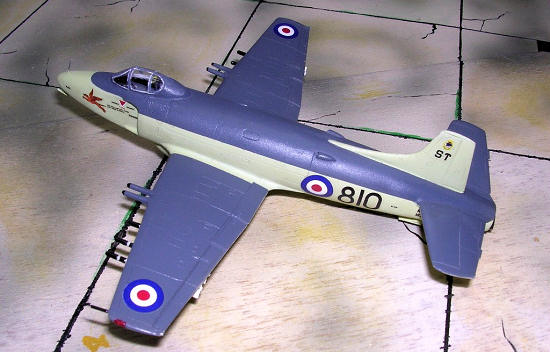
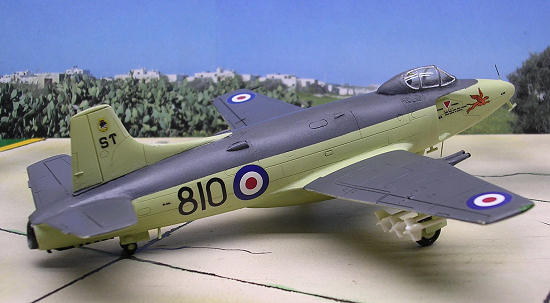
smoothened down to form one solid wing, the RN version was finished in dark
sea grey upper and duck egg blue lower and undersurfaces. The decals were of
top quality and presented with a nice selection from the Navy versions or a
Pakistan AF aircraft. .I preferred to do a RN Attacker that visited our port
and airfield, i.e. an 803 Squadron fighter bomber. This was placed next to
an early FROG kit that I had to do a lot of extra work long ago to bring to
the quality that comes with the CMR kit. The image near the beginning of the
article shows the FROG kit in the background of the CMR offering.
| CONCLUSIONS |
This adds another
Royal Navy type that made its début to the development of carrier borne Navy
jets and therefore much recommended to the modeler keen on post war combat
jets.
If you would like your product reviewed fairly and fairly quickly, please contact the editor or see other details in the Note to Contributors.