| KIT #: | ? |
| PRICE: | ZAR 164.00 |
| DECALS: | See Review |
| REVIEWER: | Mike Turnbull |
| NOTES: | Superscale decals used |
| HISTORY |
The Mirage III needs little introduction, having served with distinction in several theatres of war, over many decades. Its performance with the Israeli Air force in the 1967 Six Day war made its reputation, but it also served other nations well.
The South African Air Force (SAAF) took delivery of its first Mirage III’s in 1963. When delivered, they altered the balance of air power in Southern Africa. Prior to the arrival of the Mirages, it has been argued that the then Royal Rhodesian Air Force, with its Hawker Hunter FGA 9’s had greater firepower, albeit less aircraft, than the SAAF. When the Mirages replaced the Sabre as front line fighters, this changed.
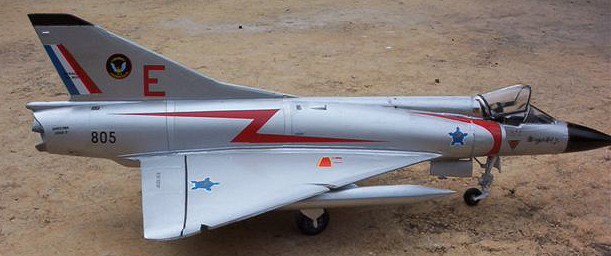
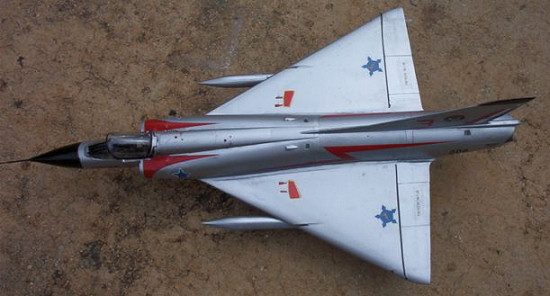
In their first years of service the Mirages of 2 Squadron “ Flying Cheetahs” sported a very sixties silver scheme with red lightning bolts. Later this disappeared and was replaced by olive and buff camouflage, then low viz. The Mirages soldier on today, reborn as Cheetahs, more than forty years after the deltas were first seen in South African skies.
| THE KIT |
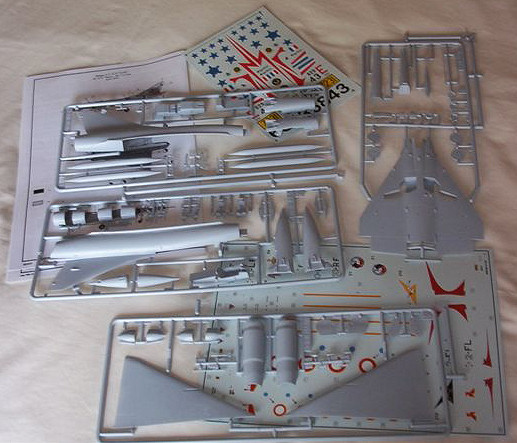 The Heller Mirage III C/B
provides the option of building a single seater IIIC or a twin seater IIIB. This
is achieved by providing separate parts for the two noses ahead of the intakes,
and different dorsal spines. The resulting fit is less than ideal, at least in
my example.
The Heller Mirage III C/B
provides the option of building a single seater IIIC or a twin seater IIIB. This
is achieved by providing separate parts for the two noses ahead of the intakes,
and different dorsal spines. The resulting fit is less than ideal, at least in
my example.
The wings come as a one piece lower wing, with the two upper wings as separate parts. This allows the delta wing’s leading edge droop to be captured rather well. Overall the panel detail is acceptable, an effort has been made to include some detail in the main wheel wells and panel lines are restrained. The cockpit, however, consists of a number of rather shapeless blobs …
The plastic is (luckily) a fairly malleable grey, the clear parts are clear and poseable. The decals provided are for French examples, and in my example so degraded as to be unusable.
| CONSTRUCTION |
Before I approach the bench on this build, in my defence:
- I built the kit in the course of two days of leave, and was determined to finish it in that time,
- And this was a test run to identify pitfalls prior to launching out into a conversion to the Cheetah C and D
Given that, and in the best traditions of the hobby, the cockpit was the first area to enjoy my attentions. The ejector seat provided would have looked fine in a barbers shop, but to my mind showed little resemblance to the real thing. A NeOmega seat was prescribed, and this filled up the pit rather satisfactorily. The completely undecorated side panels had odds and sods of photo etch added to give them some life, and the Instrument panel was treated with paint to try and bring out the rather melted moulded in detail. Considering the small size of the cockpit, this proved adequate.
 Next was dry runs on the
fuselage and wings. The first problem that evidenced itself was that the port
upper wing was warped or mis cast, leaving a good three mm step. Also readily
evident was that the tail fin had a distinct lean to starboard. Repeated
applications of hot water and patience rectified the fin, but no amount of
effort could totally eradicate the step on the wing. The fuselage is a flimsy
assembly at this stage of the build, having a huge hole on the upper surfaces
where the dorsal fairings are to go, and an equally large one where the wings
fit in. The only contact points are around the tail/jet outlet, and two thin
tabs behind where the nose unit will fit. Exercise caution and patience!
Next was dry runs on the
fuselage and wings. The first problem that evidenced itself was that the port
upper wing was warped or mis cast, leaving a good three mm step. Also readily
evident was that the tail fin had a distinct lean to starboard. Repeated
applications of hot water and patience rectified the fin, but no amount of
effort could totally eradicate the step on the wing. The fuselage is a flimsy
assembly at this stage of the build, having a huge hole on the upper surfaces
where the dorsal fairings are to go, and an equally large one where the wings
fit in. The only contact points are around the tail/jet outlet, and two thin
tabs behind where the nose unit will fit. Exercise caution and patience!
Having done the basic assembly of the fuselage and wings, using shims to get the long join down the wings partially sorted, remembering to insert the rudimentary jet pipe provided, the assembled nose unit is next attached to the main fuselage. This is quite a nifty assembly, and even I managed to get it right first time. At this point the trusty putty and sandpaper come out, to remedy the very obvious step alluded to previously. After a considerable amount of effort, the end result is barely passable. (My theory – Birdstrike on the leading edge …) Rescribe as required, and move on to the intake assembly.
Note to self – there is a difference between the C intakes and the B intakes. Having removed the B intakes, cleaned up the mess and attached the required C intakes, more filling, sanding and scribing around the intakes is called for.
Once this is done, I added the dorsal spine and ventral strake, various intakes, and, you guessed it, filled, sanded and scribed …..
Over the hump now, undercarriage fitting follows, doors, aerials etc. Dust off, mask the canopy and prime.
| COLORS & MARKINGS |
 Painting was a simple two
tone silver scheme, black Radome, white undercarriage legs and wells. Mirage 805
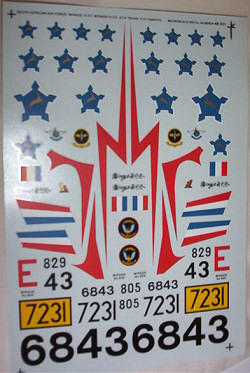
of 2 Squadron, The Flying Cheetahs, Waterkloof Air Force Base, 1965. The decals
are a superb set given to me by a friend, produced by Super Scale. Despite being
two decades old, and fairly large in places, they went on like a dream. The
exception to this was the intake flashes, and this is a result of the mixed up
intakes mentioned earlier.
Painting was a simple two
tone silver scheme, black Radome, white undercarriage legs and wells. Mirage 805
of 2 Squadron, The Flying Cheetahs, Waterkloof Air Force Base, 1965. The decals
are a superb set given to me by a friend, produced by Super Scale. Despite being
two decades old, and fairly large in places, they went on like a dream. The
exception to this was the intake flashes, and this is a result of the mixed up
intakes mentioned earlier.
| CONCLUSIONS |
The end result is a happy birthday build – not a competition model, not even particularly good, but striking. The kit is dated and shows some truly Gallic engineering, the decals superb, and the end product now graces my display cabinet as the first of what will, I plan, be a long line of South African Deltas. This was a fun build, and with more time and care, a good representation of the most beautiful jet fighter ever is within the reach of most builders.
| REFERENCES |
My home library and personal observations
May 2006
Copyright ModelingMadness.com. All rights reserved. No reproduction in part or in whole without express permission from the editor.
If you would like your product reviewed fairly and quickly, please contact me or see other details in the Note to Contributors.