Wingman Models 1/48 Fouga Magister
| KIT #: | WMK 48007 |
| PRICE: | £59-00 |
| DECALS: | Ten options |
| REVIEWER: | Frank Reynolds |
| NOTES: | Two kits, resin and p.e. for one |
| HISTORY |
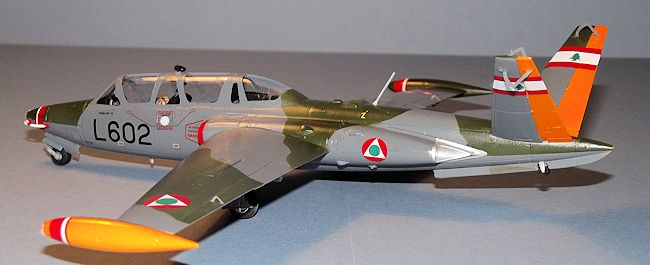
 Its distinctive shape became well
known to European air show fans when operated by the Patrouille de France
aerobatic team and Belgium’s Diables Rouge. 397 aircraft were built for
France. Heinkel of Germany undertook a production run for the Luftwaffe,
totalling 188 aircraft. A long term user was Israel who undertook licence
production and the Magister was used as a light attack type in the 1967 Six
Day War, while an upgraded version with a glass cockpit, known as the Tzukit,
was introduced in the 1980 and continued in service into the 21st
Century. Finland obtained a production licence and after receiving 18
aircraft from French production in 1958, built a further 62 at the Valmet
factory and the fleet served until 1988.
Its distinctive shape became well
known to European air show fans when operated by the Patrouille de France
aerobatic team and Belgium’s Diables Rouge. 397 aircraft were built for
France. Heinkel of Germany undertook a production run for the Luftwaffe,
totalling 188 aircraft. A long term user was Israel who undertook licence
production and the Magister was used as a light attack type in the 1967 Six
Day War, while an upgraded version with a glass cockpit, known as the Tzukit,
was introduced in the 1980 and continued in service into the 21st
Century. Finland obtained a production licence and after receiving 18
aircraft from French production in 1958, built a further 62 at the Valmet
factory and the fleet served until 1988.
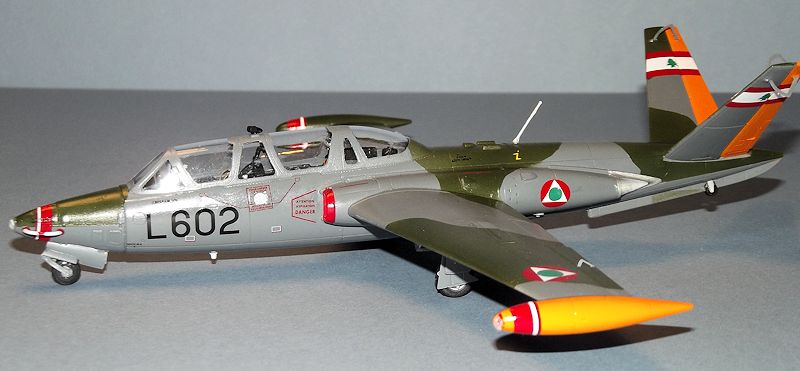
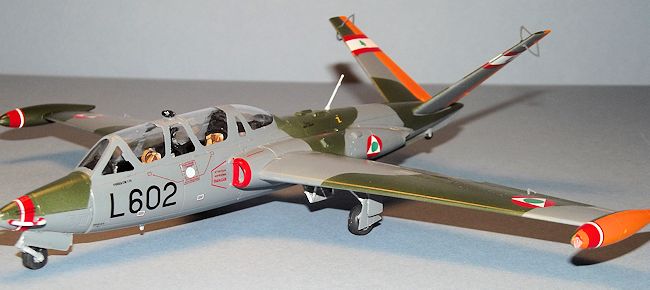
The Magister ceased production in 1967 after nearly 1000 aircraft were constructed and the type served with 25 air forces spread across Africa, Asia, Europe, the Middle East and South America. One user was Lebanon, which received five ex-Luftwaffe aircraft in 1966 and a further five in 1972.
| THE KIT |
The presentation of this package is first class.
It is supplied in a sturdy top opening box with a high gloss finish
and each face of the box top has a full colour photograph of a Magister.
This is as much a project package as a kit, for this particular boxing is
dedicated to the Fouga Magisters of the Israeli Air Force with one bonus
option for a Lebanon Air Force example. It is advertised as a limited
edition of 500; with Wingman also releasing a similar package for Luftwaffe
and Irish Magisters, also limited to 500.
The plastic parts originate from a Kinetic kit and each parts frame is
duplicated in the package to provide two full kits as standard. The mouldings
look good, with subtle recessed detail and each kit has three
 frames of grey
plastic and one of clear. There is a mass of small detail parts for external
bulges and intakes and gear bays. Two types of canopy are provided – a long one
piece unit for a closed version and a five-piece assembly for open cockpits.
frames of grey
plastic and one of clear. There is a mass of small detail parts for external
bulges and intakes and gear bays. Two types of canopy are provided – a long one
piece unit for a closed version and a five-piece assembly for open cockpits.
The instructions consist of two booklets of stapled A4 sheets in full colour.
The first is a six page section of assembly instructions consisting of
parts charts and five pages of exploded views covering 21 stages of
construction.
The second booklet has 14 pages of information on the ten colour finishes on offer, nine of them from the IDF/AF at various times of the plane's operation and one in Lebanese markings.
There are two principal decal sheets to cover all of these options, to include
comprehensive stencilling and airframe numbers, full dayglo striping, wing and
fuselage striping for the aerobatic variant, instrument panels, nose anti-glare
panel and nose/wing tank striping for the Lebanon version. The decals are by
Cartograf, with good detail and dense colour.
One set of paint masks is included, for canopy and wheels.
There is a separate colour guide with all colour call outs referenced to RAL
paint numbers and two pages of detailed drawings for placement of the stencil
decals, then fully seven pages of photographs, mostly in colour, of the Fouga in
Israeli service, including some very useful close up and cockpit shots. There is
a slight limitation in the colour information, in that a minority of the choices
have only one fuselage side view.
The kit includes a comprehensive set of upgrade parts, but only sufficient for
one of the kits in the box. This includes three brass frets of detail parts for
the cockpit interior, speed brakes and mass balances. One of the small frets is
duplicated since the air brake fingers and mass balances are not provided in
Kinetic’s original plastic. The accompanying resin parts are a delight. Crisply
cast in dark grey, they provide a whole new cockpit interior, featuring cables
and wires to the rear of the instrument panel, and replacement seast with belts.
A pair of new upper wing tank sections is provided to build the Israeli version
and the undercarriage wheels are also duplicated in resin.
 The comprehensive instructions are entirely geared to the upgraded version of
the kit, with many components on the parts chart flagged up as “not for use”,
yet during the build there are options that need to
be spotted in advance, particularly in terms of armament fit and external
aerials.
The comprehensive instructions are entirely geared to the upgraded version of
the kit, with many components on the parts chart flagged up as “not for use”,
yet during the build there are options that need to
be spotted in advance, particularly in terms of armament fit and external
aerials.
I thought that there might be a problem with the absence of instructions for the
plastic-only build but a quick check on Wingman Models website revealed a link
to Kinetic’s original instruction that can be downloaded as a pdf. This yields
another ten pages of instructions. The Wingman website mentions that there is a
further upgrade kit available for the Tzukit variant – an upgrade for an
upgraded kit, if you like.
For this build, I chose to do the basic kit, without the extensive resin and
etch upgrades, since this would provide a shallower learning curve.
| CONSTRUCTION |
This was part of my Telford Treat for 2014. I made my annual pilgrimage to
Scale Model World, the annual two-day extravaganza of IPMS UK. I brought
away a couple of short run kits but I like to treat myself to a deluxe
modelling package and this certainly fits the part. I was able to buy direct
from Wingman models stand and I find that this enhances the experience.
With two kits in the box, the simpler one and the upgraded version with all the
etch and resin, I elected for the all-plastic version for this build, as this
provides a shallower learning curve and the version with all the bells and
whistles can wait for another day
 This kit is so well packaged it is almost a shame to break open the bags and to
start cutting parts from the frames. I noticed that the “C” parts frames, which
provide most of the small fiddly bits, showed lines of flash and shallow ridges
around many of the parts. This was not excessive and fairly easily dealt with
using a fresh scalpel blade, but it did make construction more laborious. The
instructions, both from Kinetic and Wingman, repay careful study and double
checking everything before committing glue to plastic, since there are some
errors where part numbers are transposed and in the case of the nose leg
assembly, the drawings appear to be a mirror image of the plastic parts.
This kit is so well packaged it is almost a shame to break open the bags and to
start cutting parts from the frames. I noticed that the “C” parts frames, which
provide most of the small fiddly bits, showed lines of flash and shallow ridges
around many of the parts. This was not excessive and fairly easily dealt with
using a fresh scalpel blade, but it did make construction more laborious. The
instructions, both from Kinetic and Wingman, repay careful study and double
checking everything before committing glue to plastic, since there are some
errors where part numbers are transposed and in the case of the nose leg
assembly, the drawings appear to be a mirror image of the plastic parts.
I try to find a sub assembly for an easy start and the wings were an obvious
choice. They have a conventional break down of parts with left and right wings
in upper and lower panels, with the wheel well detail moulded into the upper
half. The tip tanks are moulded integrally with the wings, but flaps and
ailerons are separate and small tabs have to be trimmed away according to
whether you choose to fix them extended or retracted. The small finger-type
spoilers on the upper and lower wing surfaces have alternative inserts for
retracted or extended options. I chose to fix all of the control surfaces closed
up and the parts almost clicked together to provide the basic wing structures.
The kit has separate ducts for the intake/exhaust system, split lengthways and
before their halves are joined two tiny compressor faces are trapped deep
inside, so deep that a boroscope would be needed to see them inside the narrow
ducting. The parts were pre-painted in aluminium silver before assembly. The
long ducts are threaded inside each fuselage half through the inlet areas and
secured on pins, before the front and rear tapering sections of the engine
fairings are added around the inlets and exhausts. The parts were not a perfect
fit – probably builder error – and I found it easier to cut about 3mm out of the
centre of the ducting to enable all of the parts to interlock satisfactorily.
The missing area is buried deep within the fuselage and cannot be seen, except
with the mythical boroscope. The intake lips were left off so they could be
painted separately and added later.
Construction now moved to the interior – mostly painted Black. There is a full
length cockpit tub with raised side wall detail and a rear bulkhead. The two
control sticks and pairs of rudder pedals were glued in place. The non-ejector
seats were detailed according to the colour photos in the instruction sheet and
were painted in Tamiya XF-15 Flesh with red- brown seat cushions.
The seat belts came from an Eduard/Cyber Hobby set of fabric belts with
etch buckles, originally intended for a 1:32 Bf109, but they
 looked the part and were fixed in place with superglue. When dry the
seats were given a coat of Citadel Sepia wash to give them a used look. The
seats were added to the tub, along with the two instrument panels which are
finished with decals from the kit’s sheet. Finally I added the pair of oxygen
bottles that sit behind the front seat, painting them silver.
looked the part and were fixed in place with superglue. When dry the
seats were given a coat of Citadel Sepia wash to give them a used look. The
seats were added to the tub, along with the two instrument panels which are
finished with decals from the kit’s sheet. Finally I added the pair of oxygen
bottles that sit behind the front seat, painting them silver.
Before the fuselage halves were joined I cut plastic card to form an extension
to the rear bulkhead, closing off the rear of the void below the cockpit tub and
creating a compartment for a nose weight. The cockpit side walls locate the tub
into stepped grooves in each fuselage half and they were a tight fit, requiring
a number of dry runs and adjustment before the fuselage halves were glued
together, trapping the tub in place. When dry, the fuselage halves were seam
filled and smoothed before proceeding further, in order to avoid damaging any of
the small add-ons during the cleaning up process.
The small details proved to be something of a challenge, consisting of a series
of small scoops and acorn fairings clustered around the upper and lower curved
surfaces of the engines. Small parts like this, with compound curves, I find are
near-impossible to pick up with tweezers and after having consigned a couple of
them to the Parts Eating Carpet, I picked them up by impaling them on the tip of
a fresh scalpel blade and then holding them against the surface, applying a tiny
drop of liquid cement, then removing the scalpel with a twisting motion. Any
tiny scalpel-induced dings in the parts can be covered over at the paint priming
stage.
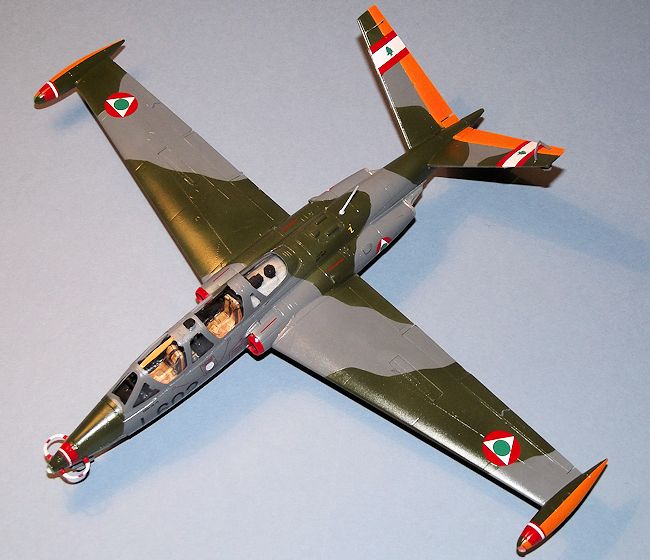
The pre-assembled wings were now glued onto the fuselage sides and the kit has
an unusual joining method, the wings having two spar stubs that slot into
vertical slots in the fuselage, mimicking the full size method of joining. The
wings have chamfered edges to the joining faces to ensure a smooth fit against
the compound curve of the fuselage – a nicely engineered feature. The wings were
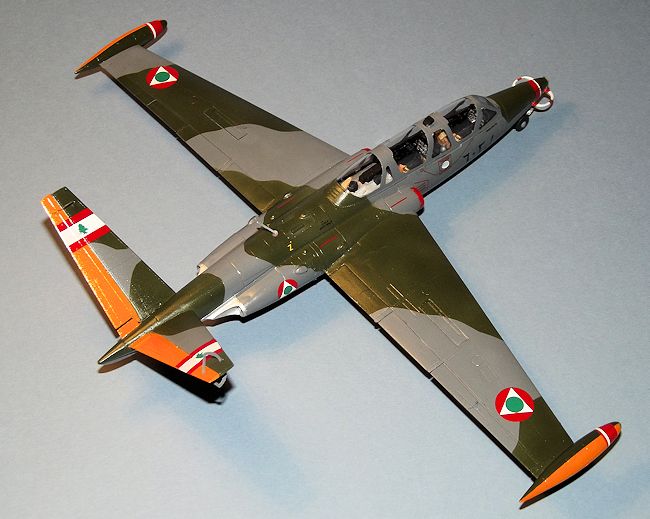
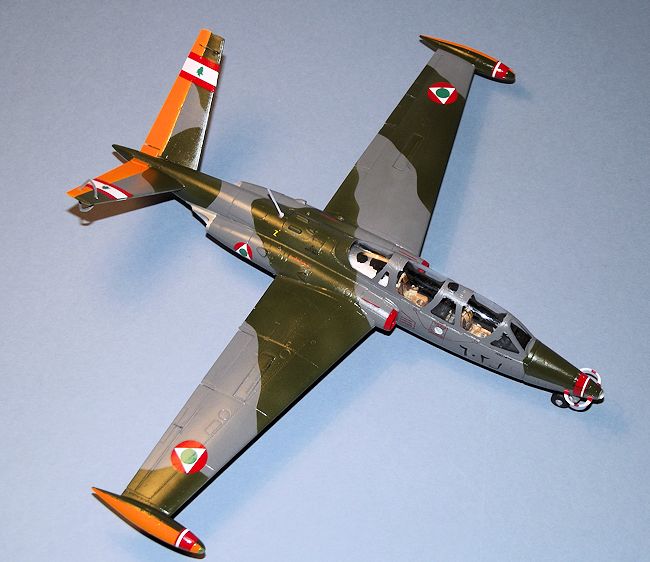
secured with liquid cement run into the joints. Each side of the V-tail consists
of upper and lower panels with a separate one piece ruddervator and these fitted
positively into small recessed boxes in the fuselage sides to form a strong
joint.
A small faring closes off
the intersection of the V-tail and the tip of the rear fuselage.
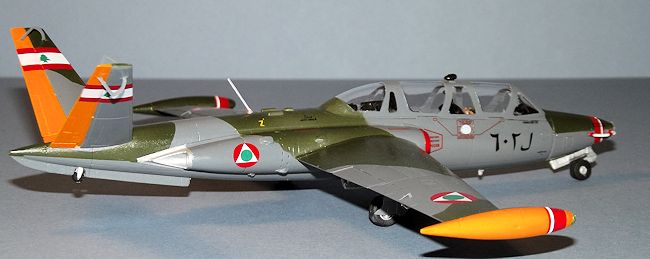
Another sub-assembly is the nose section forward of the windscreen, consisting
of 15 parts. The two piece nose leg is supported by a tubular space frame
structure that is fixed into a bulkhead and this assembly is trapped between the
nose halves, leaving a potentially fragile nose leg poking out throughout the
rest of the build. Optional nose halves are provided, according to whether nose
guns are to be
 installed – the Lebanese version is unarmed. A saddleback fairing
to the top of the nose can be left off to reveal the complex nose interior.
installed – the Lebanese version is unarmed. A saddleback fairing
to the top of the nose can be left off to reveal the complex nose interior.
It was time to add nose weight, using lead shot inserted through the open nose
and into the cockpit sub-floor area and I found 15 grams to be enough, so the
weights box was closed off with a small panel of plastic card and the nose
assembly glued in place.
The basic airframe was seam sealed and any obvious dings and scratches filled
with Revell Plasto filler. The canopy was masked up using the pre-cut yellow
tape masks provided with the kit, then, not forgetting to add the periscope for
the rear cockpit, the canopy was glued in place. This was a good time to revisit
every stage of the instruction sheet and carry out an audit to see if there were
any other non-fragile parts that needed to be glued on before the painting
stage.
| COLORS & MARKINGS |
 Wingman provides a separate comprehensive decal sheet for the Lebanese version
and although the decals seemed quite thick, with patience, and the application
of two or three coats of Micro Sol and Micro Set, they settled down well.
The striping to the nose and tip tanks, applied to compound curved
surfaces, needed extra care. The decals were sealed with a final brushed coat of
Future/Klear, which I find gives a reasonable semi-gloss finish applicable to a
jet aircraft.
Wingman provides a separate comprehensive decal sheet for the Lebanese version
and although the decals seemed quite thick, with patience, and the application
of two or three coats of Micro Sol and Micro Set, they settled down well.
The striping to the nose and tip tanks, applied to compound curved
surfaces, needed extra care. The decals were sealed with a final brushed coat of
Future/Klear, which I find gives a reasonable semi-gloss finish applicable to a
jet aircraft.
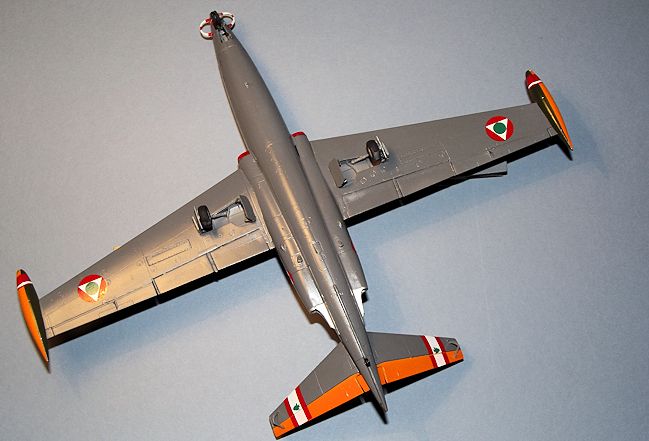
The undercarriage was added, starting with the second re-gluing of the nose leg, which had broken off as the result of mishandling during the main build. The gear is satisfyingly detailed, especially since the wheel centres are separate from the tyres, making painting easier. The main gear legs have a trident arrangement of small struts at the top, making for a strong and positive location in the wheel wells. The doors are commendably thin and the main doors have small hook-type hinges that make their installation simple. All that was needed now was check around the airframe to deal with the navigation lights and small aerials, then to superglue the etch parts for the ruddervator and trim tab linkages.
| CONCLUSIONS |
 handled with care and some of the smaller parts are difficult to clean
up where mould lines occur. The instructions require careful study and
pre-planning, more so in the case of the Kinetic instructions than Wingman, but
the exploded views are more of a guide to the relationship between groups of
parts than they are sequential assembly instructions. Few builders would expect,
for example, to add aerials to the fuselage halves before the wing and tail
assemblies have been glued on.
handled with care and some of the smaller parts are difficult to clean
up where mould lines occur. The instructions require careful study and
pre-planning, more so in the case of the Kinetic instructions than Wingman, but
the exploded views are more of a guide to the relationship between groups of
parts than they are sequential assembly instructions. Few builders would expect,
for example, to add aerials to the fuselage halves before the wing and tail
assemblies have been glued on.
This kit is
a challenge in planning, but less so in execution, It is an education for the
fact that comprehensive decals and colour information are provided and it was a
pleasure to build. Probably more suited to an experienced modeler, but
recommended. It is a uniquely shaped aircraft and an unusual subject for
display.
Back to the Review Index Page 2024