
Heller 1/72 Fouga CM.170 Magister
| KIT #: | 80220 |
| PRICE: | $ |
| DECALS: | Two options |
| REVIEWER: | Nicolai Plesberg |
| NOTES: | Heller Humbrol boxing from late 1980s |
| HISTORY |
The Fouga Magister was the first
economical jet aircraft in the world, which was capable of training a pilot
from the absolute basic flying skills to the advanced combat training
usually taking place in more advanced combat trainers. Designed by Robert
Castello and Pierre Mauboussin the Magister flew for the first time on July
23 1952. Some more development and experiments were necessary until it could
enter service with the Armée de l’Air, the French Air Force, in February
1956. Apart from France the Magister also served in several foreign air
forces; the most significant being Bundesluftwaffe in West Germany. They
ordered 250 Magisters – the largest order outside France. 62 were delivered
from France and the remaining 188 were li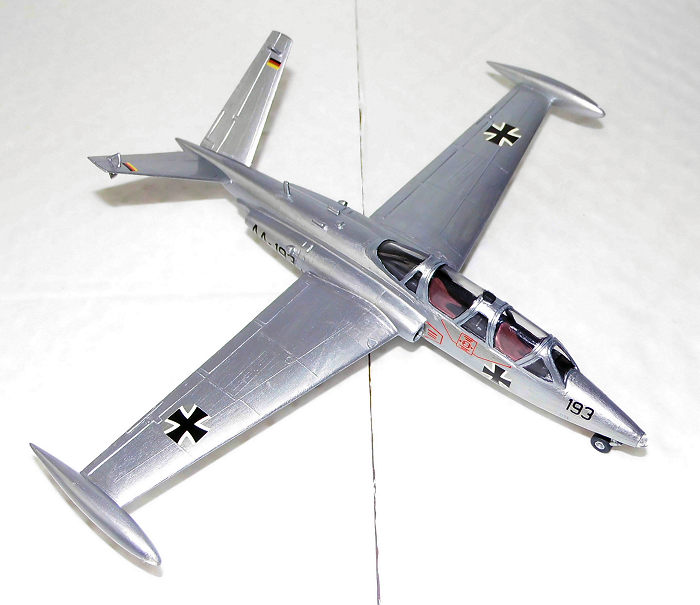 cence built by a consortium
especially set up for the task: Flugzeug Aviation Süd, which was a
co-operation between Heinkel and Messerschmitt. Other significant users were
Finland, Israel and Belgium. In Finland 18 aircraft were delivered from
France in 1958-59, while Valmet license built another 62 aircraft. They
served until 1988 as they were replaced by the BAe Hawk. In Israel the
Magister was license built by IAI under the local name of Tzukit. Although
they primarily were used for training, the Israelis also used them in combat
during the Six Day War as a close support aircraft, attacking targets on the
Egyptian front. Later they engaged Jordanian armor on the West Bank.
cence built by a consortium
especially set up for the task: Flugzeug Aviation Süd, which was a
co-operation between Heinkel and Messerschmitt. Other significant users were
Finland, Israel and Belgium. In Finland 18 aircraft were delivered from
France in 1958-59, while Valmet license built another 62 aircraft. They
served until 1988 as they were replaced by the BAe Hawk. In Israel the
Magister was license built by IAI under the local name of Tzukit. Although
they primarily were used for training, the Israelis also used them in combat
during the Six Day War as a close support aircraft, attacking targets on the
Egyptian front. Later they engaged Jordanian armor on the West Bank.
Belgium originally ordered 45 Magisters, but these were supplanted by five ex-German aircraft. The aerobatic team, The Red Devils, used Magisters for a number of years as display aircraft. A small number of Magisters remained in service, as flight maintenance aircraft for senior officers until September 2007 – the Belgian Air Force was the last country using the Magister for full military duty.
Other versions were also developed and produced – the most significant being the navalized variant, the CM 175 Zéphyr, with strengthened landing gear, catapult attachments, arrestor hook and sliding canopies. 30 were built and delivered to Aéronavale, the French Navy. Further production and development of the Magister ceased in France in 1962, but licence manufacture continued – in Finland up to 1967. The Magister served with the French Air Force until replaced by the Alpha Jet – the display team, Patrouille de France, flew with the Magister until the Alpha Jet replaced it, in that role as well, in 1981.
Today several Magisters fly as warbirds around in the world.
| THE KIT |
 The Heller kit stems from the mid
1970s so it sports the features of that time; raised panel lines, a pretty nice
landing gear, interior and diverse details in shape of antennas, intake scoops
and a tiny tail wheel. It also happens to be one of those kits that are actually
spot on to the original, something that was not assured in those days! The
contemporary Airfix kit is said to be equal to the Heller kit, but I once read a
very thorough comparison between the two kits and the Heller kit had a slight
lead over the Airfix kit.
The Heller kit stems from the mid
1970s so it sports the features of that time; raised panel lines, a pretty nice
landing gear, interior and diverse details in shape of antennas, intake scoops
and a tiny tail wheel. It also happens to be one of those kits that are actually
spot on to the original, something that was not assured in those days! The
contemporary Airfix kit is said to be equal to the Heller kit, but I once read a
very thorough comparison between the two kits and the Heller kit had a slight
lead over the Airfix kit.
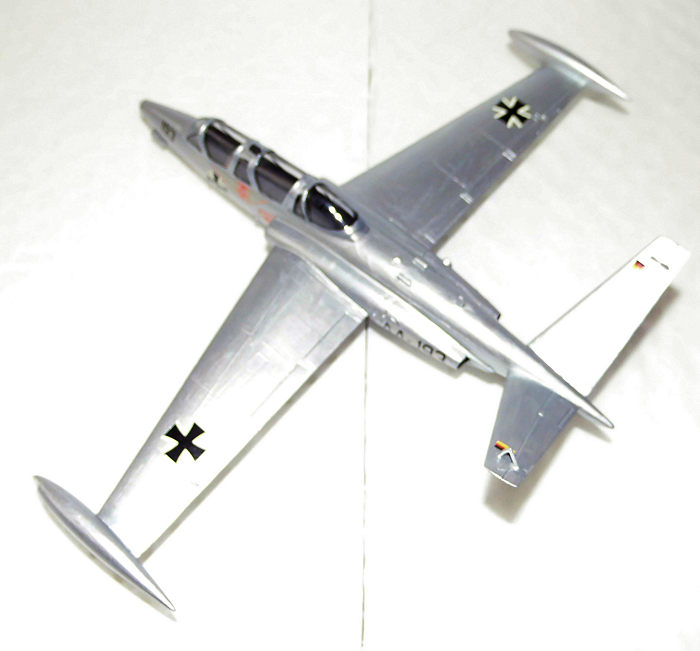
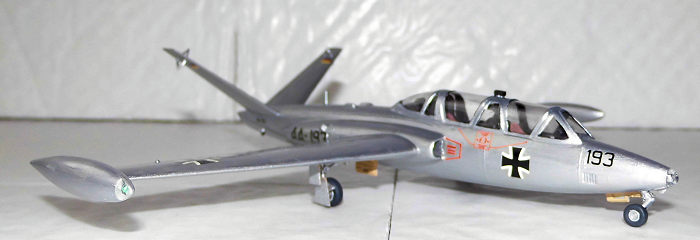
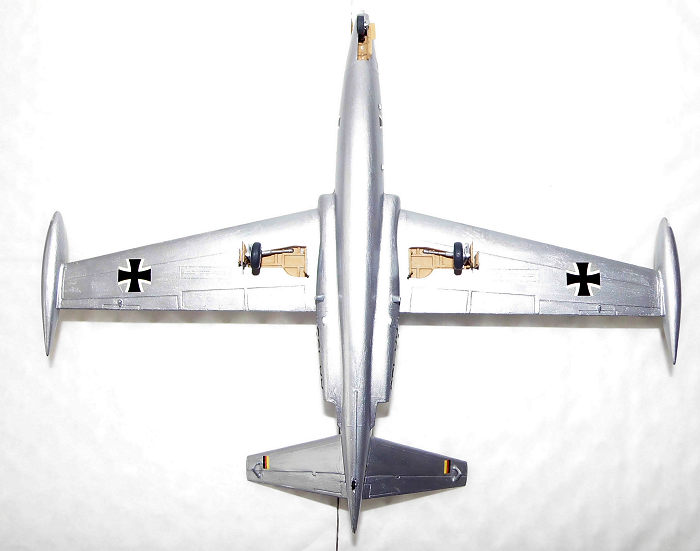
Anyway the kit consists of 62 parts molded in a light grey plastic and four parts in clear. Alternate wing tip tanks are included, as are several parts specific to the French version. Speaking of versions there are two decal options, one French, of the Patrouille de France in 1978 and a German from WS 50 (Waffen Schule 50 – Weapons School 50) in 1966. The decals are quite nice, but with slight register issues, especially with the German flags are evident, but it seems to be acceptable.
| CONSTRUCTION |
Construction began by gluing wings, tip tanks and partially the interior bits together – only the seats were omitted because they should be painted in another color. Some ejector pin towers in the cockpit / nose gear bay area were dealt with before the separating bulkhead between the cockpit and nose gear bay was glued in the right fuselage half. The seats were painted brick red while the remaining interior went flat black together with the interior of the exhausts and the position light bowls in the tip tanks went silver. Some seam treatment of wings and tip tanks was next but pretty quickly done because it wasn’t much anyway. When seats and interior had dried they were glued together finishing off that subassembly. Some locating holes in the nose on both fuselage halves were filled with stretched sprue bits as they were intended for the pulling handles for the French variant, but I had decided to build the German version, so those holes were not needed.
 The next operation consisted in
measuring and gluing nose weight in place to avoid tail-sitting. Even though the
space isn’t much, I succeeded in getting enough weight fitted. The lump between
the two cockpits is, fortunately, hollow and a decent deal of lead was stuffed
in there. Some thin pressed wine bottle lead foil was squeezed under the front
cockpit and this provided the rest, so the model could stand on the nose gear.
The gear bays plus inner sides of doors were painted sand color (Humbrol 63)
just as advised the instructions.
The next operation consisted in
measuring and gluing nose weight in place to avoid tail-sitting. Even though the
space isn’t much, I succeeded in getting enough weight fitted. The lump between
the two cockpits is, fortunately, hollow and a decent deal of lead was stuffed
in there. Some thin pressed wine bottle lead foil was squeezed under the front
cockpit and this provided the rest, so the model could stand on the nose gear.
The gear bays plus inner sides of doors were painted sand color (Humbrol 63)
just as advised the instructions.
The position lights were marked
their respective colors then the glass attached on top of them using clear
gloss. As the glass looked a little off, I rubbed them carefully with some
toothpaste them cleaning the toothpaste off and they looked much better! Then
the tip tanks were glued to the wings. Some slight fiddling was necessary to get
the interior fit in the right fuselage half then it was glued firmly in place –
as usually securing alignment by fitting the left fuselage half with adhesive
tape. The gear legs plus wheel hubs and the outer side of doors were painted
silver, needing a couple of coats to be perfect, but that’s usually the case
anyway. Some slight sanding and gluefilling was all that was needed to eliminate
the seams between the wings and tip tanks. Some touch up was done on the
interiors / exhausts before joining the fuselage halves. The seam needed, as
always, some attention from filler and sanding during a couple of sessions, but
when done the intake backing plates were glued in place and then painted silver.
A few scratches in the canopy were eliminated with toothpaste and after cleaning
the canopy with soap and water plus d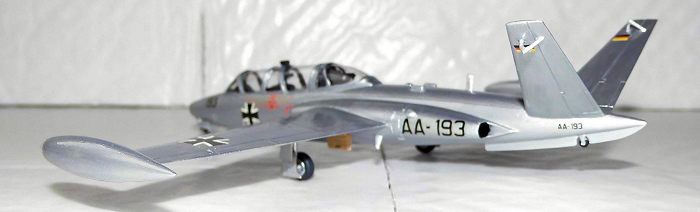 rying it with the anti-static cloth, the
inner part of the instructor’s periscope was carefully glued in place – after
some drying time the outer section was attached. It was then painted flat black
together with the rear of the intakes, to give illusion of depth, as well as the
remaining cockpit surroundings. After some drying time the canopy was carefully
attached with clear gloss. The outer parts of intakes were also attached at this
stage. The unavoidable gaps along the canopy edge were filled with clear gloss
and when set carefully sanded with a light hand to even out the seam. When that
had been done the wings and tail planes were glued to the fuselage.
rying it with the anti-static cloth, the
inner part of the instructor’s periscope was carefully glued in place – after
some drying time the outer section was attached. It was then painted flat black
together with the rear of the intakes, to give illusion of depth, as well as the
remaining cockpit surroundings. After some drying time the canopy was carefully
attached with clear gloss. The outer parts of intakes were also attached at this
stage. The unavoidable gaps along the canopy edge were filled with clear gloss
and when set carefully sanded with a light hand to even out the seam. When that
had been done the wings and tail planes were glued to the fuselage.
The seams were quite modest; only some gluefilling and sanding was required; for the intake seams a little filler had to be employed to get things smoothed properly out. The tires were then painted tire black, gear assembled and attached to the model with slow drying CA glue. In fact all the remaining details, except for the gear doors were glued in place on the airframe and after the last remaining issues were dealt with, the model was cleaned before it went to the paint shop.
| COLORS & MARKINGS |
 First the canopy framing,
including the outer section of the periscope, was painted flat black then the
entire airframe was painted silver. It took three coats before the coverage was
perfect. After the gloss coat the decals went on. They performed well even
though a slight yellowing of the carrier film could be detected. The
registstration was about ok, except the small German flags for the fins; as
they’re quite small it’s hardly noticeable anyway. Upon completing decaling the
gear doors were glued in place; some touch up with the sand color plus the
silver was necessary. Also a slight touch up with flat black became necessary,
but as soon as these things had set the whole airframe was given a gloss coat to
seal in the decals. During this process the landing light in the nose was
attached with the gloss varnish while I worked with it anyway. After the last
brush stroke the Magister was finished.
First the canopy framing,
including the outer section of the periscope, was painted flat black then the
entire airframe was painted silver. It took three coats before the coverage was
perfect. After the gloss coat the decals went on. They performed well even
though a slight yellowing of the carrier film could be detected. The
registstration was about ok, except the small German flags for the fins; as
they’re quite small it’s hardly noticeable anyway. Upon completing decaling the
gear doors were glued in place; some touch up with the sand color plus the
silver was necessary. Also a slight touch up with flat black became necessary,
but as soon as these things had set the whole airframe was given a gloss coat to
seal in the decals. During this process the landing light in the nose was
attached with the gloss varnish while I worked with it anyway. After the last
brush stroke the Magister was finished.
| CONCLUSIONS |
This neat little kit builds nicely with no surprises and can be done by everyone who wants a Magister in their collection. It’s also quite small so you can build a lot of them if you wish – for example the whole team of Patrouille de France without taking too much space of your showcase.
| REFERENCES |
Internet surfing.
Nicolai Plesberg
27 April 2020 Copyright ModelingMadness.com If you would like your product reviewed fairly and fairly quickly, please contact the editor or see other details in the
Note to
Contributors. Back to the Main Page
Back to the Review
Index Page
Back to the Previews Index Page