|
KIT # |
72-012 |
|
PRICE: |
$12.95 |
|
DECALS: |
Two aircraft |
|
REVIEW : |
Mark Fordham |
|
NOTES: |
Limited run kit |
|
HISTORY |
The first (and only) squadron to receive the FJ-1 Fury was VF-5A based at NAS North Island near San Diego, California. The squadron began an exhaustive familiarization program, including landings aboard a simulated aircraft carrier deck. The first landing of a Fury on an actual carrier took place on March 16, 1948, when Commander Pete Aurand, CO of VF-5A, landed aboard the USS Boxer. He was immediately followed by his executive officer, Lt. Cdr. Robert Elder. Both officers then took off under their own power, landed again, then took off a second time with the aid of a catapult. Since jets accelerate relatively slowly at low speeds, a longer deck run was necessary and it was decided to adopt catapulting as the standard carrier jet launching procedure.
 The pilots of VF-5A were
fairly happy about the performance of the FJ-1. The used their FJ-1s to win the
Bendix Trophy in 1948, beating USAF F-80 Shooting Stars in a cross-country race.
However, VF-5A pilots did note that the performance of the FJ-1 was fairly poor
when flying at its maximum gross weight and that the plane was uncomfortable to
fly because of a lack of pressurization and temperature control. There were also
problems with the wingtip tanks. It turned out that the tanks were not
compatible with the thin wing, and North American was forced to redesign them.
However, the problem was never entirely cured.
The pilots of VF-5A were
fairly happy about the performance of the FJ-1. The used their FJ-1s to win the
Bendix Trophy in 1948, beating USAF F-80 Shooting Stars in a cross-country race.
However, VF-5A pilots did note that the performance of the FJ-1 was fairly poor
when flying at its maximum gross weight and that the plane was uncomfortable to
fly because of a lack of pressurization and temperature control. There were also
problems with the wingtip tanks. It turned out that the tanks were not
compatible with the thin wing, and North American was forced to redesign them.
However, the problem was never entirely cured.
VF-5A was renamed VF-51 in August 1948. It operated the FJ-1 until July of 1949, when the squadron traded in its Furies for Grumman F9F-2 Panthers. Their FJ-1s were then transferred to the US Navy Reserve, where they served as transition trainers for pilots moving onto the McDonnell F2H Banshee or to the Grumman F9F Panther.
|
THE KIT |
 Well here I am again sitting
in front of a Siga box looking at the nice painting on the box
top
and quietly gathering large quantities of filler in preparation of this kit, but
wait! This
one looks like it is streets ahead of the Siga La 9 reviewed a little while
back.
Well here I am again sitting
in front of a Siga box looking at the nice painting on the box
top
and quietly gathering large quantities of filler in preparation of this kit, but
wait! This
one looks like it is streets ahead of the Siga La 9 reviewed a little while
back.
You get two chunky sprues of light Gray plastic with fine recessed panel lines and a little flash, nothing that’s too bad. The recessed panels lines are a little rough and uneven and will need to be re-scribed. One point though with both Siga kits is that they are both covered in mold release agent that needs to be washed off with warm soapy water before touching the parts.
The sprues gates on the Fury are commendably thin and in fact the kit reminds me of 1970’s style Airfix offerings, basic but usable.
The Instruction sheet is well printed and gives detailed painting and decaling instructions which is just as well as there is little in the way of resources on the FJ-1 Fury. Colors are given as “real” colors with no FS numbers quoted.
|
CONSTRUCTION |
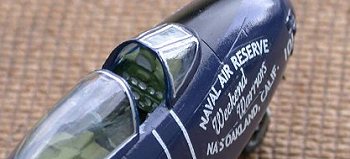
After carefully removing the cockpit parts from the sprues they were painted and dry brushed to bring out the details, cockpit consists of a basic tub with side consoles, and instrument panel with recessed dials that don’t look too bad after being picked out with a silver pen. Basic detail that can be added to make a reasonable looking cockpit.
 Nose weight is a must with
this kit and I added some lead strip wrapped in plasticine to secure it.
Nose weight is a must with
this kit and I added some lead strip wrapped in plasticine to secure it.
The nose wheel bay needed a little bending and trimming to get it to fit correctly in the fuselage and the nose intake pipe is too small a diameter and needs a fair amount of work to hide the join lines, compounding the problem is the fact that it is very difficult to get sandpaper into the area to smooth things out.
On joining the fuselage halves together I struck what seems to be a Siga problem, the starboard fuselage was again about ½ mm larger than the port one, necessitating using the vice again to crush the fuselage to the correct size while the glue was drying. Once dry the joints were cleaned up and gaps filled, A fair amount of filler was used on the underside to flatten out the fuselage height differences.
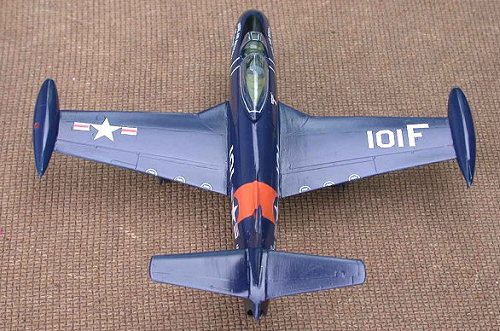
Wings and tip tanks were assembled and a little filler was needed around the leading and trailing edges to fill a few small gaps. Attaching the wings to the fuselage was an exercise in itself as the location pins on the wing are absolutely useless! And dihedral is very much dependant on the care of the modeler. You will have to try and find a photo of the Fury from front on to help you with the angle as there is no front view in the instruction sheet. The same goes for the tail-plane dihedral, best guess is about all the locating tabs are good for. After much swearing and cursing the tail-planes were finally lined up.
|
PAINT & DECALS |
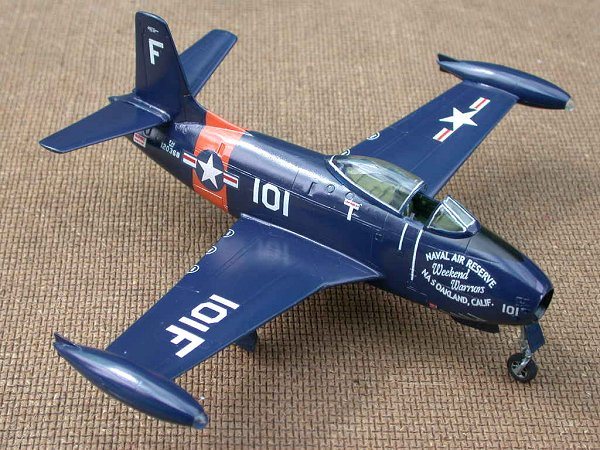
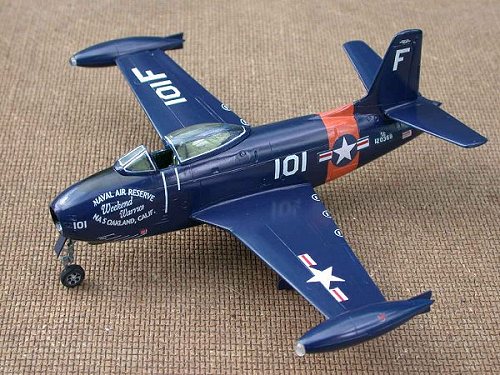
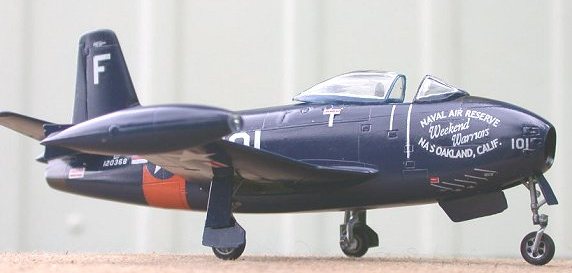
The instruction sheet give decals for two aircraft, both planes wearing the overall Navy gloss Sea Blue although the NARB Oakland Aircraft has a Orange flash on the fuselage to add a bit of color.
 After Masking up the cockpit
and undercarriage bays it was time to spray the orange around the rear of the
fuselage, four coats were needed to ensure good coverage. This was left a few
days and then masked up and the rest of the plane was sprayed Gloss Sea blue.
Finally the Matt black anti glare panel was masked off and painted on. After
removing all the masking tape it was time to apply the decals.
After Masking up the cockpit
and undercarriage bays it was time to spray the orange around the rear of the
fuselage, four coats were needed to ensure good coverage. This was left a few
days and then masked up and the rest of the plane was sprayed Gloss Sea blue.
Finally the Matt black anti glare panel was masked off and painted on. After
removing all the masking tape it was time to apply the decals.
Now after using the Siga La-7 Decals with no problems I blindly dived in and cut out one of the fuselage “Stars and Bars” only to have it disintegrate on contact with the water * sigh* two or three coats of future was applied to the remaining decals in an effort to keep them together long enough to get them on the plane.
In short it took me over two weeks to get all the decals applied as the decal film had to be trimmed completely as it silvered badly even on the gloss paint.
The damaged side “Stars and Bars” were replaced from the spares box and a couple of coats of future was sprayed over the model to finish it off.
|
CONCLUSIONS |
 Even though this model can
not be recommended for the complete novice it can, with a bit of work be made
into a nice little model of an important Aircraft.
Even though this model can
not be recommended for the complete novice it can, with a bit of work be made
into a nice little model of an important Aircraft.
In quality and fit it is streets ahead of the Siga La-7 Model I previously reviewed from this manufacturer and reminds me of 1970’s Airfix for detail, Basic but workable.
Recommended for all you Navy Buffs out there.
|
REFERENCES |
http://www.geocities.com/CapeCanaveral/Launchpad/8608/fj1.html
ttp://www.boeing.com/companyoffices/history/bna/fj.htm
Review kit courtesy of your editor and his plastic money.
Copyright ModelingMadness.com. All rights reserved. No reproduction in part or in whole without express permission.
If you would like your product reviewed fairly and fairly quickly, please contact the editor or see other details in the Note to Contributors.
Back to Reviews Page 2022