Tamiya 1/72 F-51D Mustang
|
KIT # |
60754 |
|
PRICE: |
$15.00 MSRP |
|
DECALS: |
two options |
|
REVIEWER: |
Mark Fordham |
|
NOTES: |
My first Tamiya kit and Alclad II testbed |
|
HISTORY |
|
THE KIT |
 This
Kit was sent to me by FBN/MM with the sole purpose to destroy my “No
Tamiya” boast to fame (and another successful CIA plot to undermine
our allies has come to fruition. Now onto a more heinous plot to convert
him to 1/48... Ed), as many of the regular readers to MM know my
staple diet is Airfix and short run kits, so this F-51 was a kit of
firsts, First Tamiya and first attempt at the Alclad II paint finish.
This
Kit was sent to me by FBN/MM with the sole purpose to destroy my “No
Tamiya” boast to fame (and another successful CIA plot to undermine
our allies has come to fruition. Now onto a more heinous plot to convert
him to 1/48... Ed), as many of the regular readers to MM know my
staple diet is Airfix and short run kits, so this F-51 was a kit of
firsts, First Tamiya and first attempt at the Alclad II paint finish.
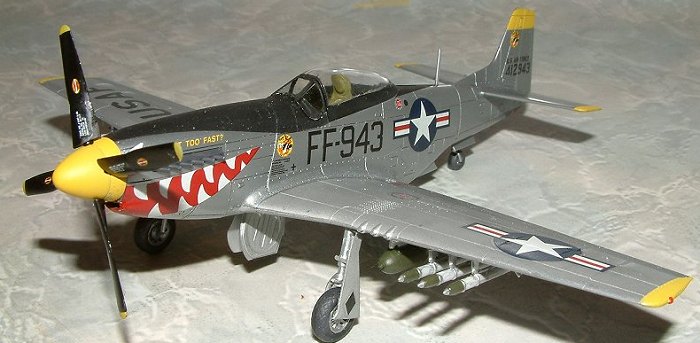
The Tamiya F-51 really needs no introduction to most modellers, being well engineered and having superbly fitting parts. Decals for this Korean war example consist of two versions, One being Capt J.W. Rogers 36th FBS 8th FBW and the 12th e FBS 18th FBG as depicted on the box top.
Instruction sheet is well laid out and easy to follow, I presume that it is the norm for most Tamiya kitsets.
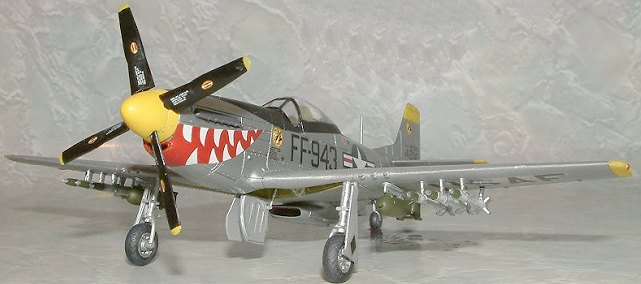
Two types of Props and spinners are included along with six rockets, two drop tanks and two 500 lb general purpose bombs.
|
CONSTRUCTION |
This
aircraft was to be a test spray dummy for my first attempt at Alclad II,
that way I only had to worry about the painting rather than the
construction of the model, well now I know were that saying
“Shake-n-bake” comes from, these kits are, all my usual work was done for
me, no scribing panel lines, no thinning trailing edges, no sanding, no
filling, hell if it wasn’t for
 the Alclad to look forward to I would have
called this model “boring”, I like sanding, I like filling, I love the
sound of a No 11 blade scraping plastic and watching the wife, kids, cat
cringe!
the Alclad to look forward to I would have
called this model “boring”, I like sanding, I like filling, I love the
sound of a No 11 blade scraping plastic and watching the wife, kids, cat
cringe!
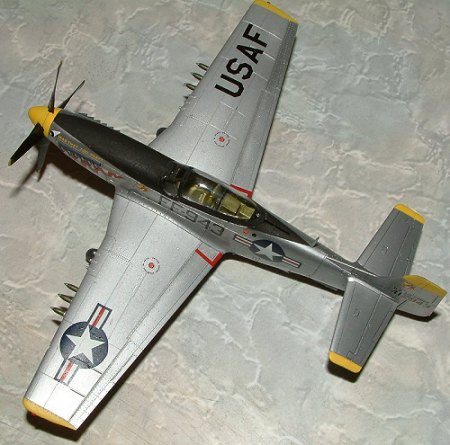
I elected as the fit was so good, not to glue the wings to the fuselage as this made it easier for painting, the only cleanup work needed was a light and I means light sand along the to of the fuselage join forward of the cockpit and a tiny scrape off the bottom around the front of the nose.
The overall construction on took a couple of evenings to complete, the cleanup to hide the joins and getting the seams perfect for the Alclad took a couple of nights with constant checking to make sure that I had got them all, I wanted for once to have a “good” finish free from “b@lls ups” and fingerprints and this time I even remembered to drill out the weapons points before I glued the wings together rather than trying to guess them later on.
The undercarriage was idiot proof, with a fit so good you could almost do away with the glue.
|
CAMOUFLAGE & MARKINGS |
Now I asked half a dozen experts on Alclad and got half a dozen different answers when it came to using a undercoat as this was to be a test bed I chose to play it safe and forgo an undercoat as I wasn’t confident that I was skilful enough to get a smooth blemish free undercoat down with my painting skills.
 I
spent a fair amount of time polishing the plastic to get it really smooth
and free of sanding marks, I then loaded up the trusty old Paasche VSL90
with Alclad and cranked the ‘ol fridge down to 12 psi, Fridge?? Fridge!
What’s this boy been drinking I hear you ask? Did I forget to mention I
don’t have a air compressor as they are too noisy, so I built my own
silent compressor out of an old fridge motor, dead silent and cost me
just $25 for a regulator, everything else came from the local landfill,
the holding tank started out life as an air tank on a small Jappa truck.
The only drawback is it is sometime too quiet and I have blown the safety
valve as I forgot to turn it off in the past.
I
spent a fair amount of time polishing the plastic to get it really smooth
and free of sanding marks, I then loaded up the trusty old Paasche VSL90
with Alclad and cranked the ‘ol fridge down to 12 psi, Fridge?? Fridge!
What’s this boy been drinking I hear you ask? Did I forget to mention I
don’t have a air compressor as they are too noisy, so I built my own
silent compressor out of an old fridge motor, dead silent and cost me
just $25 for a regulator, everything else came from the local landfill,
the holding tank started out life as an air tank on a small Jappa truck.
The only drawback is it is sometime too quiet and I have blown the safety
valve as I forgot to turn it off in the past.
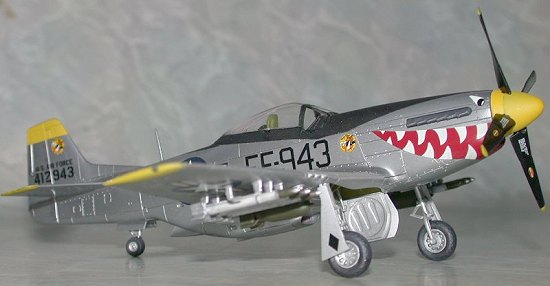
Well getting back to the model, with the airbrushed raring to go, it was time to start laying down the Alclad on the fuselage, a number of very light coats were misted onto the bare plastic and the most realistic metal finish I have ever achieved appeared like magic, now the trick is MIST, without a primer you have to be careful not to put too much on the first time as the hot lacquer will eat into the plastic and ruin your finish, by misting the first few coats on it built up a smooth hard layer that enabled a slightly thicker coat to finish it off. Now I know why people rave about this product, nothing comes close to the look of real metal and durability of Alclad,
 The
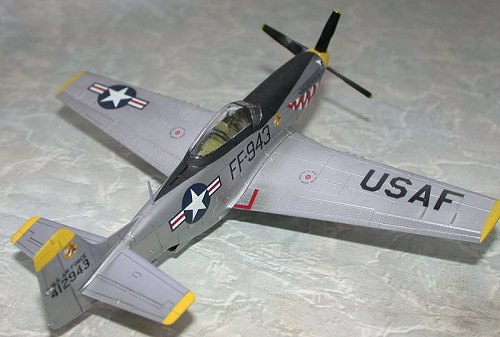
flaps and Ailerons were also sprayed with Alclad then it was onto the
silver lacquer wings, this was sprayed using Tamiya Flat Aluminium and
buffed with a Nylon Pot scrubber until the desired amount of shine was
achieved. The Flat black antiglare panel on the nose was masked off and
sprayed using Tamiya Flat black. The yellow bits were masked off and
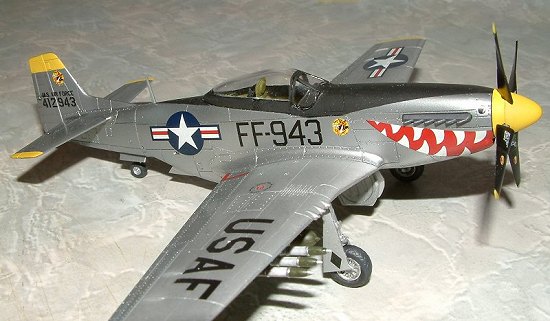
sprayed using multiple light coats of Tamiya Flat yellow.
The
flaps and Ailerons were also sprayed with Alclad then it was onto the
silver lacquer wings, this was sprayed using Tamiya Flat Aluminium and
buffed with a Nylon Pot scrubber until the desired amount of shine was
achieved. The Flat black antiglare panel on the nose was masked off and
sprayed using Tamiya Flat black. The yellow bits were masked off and
sprayed using multiple light coats of Tamiya Flat yellow.
Then it was time for the decaling, being an OOB builder who can't get aftermarket decals without waiting for a month for them to come from overseas I was forced to use the Kit decals so chose the Sharkmouth F-51D featured on the Box top art, not the most original F-51 but certainly eye catching, I have read and heard nasty thing about Tamiya decals being thick and impervious to setting solutions, well they haven’t come across my home brewed concoction before, the decals where applied as to instructions and then hit with my decal softener, within seconds the decals had “melted” into the paintwork., now I normally screw up with decals big time, this time I managed to get everything in the right place and not one of them silvered on me!
With the decals on and dry the finishing touches were added, the rockets were painted up and added along with the 500 lb GP bombs, I decided not to weather this aircraft at all as I just knew I would screw up that lovely surface, so I’ve left this one factory fresh and clean. The last final job was to clip the wing onto the fuselage and as you can see no glue was needed and to push the prop onto the little poly cap that Tamiya supply.
|
CONCLUSIONS |
 Well
there you have it, Alclad is so good even an average modeller like me can
get a good impression of a NMF aircraft. The Tamiya F-51D fit like a
glove with no vices or problems whatsoever, but if it wasn’t for the
Alclad finish I would have felt cheated somehow. I’m one of these mad
buggers that get a kick out of trying to make that Airfix kit look like a
Tamiya offering. Will I rush out and buy more Tamiya aircraft? Maybe, if
Tamiya start bringing out subjects like the Fairy Battle and CAC
Boomerang, until then I will soldier on with the Airfix offerings. Now
that I’m more confident with Alclad it’s time to try it out on a somewhat
harder subject so stay tuned. My thanks to Scott VA for the testbed and
Tom Cleaver for the advice on Alclad.
Well
there you have it, Alclad is so good even an average modeller like me can
get a good impression of a NMF aircraft. The Tamiya F-51D fit like a
glove with no vices or problems whatsoever, but if it wasn’t for the
Alclad finish I would have felt cheated somehow. I’m one of these mad
buggers that get a kick out of trying to make that Airfix kit look like a
Tamiya offering. Will I rush out and buy more Tamiya aircraft? Maybe, if
Tamiya start bringing out subjects like the Fairy Battle and CAC
Boomerang, until then I will soldier on with the Airfix offerings. Now
that I’m more confident with Alclad it’s time to try it out on a somewhat
harder subject so stay tuned. My thanks to Scott VA for the testbed and
Tom Cleaver for the advice on Alclad.
|
REFERENCES |
Instructions for the F-51D
Modelling Madness Discussion board for the Alclad questions,
November 2003
Copyright ModelingMadness.com. All rights reserved. No reproduction in part or in whole without express permission.
If you would like your product reviewed fairly and quickly, please contact the editor or see other details in the Note to Contributors.