The Aero L-29 Delfín is a military jet trainer developed and manufactured by
Czechoslovakian aviation manufacturer Aero Vodochody. It was the country's
first locally designed and constructed jet aircraft, as well as likely being
the biggest aircraft industrial programme to take place in any of the
Council for Mutual Economic Assistance (COMECON) countries except the Soviet
Union.
 The L-29
was selected to become the standard jet trainer for the air forces of Warsaw
Pact nations, for which it was delivered from the 1960s onwards. During the
early 1970s, the type was succeeded in the principal trainer role by another
Aero-built aircraft, the L-39 Albatros, heavily contributing to a decline in
demand for the earlier L-29 and the end of its production during 1974.
The L-29
was selected to become the standard jet trainer for the air forces of Warsaw
Pact nations, for which it was delivered from the 1960s onwards. During the
early 1970s, the type was succeeded in the principal trainer role by another
Aero-built aircraft, the L-39 Albatros, heavily contributing to a decline in
demand for the earlier L-29 and the end of its production during 1974.
Of the 3665 produced, around 2,000 were reported to have been delivered to
the Soviet Union, where it was used as the standard trainer for the Soviet
Air Force. Of the others, which included both armed and unarmed models, many
aircraft were delivered to the various COMECON countries while others were
exported to various overseas nations, including Egypt, Syria, Indonesia,
Nigeria and Uganda. Reportedly, the L-29 has been used in active combat
during several instances, perhaps the most high-profile being the use of
Nigerian aircraft during the Nigerian Civil War of the late 1960s and of
Egyptian L-29s against Israeli tanks during the brief Yom Kippur War of
1973.
The Uganda Army Air Force (UAAF) was established in 1964. They possessed a
number of L-29 Delfins (5 to 12, with sources varying), that were put into
use during the air campaign of Uganda–Tanzania War of 1978–79.
Introduced in 1970, this looks to be the first kit KP produced (with the
Avia B-534, IL-10 and Mig-19 following…). Definitely “old style”, providing
only basic external details and minimal internal ones, this venerable kit is
regularly reboxed, totally unchanged (only different decal schemes), with
the 2010 and onwards reissues performed by the Polish Mistercraft, who have
obviously acquired the KP molds.
 My
specific kit is the fourth (late 90’s) reissue, that I was lucky enough to
discover back in 2011, forgotten in a toy shop, at a symbolic price of only
3 euros! Upon opening the box, I was greeted with the nostalgic look of
separate 9 basic elements (fuselage halves and aerodynamic surfaces), two
small trees containing the “detail” parts and a clear fret containing the
canopy and a base for the assembled model.
My
specific kit is the fourth (late 90’s) reissue, that I was lucky enough to
discover back in 2011, forgotten in a toy shop, at a symbolic price of only
3 euros! Upon opening the box, I was greeted with the nostalgic look of
separate 9 basic elements (fuselage halves and aerodynamic surfaces), two
small trees containing the “detail” parts and a clear fret containing the
canopy and a base for the assembled model.
The kit is very simple, with external detail mostly heavily raised, full of
rivets, not up to modern standards (would not look out of place back in the
70s, though). There’s no cockpit to speak of, just two seat backs lookalike
plates, where two mummy pilot figures are supposed to be glued and fill the
total emptiness. All “detail” parts are basic looking and crude, toy-ish
like, especially the landing gear struts that have a thick, rectangular,
unrealistic cross section. Wheel wells are plain looking and shallow. Canopy
is thick with heavy framing, but reasonably clear. The provided stand is a
nice touch.
Instructions are old school, with two major construction steps and a
detailed text including a comprehensive history of the type, construction
guidelines and color callouts, all nice and clear. Two camo schemes are
provided: a “silver” Czech and (surprisingly) an “exotic” Uganda one. Decals
are printed by Propacteam, meaning good initial impressions, but cautiously
thin.
Having a soft spot on exotic schemes and an even softer on tackling old
molds, the decision to build this kit as a Uganda bird came as no surprise!
Whereas “simple” may not always seem “easy”, this was not the case here: the
kit can easily be assembled in no time . I started by gluing the two
fuselage halves together, followed by the pair of inner wing halves that
were consequently attached at the fuselage sides, with the one piece outer
wings and horizontal stabilizer soon after. Airbrakes were attached
“retracted” and the two wing tanks were assembled, but not attached. Fit was
nice and solid, with the occasional mini seams requiring filling and
sanding, which came immediately after. To add some realism, I drilled out
the four air inlets at the fuselage top.
And hat was it! Major construction done and off to the paint shop!
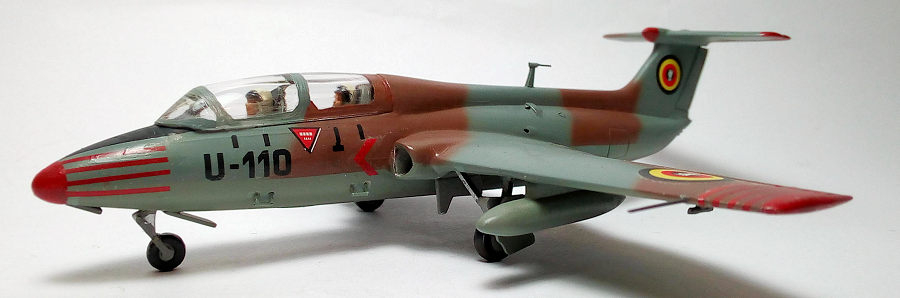
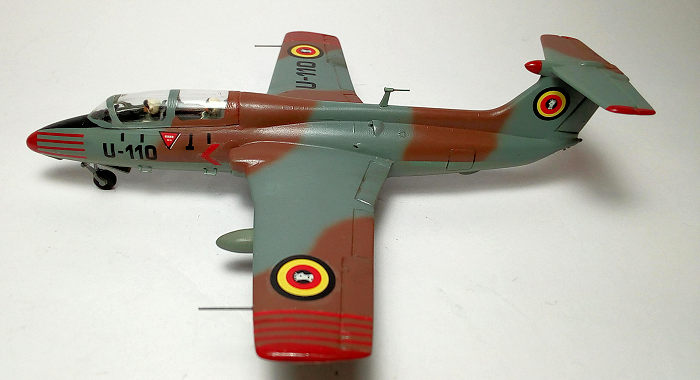
Instructions called for a brown/blue gray over turquoise blue camo. After
some net research, I came across two color pics of Ugandan L-29, sporting
kind of “chocolate”/neutral gray tops and light-to-medium blue gray bottoms.
To replicate the camo, I first sprayed the undersides (including the wing
tanks) with Hu145 Medium Gray (which has a blue gray hue) and, upon masking,
I gave the top a freehand camo of Hu98 Chocolate and Hu126 Medium Gray, all
done with my Revell Vario airbrush.
 After a
protective coat of Future, I painted the nose, fin top cone, wing and tail
plane tips red. Instructions wanted you to paint four of a kind red tiny
strips at each side of the cone and wingtips, 24 in total. Hating painting
lines (and insignia in general, I admit), I resorted to my decal dungeon,
found suitable pieces and attached them. I did not have sufficient red
stripes pieces, so I first attached three stripes at each position. Then, I
could not live with it, so I added a (slightly different) extra piece at
each line pattern, with the hue difference being noticeable; oh well, it’s a
“simple – nostalgic” build, anyway!
After a
protective coat of Future, I painted the nose, fin top cone, wing and tail
plane tips red. Instructions wanted you to paint four of a kind red tiny
strips at each side of the cone and wingtips, 24 in total. Hating painting
lines (and insignia in general, I admit), I resorted to my decal dungeon,
found suitable pieces and attached them. I did not have sufficient red
stripes pieces, so I first attached three stripes at each position. Then, I
could not live with it, so I added a (slightly different) extra piece at
each line pattern, with the hue difference being noticeable; oh well, it’s a
“simple – nostalgic” build, anyway!
The rest of the decals came from the decal sheet. Propacteam decals are
among the thinnest ones, let alone the fact that they were some 25 years
old. Despite treating them very carefully, some black codes disintegrated
and I resorted to retouching them by hand, doing at places a less than
average job.
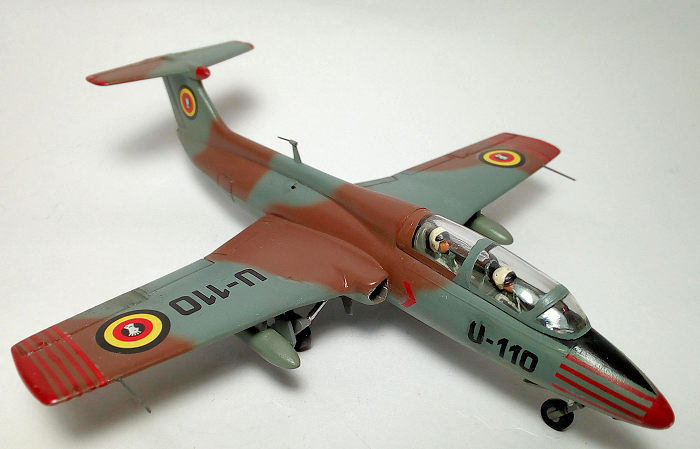
 I
busied up the empty cockpit area a tad, by adding a few of styrene sheets
here and there, as a means of floor and side consoles, then added the half
seats, with the pilots glued at them. Basic cockpit color was a medium gray,
with black instrument panel, consoles and headrests. The pilots had green
uniforms, white helmets with black visors and linen seat belts. Cockpit
looked less empty then, hoping to be passable under the thick canopy.
I
busied up the empty cockpit area a tad, by adding a few of styrene sheets
here and there, as a means of floor and side consoles, then added the half
seats, with the pilots glued at them. Basic cockpit color was a medium gray,
with black instrument panel, consoles and headrests. The pilots had green
uniforms, white helmets with black visors and linen seat belts. Cockpit
looked less empty then, hoping to be passable under the thick canopy.
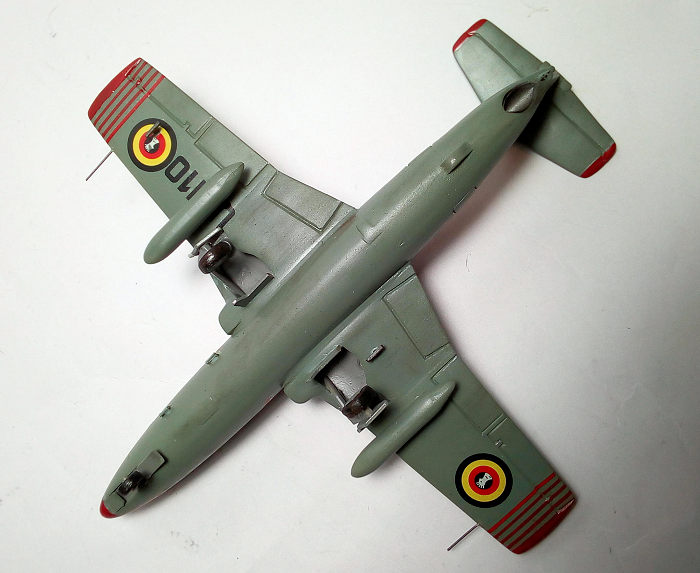
I then attached the landing gear components and the wing tanks. Instructions
advised to secure the main wheels at their axles and heat the axle tips, so
they can rotate. I just glued them and cut the protruding bit (I know a
number of “nostalgic” modelers would go for the rotating main wheels
option). All landing gear components, including the wheel wells, received
the same cockpit medium gray, silver painted oleos, with the tires painted
black. The shallow air intakes had their innards painted Testors Steel with
black rear wall, as to give an illusion of depth.
The two wing pitots, the rear facing top fuselage antenna tip and the
characteristic crew steps at the port fuselage side were replicated using
stretched sprue, as the kit parts not only were crude, but disintegrated
upon attempting to detach them from the sprue tree. No exhaust cone was
supplied, so my sons’ straws
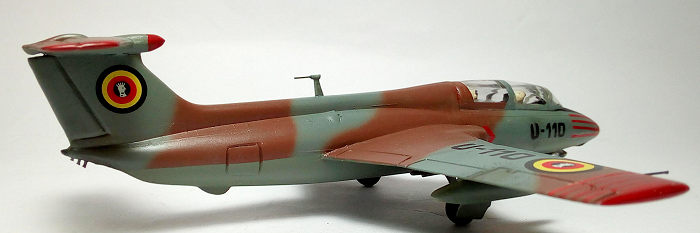 came to
the rescue, in the form of choosing a suitable diameter one, cutting it at
an angle, painting it Testors Burned Metal and attaching it from the rear.
Those small improvements aimed to add some interest to the viewer’s eye,
hoping to convince him he is not looking at a toy.
came to
the rescue, in the form of choosing a suitable diameter one, cutting it at
an angle, painting it Testors Burned Metal and attaching it from the rear.
Those small improvements aimed to add some interest to the viewer’s eye,
hoping to convince him he is not looking at a toy.
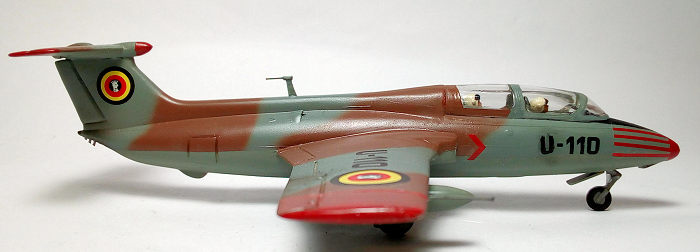
Photo evidence showed the Uganda birds in pristine condition, so minimal
“here and there” weathering was added, followed by the final almost matt
(70/30 matt/gloss) coating. A small acetate piece was affixed to replicate
the gunsight and the canopy was easily hand painted and attached in
position, with the gaps (especially the rear one) faired with white glue and
retouched.
I then called this Uganda beauty done!
AMK (later reboxed by Veselý Lepič and finally Eduard) came with a
definitive 1/72 mainstream L-29 in
2016, offered at very reasonable prices. Originating from their equally
definitive quarter scale one, it will require some careful work, but will
surely result in a beautiful model and is the way to go if you want to build
a good 1/72 Delfin.
The KP, even at its latest frequent reissues, is the same basic kit of the
early 70s: simple, easy to build, good general shape but with crude and toy-ish
details, the absence of cockpit definitely included among them! With some
extra work and decent painting, an acceptable, basic, toy looking model
might result. Due to its simplicity, parts rigidity and low price offered,
it can also be recommended as an introduction to very young modelers,
spending their afternoon putting it together, with glue oozing here and
there, and possibly trying basic hand painting, like many of us have done in
the past, maybe with the same kit!
As usual, I had a great time putting this oldie together, which would
otherwise have disappeared with time, thrown away from that toy shop…
Happy modeling!
Spiros Pendedekas
22 October 2021
Copyright ModelingMadness.com. All rights reserved.
No reproduction in part or in whole without express permission.
If you would like your product reviewed fairly and fairly
quickly, please
contact
the editor
or see other details in the
Note to
Contributors.
Back to the Main Page
Back to the Review Index Page
Back to the Previews Index Page