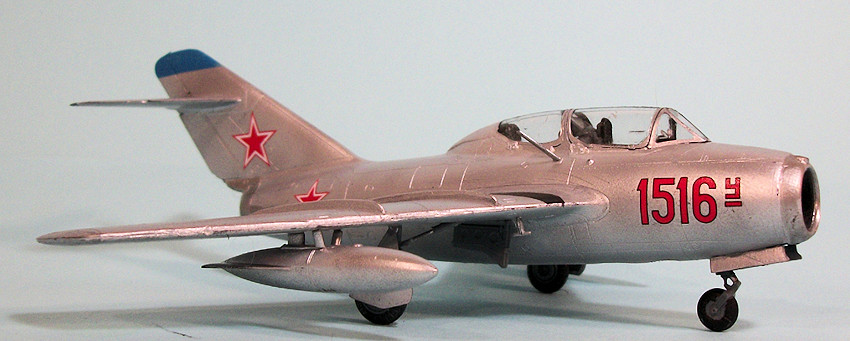
Eduard 1/72 MiG-15UTI
| KIT #: | 7055 |
| PRICE: | $24.95 |
| DECALS: | Five options |
| REVIEWER: | Tom Cleaver |
| NOTES: | Profipak kit |
| HISTORY |
First flown in 1947, the
MiG-15 proved a nasty surprise to the United States Air Force when it first
appeared over North Korea in November 1950. Flown by Soviet World War II
veterans, the airplane was superior to both the F-80, which was the standard
USAF fighter jet in Korea at the time, the Navy’s F9f-2 Panther, and the F-84
that was sent to Korea as an escort for B-29s and fighter bombers. The MiG’s
only equal was the F-86 Sabre. During 1951, a period known to Air Force fighter
pilots in Korea as “the year of the honcho,” the USAF 4th
Fighter Interceptor Wing and the Soviet 29th
GvIAP each managed a victory-loss ratio of 1:1. When less-experienced Chinese
and North Korean pilots entered combat in 1952-53, the superior American pilot
training gave the Sabre the edge. The top-scoring pilots of the Korean War were
three Russians, Major Nikolay Sutyagin, credited with 22 victories, 13 of which
were confirmed by t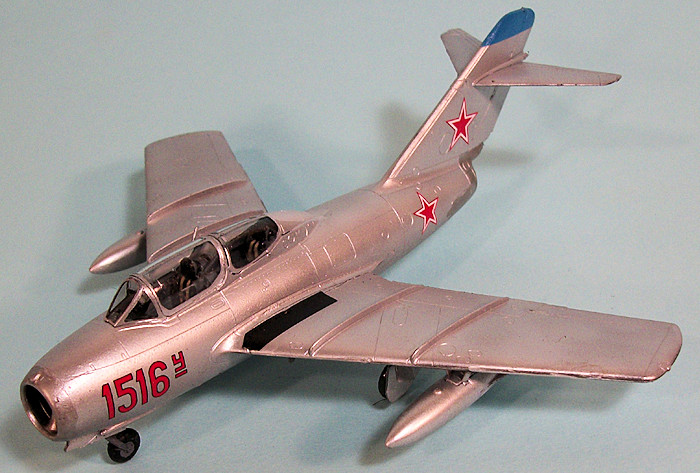 he
US; Colonel Yevgeny Pepelyaev with 19 claims, 15 confirmed; and Major Lev
Shchukin with 17 credited, 11 verified.
he
US; Colonel Yevgeny Pepelyaev with 19 claims, 15 confirmed; and Major Lev
Shchukin with 17 credited, 11 verified.
In recent years, it has become “common knowledge” to erroneously attribute the MiG 15 as a development of the Ta-183, a design by Kurt Tank. Although the fuselage arrangement bears a superficial similarity to Tank's later Pulqui II aircraft, the wing planform is decidedly different. Difficult as it might be for Westerners to accept, the Soviets may have understood theoretical aspects of transonic flight some three years before the West. An effort began in 1942 to develop a unified general theory of supersonic wings. The results of the coordinated inquiry were published in 1946 and 1947. Among the contributions was an exploration of the application of conical flow theory to delta wings, written by Mikhail J. Gurevich. Given this, it is certainly possible that the theoretician Gurevich and the production expert Mikoyan were perfectly capable of developing a design like the MiG-15. The similarity between the U.S. F 86 Sabre, the MiG 15, and Tank's Ta-183 comes from a common reliance on 1940's technology and application of the principles of aerodynamics that had been given practical meaning by extensive German wind tunnel testing, which was available to all competing post war nations.
The MiG 15 had several faults, most notably its dangerous spin characteristics. It was necessary to send air force test pilots to units converting to MiG-15 to demonstrate proper spin recovery measures. For a period spinning was banned, pending the investigation of a number of accidents; even afterward, special clearances were required for the maneuver. The MiG-15 was a “handful” for a pilot transitioning from propeller-dirven aircraft, and the Soviets followed their traditional policy of creating a two-seat trainer for pilot introduction. The result was the MiG-15UTI (NATO reporting name “Midget”).
With a second cockpit
installed aft of the normal cockpit, fuel capacity was lost. Thus, the MiG-15UTI
almost always used the underwing tanks first introduced on the MiG-15 (bis). The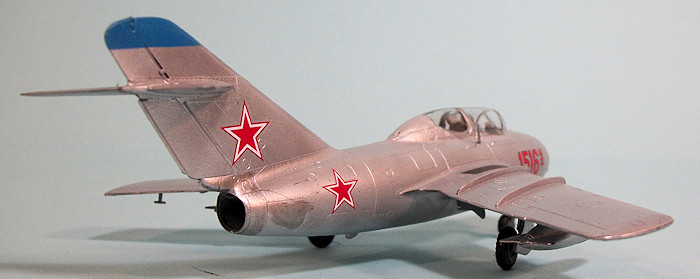 trainer also used the VK-1F engine of the MiG-15 (bis). The instructor sat under
the second cockpit, which had a rear-sliding canopy while the front cockpit had
a side-opening canopy. The airplane had all the aerodynamic faults of the
single-seater, which meant that a pilot training on it would be fully capable of
transitioning to the single-seater.
trainer also used the VK-1F engine of the MiG-15 (bis). The instructor sat under
the second cockpit, which had a rear-sliding canopy while the front cockpit had
a side-opening canopy. The airplane had all the aerodynamic faults of the
single-seater, which meant that a pilot training on it would be fully capable of
transitioning to the single-seater.
The Soviets did not develop trainer versions of the MiG-17 or MiG-19; thus the MiG-15UTI was used for initial jet fighter training well into the 1960s, when it was replaced in Warsaw Pact air forces by the Czech L.29 Delfin trainer. MiG-15UTI trainers were supplied to all air forces that received the MiG-15, the MiG-17 and the MiG-19, guaranteeing it saw worldwide service up to the 1980s.
The People’s Liberation Army Air Force received only a few MiG-15UTI aircraft. The forward fuselage with the two cockpits was successfully grafted onto the Chinese-built MiG-17 (F-5 in Chinese service) and was known as the FT-5. It served throughout the 1960s with the PLAAF.
Several MiG-15UTIs were exported to the West following the end of the Cold War. They have been used as trainers for those individuals who have purchased former Soviet fighters, and at least two have been used as air demonstration aircraft. There are currently two MiG-15UTI aircraft at Planes of Fame Air Museum in Chino, California, though they have not been flown in several years.
| THE KIT |
There have been numerous
MiG-15s of varying quality released over the years in 1/72. To my mind, the
series released by Eduard appear to be the best and most accurate, an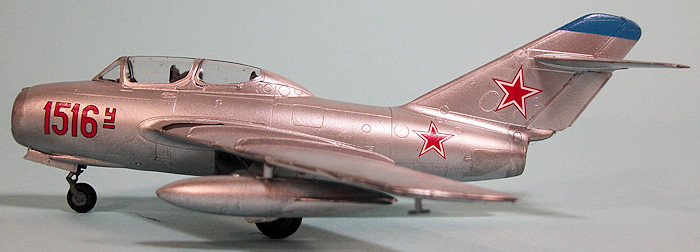 d
certainly the most highly-detailed in this scale. I don’t recall a two-seater
being done before but I might be mistaken since it has been well over 20 years
since I did much in this scale. (In fact, KP and Hobby Boss have both
released 1/72 kits of the two seat version, your editor building the Hobby Boss
version earlier this year. Ed)
d
certainly the most highly-detailed in this scale. I don’t recall a two-seater
being done before but I might be mistaken since it has been well over 20 years
since I did much in this scale. (In fact, KP and Hobby Boss have both
released 1/72 kits of the two seat version, your editor building the Hobby Boss
version earlier this year. Ed)
The Profipack kits include photo-etch seat belts and various instrument side panels as well as the main panels, which go a long way to dressing up the cockpit. Decals include markings for five different air forces, four in natural metal and one in camouflage for those NMF-challenged modelers.
| CONSTRUCTION |
This is definitely a kit where construction begins with the cockpit. I matched the grey on the pre-painted photo-etch with Tamiya RAF Ocean Grey and so painted all the interior with that before further assembly. The seat backs were done with Tamiya Semi-gloss Black X-18. I then assembled the main panels and attached them to their plastic parts, then attached all the side panels. Assembly of the cockpit went quickly. Do be sure to get the rear seat down in the proper position or it will stick up too high to allow the canopy to sit right open or closed. Also beware that all parts fit very precisely and all little sprue nubs need to be cleaned off completely. The days of “close enough” modeling are gone with these new kits.
Be very careful in attaching
the completed cockpit to whichever fuselage half you use. Again, precision fit
is crucial, as the entire fuselage assembly is very tight. I put some squashed
small fish weights in the nose ahead of the cockpit inside the intake walls, and
under the cockpit in both sections. The majority of th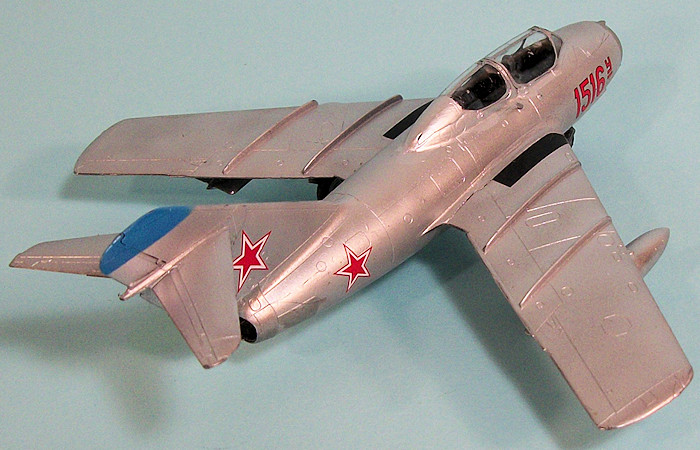 e
MiG-15 kit is behind the main gear weight-wise, so as much as you can squeeze in
is useful in insuring a nose-sitter. Sine I managed to knock off and lose a
couple of the smaller instrument panels in this process, I decided to finish the
model with the canopies closed. This is the harder choice, since getting them
positioned correctly is not easy and took a lot of fiddling; the rear canopy is
not a close fit at all, even with some bending. If you have a nicely-detailed
cockpit, I would strongly recommend attaching the canopies open, since that is
the easier option and the poor fit will not be obvious.
e
MiG-15 kit is behind the main gear weight-wise, so as much as you can squeeze in
is useful in insuring a nose-sitter. Sine I managed to knock off and lose a
couple of the smaller instrument panels in this process, I decided to finish the
model with the canopies closed. This is the harder choice, since getting them
positioned correctly is not easy and took a lot of fiddling; the rear canopy is
not a close fit at all, even with some bending. If you have a nicely-detailed
cockpit, I would strongly recommend attaching the canopies open, since that is
the easier option and the poor fit will not be obvious.
Even with as much care as I took, I really had to squeeze to get the other fuselage half to join up, and used several really big rubber bands to hold it together. Even with all that there was a pretty major centerline seam above and below to deal with. Mr. Surfacer 500 was liberally applied and sanded down, with a final line of C-A glue and more sanding to get rid of the “ghost” seam. Fortunately there is not any surface detail lost in this that cannot be rescribed easily.
The wings were assembled; you need to decide it you are going to use drop tanks and open the mounting holes before gluing the wing halves together. Be very precise when attaching the wings to the fuselage in order to get the two aligned properly on both sides. I finished assembly by attaching the horizontal stabilizers.
| COLORS & MARKINGS |
I was very happy to use the Eduard express masks for the canopies, since cutting out Tamiya tape over them would be a real PITA.
The model was painted with
the new Vallejo acrylic metal paints. I applied a coat of the black primer. This
needs to be thinned before airbrushing, and misted on with several passes to get
a smooth surface for the metal colors. The metal colors are pre-thinned, so they
can just be shot. Again, mist them on in several thin coats to get as sm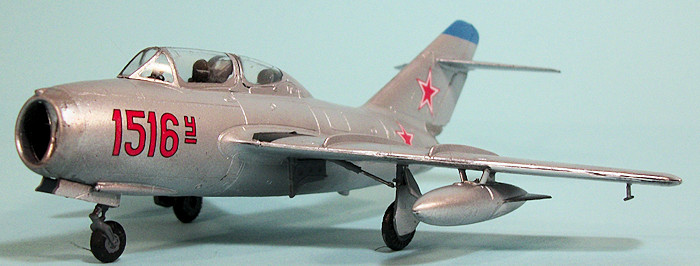 ooth
a finish as possible. If you see any “orange peel” or build-up start, wipe it
off and re-apply. All the MiG-15s I have seen out at Chino over the past 30
years have a very flat aluminum finish. I applied a thin coat of Matt Aluminum,
then when that was set up I applied a thinner coat of White Aluminum over it,
There are some parts of the airframe, such as the intake ring and exhaust area
and the dive brakes that appear a little shinier. I brush painted Duraluminum
Silver on these areas. I masked off the upper vertical fin and painted the tip
with Tamiya Sky Blue X-14. There is no pull-up of the Vallejo paints if you have
let them dry for a couple of hours.
ooth
a finish as possible. If you see any “orange peel” or build-up start, wipe it
off and re-apply. All the MiG-15s I have seen out at Chino over the past 30
years have a very flat aluminum finish. I applied a thin coat of Matt Aluminum,
then when that was set up I applied a thinner coat of White Aluminum over it,
There are some parts of the airframe, such as the intake ring and exhaust area
and the dive brakes that appear a little shinier. I brush painted Duraluminum
Silver on these areas. I masked off the upper vertical fin and painted the tip
with Tamiya Sky Blue X-14. There is no pull-up of the Vallejo paints if you have
let them dry for a couple of hours.
Eduard provides a very complete set of stencils which are properly sized and thus very tiny and I decided I could get along without them. You may decide otherwise. The national insignias went on easily under a thin coat of Micro-Sol and did not require any clear cover afterwards.
I unmasked the canopies and then attached the landing gear. Again, there is precise fit and getting the hubs inside the main wheels required they be totally cleaned up and even then there was some squeezing to get things in position. I attached the underwing antennas and declared the operation a success.
| CONCLUSIONS |
 As with all
Eduard kits, there is a “fiddly factor” to be dealt with, and care needs to be
taken throughout the assembly. If you miss something getting set in position
precisely you will pay for it down the line with Modeler-Induced Problems. The
end result is really nice looking, and these Eduard MiG-15s can easily be
declared Best In Scale. If Eduard upsized them to 1/48 they would have a real
winner on their hands. Recommended to all jet and Soviet aircraft fans.
As with all
Eduard kits, there is a “fiddly factor” to be dealt with, and care needs to be
taken throughout the assembly. If you miss something getting set in position
precisely you will pay for it down the line with Modeler-Induced Problems. The
end result is really nice looking, and these Eduard MiG-15s can easily be
declared Best In Scale. If Eduard upsized them to 1/48 they would have a real
winner on their hands. Recommended to all jet and Soviet aircraft fans.
December 2015
Copyright ModelingMadness.com
Thanks to my billfold for the review kit.
If you would like your product reviewed fairly and fairly quickly, please contact the editor or see other details in the Note to Contributors.