| KIT #: | 3203 |
| PRICE: | $79.95 MSRP |
| DECALS: | Three options |
| REVIEWER: | Tom Cleaver |
| NOTES: | Short run kit with resin and photo etch parts |
| HISTORY |
Since its introduction in 1949, the Lockheed T‑33A “Shooting Star” has
been the most widely used jet trainer in the world having flown with 20
different air forces during its career, and continues to serve in various air
forces around the world today, as well as appear on the warbird circuit as one
of the most widely-operated private ex-military jet aircraft. There were no
fewer than four T-33s on the flight line at the recent air show put on by The
Air Museum, Planes of Fame, in Chino, California, as an example of the type’s
ubiquity.
 Essentially, the T‑33 is a F‑80 with a fuselage lengthened by three feet
ahead of the wing, to make room for the second tandem seat.
Interestingly enough, with a better fineness ratio, the trainer is faster
than the original fighter.
Essentially, the T‑33 is a F‑80 with a fuselage lengthened by three feet
ahead of the wing, to make room for the second tandem seat.
Interestingly enough, with a better fineness ratio, the trainer is faster
than the original fighter.
With the introduction of the P-80 Shooting Star in Air Force service in
1945, pilots discovered there were many differences between a jet and a
propeller airplane, not least the slower throttle response, which had led to
several fatalities when even
experienced pilots flew the airplanes with their piston-powered flying habits.
It was felt there was a need for a two seat conversion trainer, to allow
pilots to get used to the new powerplant.
Lockheed had already been thinking along these lines, and was able to
meet the Air Force’s new specification very quickly.
It was the single smartest commercial decision Lockheed ever made as a
company, since the T-33 became the best-selling Lockheed product ever.
Originally designated the TF‑80C, the T‑33 made its first flight in March
1948, with Lockheed test pilot Tony LeVier at the controls.
LeVier’s report was that the airplane flew better than its predecessor.
Series production began in 1949, when the airplane was finally designated
T-33A, and production continued until August 1959 with 5,691 T‑33s built, as
compared with only 1,718 F-80s. By
the early 1950s, it was the basic jet trainer for both the
The airplane equipped NATO Air Forces during the 1950s through the MDAP
program. By the mid-1960s, as more
advanced trainers were developed, the airplane served with air forces throughout
the developing world. Even though
it was obsolete by the 1960s, the T-33 performed many different tasks and was
found in Air Force, Air Force Reserve and Air National Guard service until the
early 1990s.
 The T-33 was produced under license in both
In the 1980s, there was a development of the T-33 called the Sky Fox,
which was planned to utilize low-time T-33 airframes with the engine replaced by
two CJ-60 turbofans. The airplane
was planned to compete
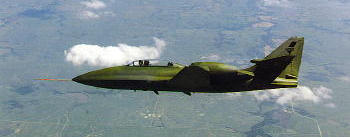 directly
with later jet trainers for service in
directly
with later jet trainers for service in
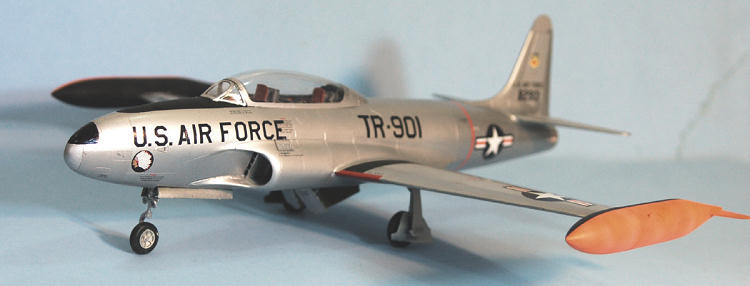
| THE KIT |
| CONSTRUCTION |
Overall, the kit fits as well as the earlier F-80 kit.
It is definitely a short-run kit, and a modeler is well advised to “test
fit thrice before gluing once.” I
found I needed cyanoacrylate glue on the fuselage centerline seam to make it
disappear, as well as for the jet intakes.
I used Mr. Surfacer on all seams.
That said, the model went together easily over the course of a weekend.
 assembly.
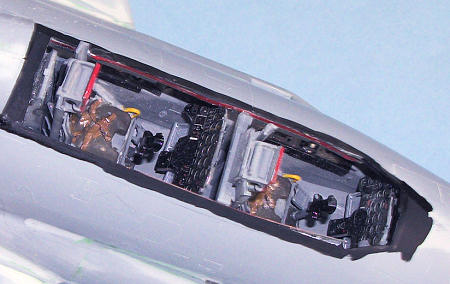
This allows you to get excellent fit for the intakes and trunking, which
isn’t really possible if you follow the kit’s design and instructions.
I would also caution you to be certain to attach the resin intake grills
before further assembly after you have the intakes assembled.
I managed to forget these until after the model was painted.
While they fit well, the operation on a model that was already painted in
natural metal was dicey enough I wouldn’t care to do it again, and the fit is
not as close as I would have gotten had I performed this bit of assembly at the
proper time.
assembly.
This allows you to get excellent fit for the intakes and trunking, which
isn’t really possible if you follow the kit’s design and instructions.
I would also caution you to be certain to attach the resin intake grills
before further assembly after you have the intakes assembled.
I managed to forget these until after the model was painted.
While they fit well, the operation on a model that was already painted in
natural metal was dicey enough I wouldn’t care to do it again, and the fit is
not as close as I would have gotten had I performed this bit of assembly at the
proper time.
 r
your edification and education, under the “fair use” doctrine).
r
your edification and education, under the “fair use” doctrine).
 configuration.
Beware if you decide to do this.
As with most kits, if a part is designed to be displayed open, it is
easier to do that than to close things up.
You need to thin the rear area of the canopy around the hinges, and you
also need to shave off a bit of the “hump” the canopy attached to, to insure a
nice easy fit. I neglected that last part and forced the fit a bit more than I
should have, with the result that there are some needless stress marks in the
rear canopy, which are very visible at certain angles under certain lighting. If
you decided to do this, be sure to test fit and modiry until you have a very
easy fit back there.
configuration.
Beware if you decide to do this.
As with most kits, if a part is designed to be displayed open, it is
easier to do that than to close things up.
You need to thin the rear area of the canopy around the hinges, and you
also need to shave off a bit of the “hump” the canopy attached to, to insure a
nice easy fit. I neglected that last part and forced the fit a bit more than I
should have, with the result that there are some needless stress marks in the
rear canopy, which are very visible at certain angles under certain lighting. If
you decided to do this, be sure to test fit and modiry until you have a very
easy fit back there.
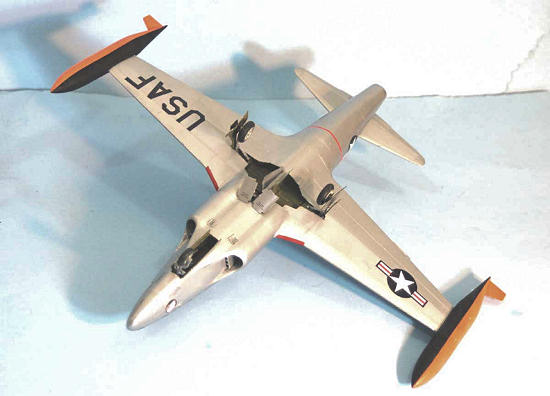
When I attached the wing sub-assembly to the fuselage, after much
test-fitting to be sure the upper wing-fuselage joint would be smooth, I found
it was a good idea to attach the two sub assemblies with cyanoacrylate glue as I
held them together on each side of the fuselage in proper position.
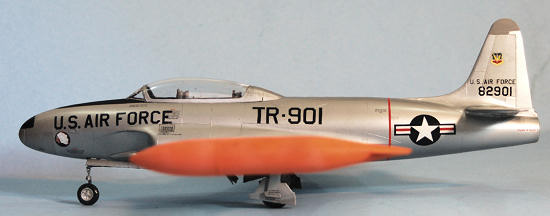
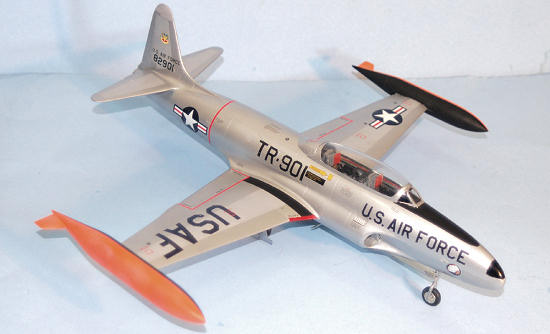
| COLORS & MARKINGS |
 model with
my dremel polishing head before painting, to be sure I had all the scratches
sanded and filled.
model with
my dremel polishing head before painting, to be sure I had all the scratches
sanded and filled.
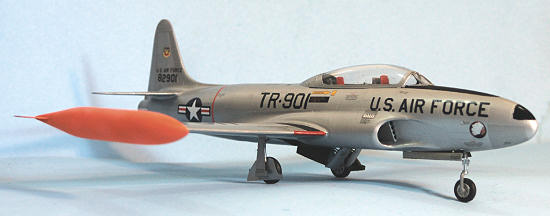
| FINAL CONSTRUCTION |
| CONCLUSIONS |
May 2010
If you would like your product reviewed fairly and quickly, please contact me or see other details in the Note to Contributors.