Airfix 1/48 Meteor F.8
| KIT #: | A09182 |
| PRICE: | $45.98 SRP |
| DECALS: | Two Options |
| REVIEWER: | Tom Cleaver |
| NOTES: | Xtradecals 48-043 |
| HISTORY |
By 1947, the Meteor fighter had been in production slightly more than four years, with an airframe that was much the same as the original prototype, other than extensions of the engine nacelles which had been accomplished with the F.Mk.4 and resulted in a significant aerodynamic cleanup of the airframe with a concomitant increase in speed. The Meteor F.Mk.8 was the result of a development program on the part of Gloster Aircraft to extend the life of the Meteor line by raising the limiting Mach number.
 To improve
the Meteor's performance, and provide for new equipment made necessary by
changing operational requirements, Gloster embarked on a major redesign of the
airframe while attempting to keep as many F.4 components as possible. Most
prominently, the fuselage of the Meteor 8 was lengthened by 30 inches, moving
the ammunition and weapons forward the same distance, and allowing an additional
50 gallon fuel tank to be installed. It was hoped that this would also result in
the deletion of the lead ballast carried in the nose of the F.4; Meteor F.4
RA382 had the lengthened nose, but it was discovered that deleting the lead
ballast had the unfortunate effect of shifting the center of gravity to the rear
as ammunition was expended, with increasing airframe instability.
To improve
the Meteor's performance, and provide for new equipment made necessary by
changing operational requirements, Gloster embarked on a major redesign of the
airframe while attempting to keep as many F.4 components as possible. Most
prominently, the fuselage of the Meteor 8 was lengthened by 30 inches, moving
the ammunition and weapons forward the same distance, and allowing an additional
50 gallon fuel tank to be installed. It was hoped that this would also result in
the deletion of the lead ballast carried in the nose of the F.4; Meteor F.4
RA382 had the lengthened nose, but it was discovered that deleting the lead
ballast had the unfortunate effect of shifting the center of gravity to the rear
as ammunition was expended, with increasing airframe instability.
The solution was discovered almost by accident. Tests were being carried out on the E.1/44 prototype in the Farnborough wind tunnel, where it was discovered that the tail assembly of this airplane would provide the necessary control for the F.8. Once an E.1/44 tail was grafted onto RA382, it handled beautifully without ballast. Other improvements included a new gunsight and the Martin Baker Mk.2 ejection seat.
The first F.8 prototype,
VT150, made its first flight on October 12, 1948. A further change was made when
it was discovered that the under fuselage ejection slots for spent shell casings
was scoring the belly tank and
 rear
fuselage; large external chutes were fitted to the slots to carry the shell
casings clear. A pair of Rolls Royce Derwent 8s gave the F.Mk.8 a top speed of
590 m.p.h. Later, the size of the air intakes was increased by 4.5 inches in
diameter, which resulted in an extra 200 pounds of thrust for each engine due to
the increased air mass available. This resulted in a top speed of around 600
m.p.h.
rear
fuselage; large external chutes were fitted to the slots to carry the shell
casings clear. A pair of Rolls Royce Derwent 8s gave the F.Mk.8 a top speed of
590 m.p.h. Later, the size of the air intakes was increased by 4.5 inches in
diameter, which resulted in an extra 200 pounds of thrust for each engine due to
the increased air mass available. This resulted in a top speed of around 600
m.p.h.
The first F.8, VZ438, was handed over to the RAF on December 10, 1949, while the last WL191 left the assembly line on April 9, 1954. Thirty two RAF squadrons and eleven Auxiliary Air Force squadrons would operate the Meteor between its first appearance on the squadron level in 1950 and its final replacement by the Hunter in 1958. The F.Mk.8 was also operated by the air forces of Australia, Denmark, the Netherlands, Belgium, Israel, Egypt, Syria, and Brazil until as late as the 1970s. The final use of the F.Mk.8 was as a target drone, under the designation Meteor U.16.
| THE KIT |
Airfix announced the release
of a 1/48 meteor F.8 last year. Modelers who had struggled with the Classic
Airframes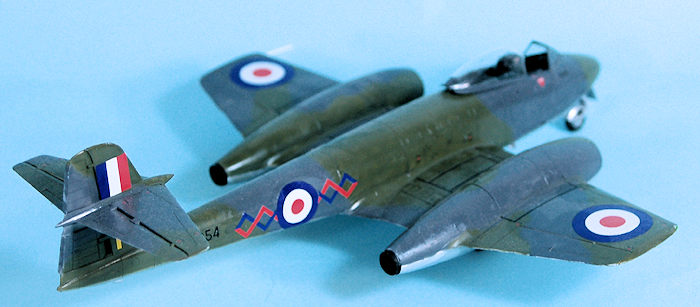 kits were very happy with this news. The kit was released this past April in the
UK, finally arriving on this side of the Atlantic in May. Sales have been brisk,
to say the least.
kits were very happy with this news. The kit was released this past April in the
UK, finally arriving on this side of the Atlantic in May. Sales have been brisk,
to say the least.
The positive response to the kit is justified on opening the big red box. The kit is logically laid out, with crisp molding and surface detail that looks good under the proverbial “coat of paint.”
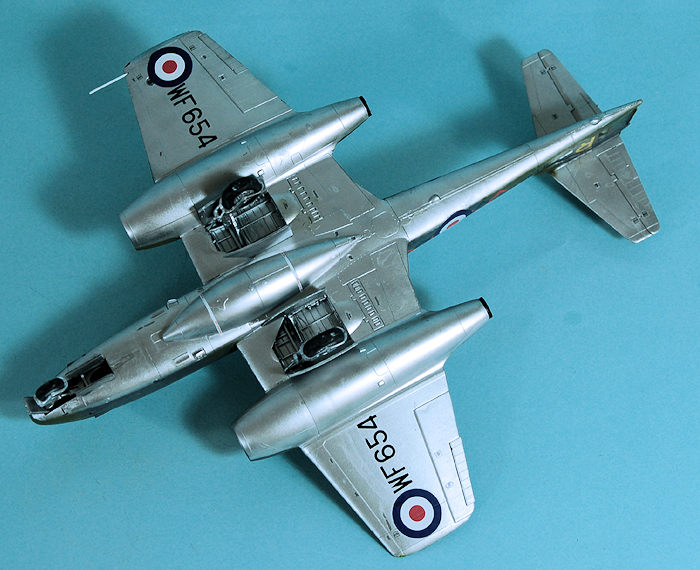
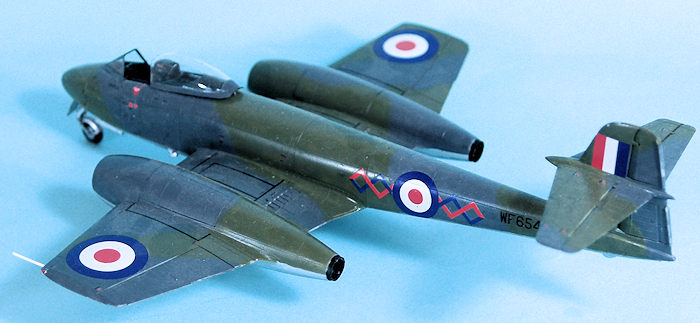
Both the early “small bore” intakes and later “large bore” intakes are provided, and the kit also includes two Derwent engines which can be displayed with the engine covers off. The early framed canopy and later blown canopy are also present. The framed canopy has the bulged canopy that has eluded the makers of previous meteor F.8 kits. Decals are provided for two RAF Meteors, one in “high speed silver” and one in camouflage.
| CONSTRUCTION |
Compared to the truly wretched Classic Airframes “putty monsters,” the Airfix Meteor is nearly trouble-free. It’s not totally trouble-free, but the problems that exist are easily solved and certainly nowhere near the difficulty and problems of the earlier kits.
 This was my
second kit of the Meteor, and my construction technique profited from having
found the minefield “the hard way” the first time. If you follow what I did
here, you too will have a trouble-free build. This was a second-run kit, and did
not have the warp in the right fuselage that the first kit did.
This was my
second kit of the Meteor, and my construction technique profited from having
found the minefield “the hard way” the first time. If you follow what I did
here, you too will have a trouble-free build. This was a second-run kit, and did
not have the warp in the right fuselage that the first kit did.
I found that the Airfix instructions that have one not attach the nose cone until the fuselage and cone have been assembled separately leads to fit problems. What I did this time was to glue the nose cone halves to the respective fuselage halve prior to further assembly. This got the fit perfect, and also guaranteed I would attach the nose gear properly so that the nose gear door would fit without having to be trimmed as I had to do with the first kit.
Modelers have noted problems with the fuselage-wing fairing pieces, with some modelers finding that there is a substantial gap between the fuselage and upper wing when the two sub-assemblies are joined. This is a modeler-induced problem. I attached the fuselage/wing fairing parts to their respective fuselage halves prior to further assembly, which allowed me to work the joint from both sides and get it absolutely perfectly aligned with the surrounding fuselage half. This insured that there would be no wing-fuselage gap when I attached the wing sub-assembly to the fuselage sub-assembly. In fact, with this kit I only had to use a bit of Mr. Surfacer on the fuselage centerline seam; everything else had fit just right.
I added as many fishweights as I could squeeze into the area behind the cockpit between the cannon bays to insure nose-sitting. I also used the kit ejection seat, with the part that had the molded-in seatbelts. A resin seat would look good here, but given that everything including the seat is flat black, the kit part is just fine.
| COLORS & MARKINGS |
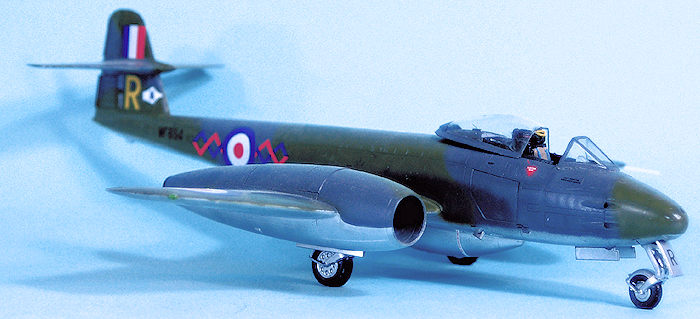 I gave the
model an overall coat of Tamiya Gloss Black X-1 for a primer, then airbrushed
Vallejo “White Aluminum” over all the lower surfaces. I then painted the
camouflaged upper surfaces with Tamiya RAF Dark Green and Dark Grey, which is
close to the Dark Sea Grey that was used on the original. When that was dry, I
gave the model a thin coat of Future.
I gave the
model an overall coat of Tamiya Gloss Black X-1 for a primer, then airbrushed
Vallejo “White Aluminum” over all the lower surfaces. I then painted the
camouflaged upper surfaces with Tamiya RAF Dark Green and Dark Grey, which is
close to the Dark Sea Grey that was used on the original. When that was dry, I
gave the model a thin coat of Future.
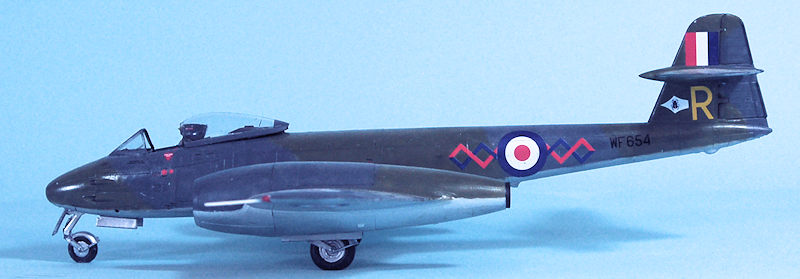
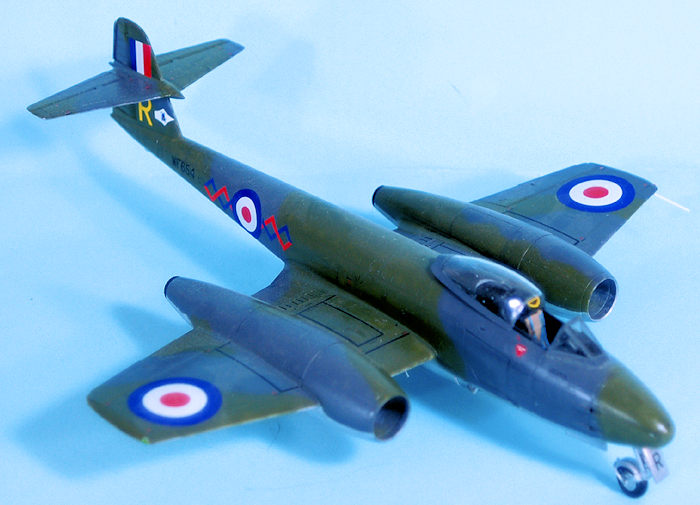
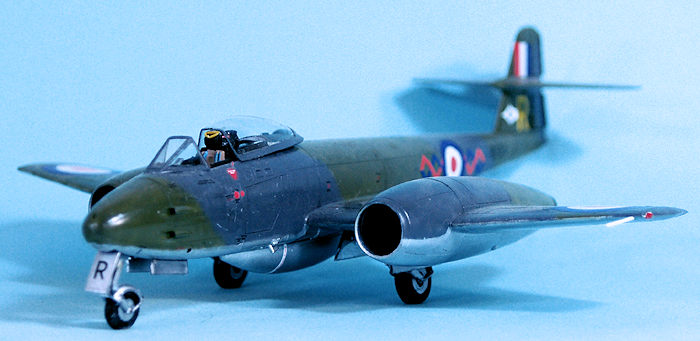
I used the kit decals for the national insignia, which is the right colors, and for the extensive stencils. I used Xtradecals 48-043 for the individual aircraft markings and did the 64 Squadron F.8 as seen circa 1955-56.
When the decals were set, I washed the model to get rid of any dried decal solvent, then gave the model a coat of Clear Satin.
I attached the landing gear and positioned the blown canopy in the open position.
| CONCLUSIONS |
 This kit is
light years better than the old Classic Airframes kits, which can safely be
turned into the door stops they have always aspired to be. The kit is easy to
assemble if you take care with the details mentioned above, and the result is a
really outstanding model, however you finish and mark it. There are lots of
decal sheets out there for the F.8 and the two new sheets from Hannat’s have a
nice international selection of markings possibilities, as well as the older
sheets they did for the Classic Airframes kit, which have now been reprinted.
This kit is
light years better than the old Classic Airframes kits, which can safely be
turned into the door stops they have always aspired to be. The kit is easy to
assemble if you take care with the details mentioned above, and the result is a
really outstanding model, however you finish and mark it. There are lots of
decal sheets out there for the F.8 and the two new sheets from Hannat’s have a
nice international selection of markings possibilities, as well as the older
sheets they did for the Classic Airframes kit, which have now been reprinted.
1 September 2016
Copyright ModelingMadness.com
Review kit courtesy of Hornby USA. Decals courtesy of Hannant’s.
If you would like your product reviewed fairly and fairly quickly, please contact the editor or see other details in the Note to Contributors.