Classic Airframes 1/48 Vampire FB.5
| KIT #: | 470 |
| PRICE: | $49.95 MSRP |
| DECALS: | Three options |
| REVIEWER: | Tom Cleaver |
| NOTES: | Limited run with resin parts. |
| HISTORY |
Unlike the Gloster Meteor - which was always intended to be an interceptor - the de Havilland Vampire began as an experimental aircraft, originally developed to specification E6/41. Design of what the company named the DH-100 began at the de Havilland factory at Hatfield in mid-1942, some two years after the Meteor began development. Known in the company as the “Spidercrab,” the aircraft utilized de Havilland's extensive experience in using molded plywood for aircraft construction, and was the last composite wood/metal construction high performance military aircraft. To reduce thrust loss, the single H.1 engine - later known as the Goblin - in the egg-shaped aluminum-surfaced fuselage (which had a wooden basic structure) had a short exhaust pipe, with the rear control surfaces on twin booms to either side of the fuselage. While the design looks strange today, at least two contemporary German jet fighter projects used a similar layout.
The first prototype, LZ548/G, was flown by Geoffrey de Havilland on September 20, 1943, only six months later than the Meteor. The production Mk I - by this time known as the “Vampire” - did not fly until April, 1945. Almost all Vampire F Mk.Is were built by English Electric, due to the commitment of de Havilland for production of the Mosquito series.
 The first Vampire F Mk.1 was taken on charge by 247 Squadron in March 1946.
Improvements were introduced on the line and as production progressed, with
the Goblin 2 of 3,100 lb thrust introduced along with auxiliary under wing
fuel tanks with the 40th airplane and a pressurized cockpit and
bubble canopy from the 51st. The centrifugal engine was
thirsty, and the early Vampires suffered from having a range of only 730
miles.
The first Vampire F Mk.1 was taken on charge by 247 Squadron in March 1946.
Improvements were introduced on the line and as production progressed, with
the Goblin 2 of 3,100 lb thrust introduced along with auxiliary under wing
fuel tanks with the 40th airplane and a pressurized cockpit and
bubble canopy from the 51st. The centrifugal engine was
thirsty, and the early Vampires suffered from having a range of only 730
miles.
The range problem was addressed in the Vampire F Mk.3, built to specification F.3/47, which carried additional fuel in wing tanks that extended the range to 1,145 miles. The tanks caused stability problems, which were solved by lowering the horizontal stabilizer, widening its chord, and changing the shape of the fin and rudder. The prototype, TG275, first flew on November 4, 1945 and the F Mk.3 entered service with 54 Squadron in April 1948.
The most-produced combat variant of the Vampire was the FB Mk.5 with 473 aircraft. The FB Mk.5 utilized the type’s good handling qualities for ground attack. The wingtips were clipped and the wings strengthened to carry two 1,000lb bombs or eight rockets. To compensate for the higher wing loading, a longer-stroke undercarriage was fitted. The prototype, TG444 - a converted F Mk.1 - flew on June 28, 1948 and the first production aircraft followed in June 1949, with first deliveries to 54 Squadron that fall. The FB Mk.9 was optimized for tropical operations with an air conditioned cockpit, and was otherwise distinguishable from the FB Mk.5 by an eight inch increase in the starboard wing root fillet to house the air conditioning unit.
 The FB Mk.5 became the first jet aircraft operated by the Royal Navy as the
F Mk.20, with the wing strengthened and the dive brakes and flaps enlarged
to reduce landing speeds. The F.20 was issued to second-line units for jet
familiarization training.
The FB Mk.5 became the first jet aircraft operated by the Royal Navy as the
F Mk.20, with the wing strengthened and the dive brakes and flaps enlarged
to reduce landing speeds. The F.20 was issued to second-line units for jet
familiarization training.
The Vampire was exceptionally versatile, setting many aviation firsts and records. It was the first RAF fighter with a top speed of over 500 mph, and the first jet to take off from and land on an aircraft carrier when an F Mk.1 landed aboard HMS Ocean on December 3, 1945. In 1948 Wing Commander John Cunningham set a new world altitude record of 59,446 ft. On July 14, 1948, four Vampire F Mk.3s of 54 Squadron became the first jet aircraft to fly across the Atlantic, traveling via Stornoway, Iceland and Labrador to Montreal on a goodwill tour of Canada and the U.S. where they gave several formation aerobatic displays that late summer and fall.
The Vampire served with front-line RAF units until 1955 and with the RAuxAF until its disbandment in 1957. The airplane also served with the air forces of Australia, Finland, France, India, New Zealand, Sweden, Switzerland, Mexico, the Dominican Republic and several other countries. 4,400 Vampires of all types including the 2-seat trainers were built, 1,100 of them under license, including 190 built in Australia starting in 1946.
The Vampire trainers remained in service with several air forces into the 1980s, and there are still some being flown today. Several Vampire FB.5s still exist and are being flown by private owners, including one owned by John Travolta, who uses it to maintain his jet and aerobatic proficiency.
| THE KIT |
The Vampire has been well-served in 1/72 scale, with a still-good kit released by Heller in the 1970s that can be made up into a nice-looking model with not a lot of effort. In 1/48, the Vampire was badly served by a series of kits from Hobbycraft in the late 1980s and early 1990s that bore only a general planform relationship to the original airplane. Aeroclub had been about to release a very good series of vacuform kits of all the major sub-types just at the point when the Hobbycraft trainwreck came out; these were finally released in 1996, and are still excellent kits that make up into good models for those not afraid of the V-word if you can find them, since they are long out of production.
 This Vampire from Classic Airframes is announced as the first of a “Vampire
family” that should include the earlier F MK.1 and F Mk.3, as well as the
NF Mk.10 and T Mk.11 two-seaters. Given that the current kit includes the
extended wingtips of the F Mk.3, that type could be built now if a modeler
obtained correct serial numbers for it.
This Vampire from Classic Airframes is announced as the first of a “Vampire
family” that should include the earlier F MK.1 and F Mk.3, as well as the
NF Mk.10 and T Mk.11 two-seaters. Given that the current kit includes the
extended wingtips of the F Mk.3, that type could be built now if a modeler
obtained correct serial numbers for it.
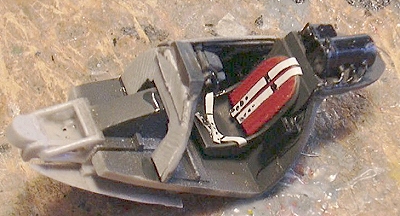
The kit comes on two sprues of injection-molded plastic that contain the main parts of the airframe - fuselage, wings, booms and tail - with the cockpit, wheel wells, and lower fuselage nose done in resin. These parts will make up into a cockpit that looks so nice it’s almost a shame to have to paint the interior black.
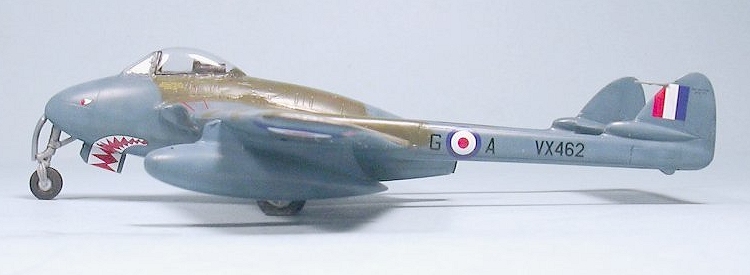
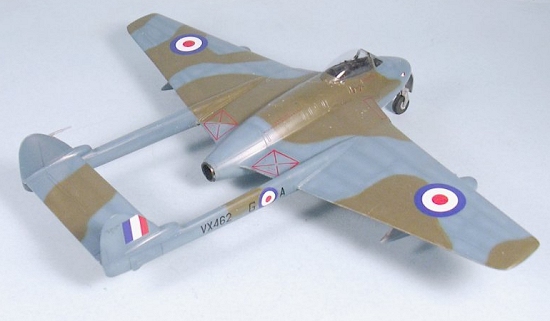
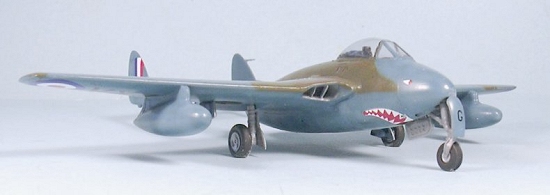
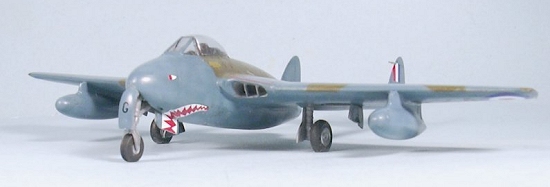
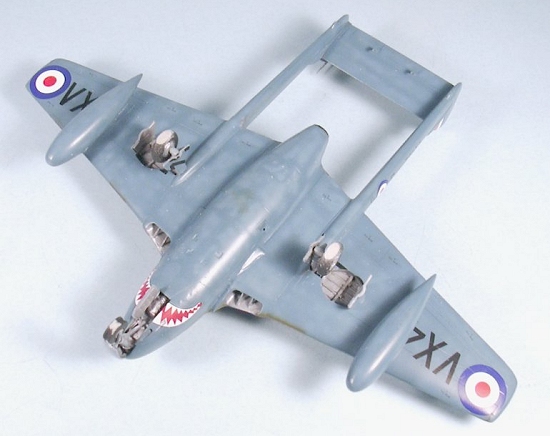
The kit decals provide markings for three aircraft: a camouflaged FB Mk.5 of 112 Squadron in Germany in an experimental one-off scheme of overall PRU Blue with a disruptive pattern of dark green on the upper surfaces, a silver FB Mk.5 of 421 Squadron RCAF, and a camouflaged FB Mk.9 of 75 Squadron RNZAF. These are printed by Micro-Scale and are of their usual excellent standard.
 (Your
editor would like to point out that the New Zealand markings really are for
an FB.5. Discussions of this with 'Mr RNZAF', Phil Treweek, brought to
light that there were no FB.9s in RNZAF service. Two were bought from
Singapore as instructional airframes and some FB.9 wings were purchased as
part of a batch of
spares, but that is the extent of it. New Zealand's second batch of FB.5s
(actually FB.52s) were built in the same production batch as RAF FB.9s and
this led author A.J Jackson to believing them to be FB.9s. He so stated
this in his Putnam book on DeHavilland. This was the beginning of the confusion regarding the use of
FB.9s by New Zealand that apparently continues even today!)
(Your
editor would like to point out that the New Zealand markings really are for
an FB.5. Discussions of this with 'Mr RNZAF', Phil Treweek, brought to
light that there were no FB.9s in RNZAF service. Two were bought from
Singapore as instructional airframes and some FB.9 wings were purchased as
part of a batch of
spares, but that is the extent of it. New Zealand's second batch of FB.5s
(actually FB.52s) were built in the same production batch as RAF FB.9s and
this led author A.J Jackson to believing them to be FB.9s. He so stated
this in his Putnam book on DeHavilland. This was the beginning of the confusion regarding the use of
FB.9s by New Zealand that apparently continues even today!)
| CONSTRUCTION |
Some Classic Airframes kits are better than others when it comes to production design, ease of construction, and accuracy. Unfortunately, in my opinion, this kit is rather further down the scale than such recent releases as the Wyvern.
I started with the cockpit, which is one of the most beautiful cast resin cockpits I have seen. Sadly, the cockpit opening is small enough that once installed in the fuselage with the fuselage assembled, one has to look pretty closely to see all this nice detail. The fact that the cockpit is to be painted black doesn’t improve things. I do wish that Classic Airframes would have their resin seats designed with molded-in seatbelts. I ended up making an approximation of a Sutton harness from lead foil taken from a wine bottle.
 I also found that attaching the exterior lower nose resin part to the rest
of the assembled cockpit before assembling all this into the fuselage will
guarantee you’ll get a good fit when you proceed with full fuselage
assembly.
I also found that attaching the exterior lower nose resin part to the rest
of the assembled cockpit before assembling all this into the fuselage will
guarantee you’ll get a good fit when you proceed with full fuselage
assembly.
Once I had the cockpit installed in the right fuselage half, I stuffed in as many small fishing weights in the upper nose behind the instrument panel and above the nose wheel as I could. I then assembled the fuselage and left the bottom panel off until I had the whole airframe installed, since it was obvious the weight in the nose was insufficient to get a nose-sitter as it was.
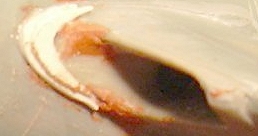
Assembly of the wings and tail is “fiddly” to say the best. All the joints needed filling, and the seams for the rear area of the wing-to-fuselage joint were particularly resisted my attempts to get rid of them. Almost all the engraved detail on the rear fuselage had to be re-scribed after I managed to get rid of the persistent fuselage centerline seam. The tail booms have nothing to insure they are correctly fitted, so you have to eyeball them closely to get them aligned properly. I attached the horizontal stabilizer and then rubber-banded the whole assembly to get a good tight fit. My fears about the heavy-handed engraved detail on the kit were groundless; I had to sand the assembled airframe down so much to get rid of seam and joint lines that the panel lines were the least of the worries.
I then filled the area immediately under the rear of the cockpit floor with
more fishing weights. As it turned out even that was not enough.
I recommend you put more weight on the back of the cockpit bulkhead too,
because in the end when I attached the landing gear it was still a
tail-sitter and I was only able to get it to nose sit by sticking a final
fish weight in the nose wheel well. Since the distance from main gear
to nose is so short with this kit, and the weights are thus just barely in
front of the center of balance, it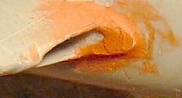 requires much more weight that you expect to get a nose sit.
 The really big problem of the model, one that can’t really be completely
corrected, is the resin air intakes. These are not the right shape, and
even after you fiddle with them and re-shape them as I did, the best you
can get is “less incorrect.” John Adams was very close to releasing his own
limited-run injection-molded Vampire when the Classic Airframes kit was
announced, and he put the project aside. He has informed me he is checking
to see if his intakes w
The really big problem of the model, one that can’t really be completely
corrected, is the resin air intakes. These are not the right shape, and
even after you fiddle with them and re-shape them as I did, the best you
can get is “less incorrect.” John Adams was very close to releasing his own
limited-run injection-molded Vampire when the Classic Airframes kit was
announced, and he put the project aside. He has informed me he is checking
to see if his intakes w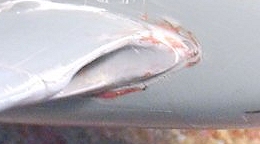 ould fit this kit. If they do he will release them
along with his vacuformed canopy as a correction set and I will highly
recommend you get it. I threw away the kit-supplied cockpit canopy, since
it bears no resemblance to the shape of the Vampire canopy, and replaced it
with a vacuformed canopy from Aeroclub that vastly improves the look of the
model and allows you to assemble it closed - so it looks good - and still
see that nice cockpit.
ould fit this kit. If they do he will release them
along with his vacuformed canopy as a correction set and I will highly
recommend you get it. I threw away the kit-supplied cockpit canopy, since
it bears no resemblance to the shape of the Vampire canopy, and replaced it
with a vacuformed canopy from Aeroclub that vastly improves the look of the
model and allows you to assemble it closed - so it looks good - and still
see that nice cockpit.
| COLORS & MARKINGS |
Painting:
 I had given thought to doing my kit in overall Speed Silver, but a coat of
grey primer showed that there were still “hills and valleys” around the
wing seams that would be visible under a thin coat of a single color of
paint. By this point my enthusiasm level for the project was waning fast,
so I decided to do the box art airplane, a Vampire from 112 Squadron in
Germany in 1952 in a one-off experimental paint scheme of overall PRU Blue
with a disruptive pattern of dark green on the upper surfaces. I used
Xtracrylix paints for both colors and applied the camouflage freehand,
since all Vampires were camouflaged “in the field.” I gave the model a
coat of Future and was ready for decals.
I had given thought to doing my kit in overall Speed Silver, but a coat of
grey primer showed that there were still “hills and valleys” around the
wing seams that would be visible under a thin coat of a single color of
paint. By this point my enthusiasm level for the project was waning fast,
so I decided to do the box art airplane, a Vampire from 112 Squadron in
Germany in 1952 in a one-off experimental paint scheme of overall PRU Blue
with a disruptive pattern of dark green on the upper surfaces. I used
Xtracrylix paints for both colors and applied the camouflage freehand,
since all Vampires were camouflaged “in the field.” I gave the model a
coat of Future and was ready for decals.
Decals:
Xtradecal has also released a sheet of their usual excellent-quality decals for the Vampire, and I used these for all but the 112 Squadron shark mouth and the serials. Getting the serials on the gear doors was not fun - I placed each door on the decal while still on the sheet, and traced around it with a #11 X-acto, then applied the decals. (As a old-time builder of things RAF, I'd suggest tacking the gear doors in the 'closed' position before applying under wing decals. Then slice along the edges and there you are. Of course, I've not built my Vampire kit so this may not be a viable option. Ed)
| FINAL CONSTRUCTION |
I gave the model a coat of Xtracrylix Satin varnish, since this is a good approximation of what a glossy paint scheme looks like “in scale” and after it’s been “out in the world” awhile in real life.
I assembled the landing gear and discovered I still had a tail-sitter. Even flattening the main gear as much as possible without losing a realistic look it still teetered. As I said above, this was solved with a fish weight in the nose wheel well that can’t be seen unless the model is turned over.
| CONCLUSIONS |
Since the Aeroclub vacuform Vampire is no longer available, this Classic Airframes kit is the only game in town. Unfortunately, its accuracy problems with the canopy and the intakes result in a model that is at best - and after much work - only an approximation of the Vampire. Get the Aeroclub canopy for certain and I hope John Adams releases corrected intakes for this kit. With those two items, it could be improved to the point I would not be saying that - out of the box - it is a disappointment.
February 2005
Review kit courtesy of Hannant’s.
If you would like your product reviewed fairly and fairly quickly, please contact the editor or see other details in the Note to Contributors.