
Roden 1/48 Beechcraft D17S Staggerwing
| KIT #: | 446 |
| PRICE: | $35.00 MSRP |
| DECALS: | Three options |
| REVIEWER: | Blair Stewart |
| NOTES: | Includes resin and photo etched parts |
| HISTORY |
At the height of the Great Depression, aircraft executive Walter H. Beech and airplane designer T. A. "Ted" Wells joined forces to collaborate on a project to produce a large, powerful, and fast cabin biplane built specifically for business executives. The Beechcraft Model 17, known as the "Staggerwing", first flew on November 4, 1932. During its heyday, it was used as an executive aircraft, much as the private jet is now, and its primary competitors were the Waco Custom Cabin and Waco Standard Cabin biplanes.
The Model 17's unusual negative stagger wing configuration (i.e.,
the upper wing being staggered behind the lower) and unique shape maximized the
pilot’s visibility while reducing interference between the wings. The
fabric-covered fuselage was faired with wood formers and stringers over a
welded, steel tube frame.
 The aircraft’s construction was complex and required
many man-hours to complete. The Staggerwing's retractable conventional landing
gear, uncommon at the time, combined with careful streamlining, light weight,
and a powerful radial engine, all improved its flight performance.
The aircraft’s construction was complex and required
many man-hours to complete. The Staggerwing's retractable conventional landing
gear, uncommon at the time, combined with careful streamlining, light weight,
and a powerful radial engine, all improved its flight performance.
In the mid-1930s, Beech undertook a major redesign of the aircraft, to create the Model D17 Staggerwing. The D17 featured a lengthened fuselage that improved the aircraft's handling characteristics by increasing control leverage, and the ailerons were relocated to the upper wings, eliminating interference with the flaps. A foot-operated brake linked to the rudder pedals improved the aircraft’s braking.
Sales started very slowly. The first Staggerwings' high price tag ($14,000 to $17,000, depending on engine size) scared off potential buyers in an already depressed civil aircraft market. Only 18 Model 17s were sold during 1933, the first production year, but sales steadily increased. Each Staggerwing was custom hand-built. The luxurious cabin, trimmed in leather and mohair, held up to five passengers. Eventually, the Staggerwing captured a substantial share of the passenger aircraft market. By the start of World War II, Beechcraft had sold more than 424 Model 17s.
The Staggerwing's speed made it popular with 1930s air racers. An
early version of the Model 17 won the 1933 Texaco Trophy Race. In 1935, a
British diplomat, Capt. H.L. Farquhar, successfully flew around the world in a
Model B17R, traveling 21,332 miles from New York to London, by way of Siberia,
Southeast Asia,
 the Middle East, North Africa and back across Europe.
Louise Thaden and Blanche Noyes won the 1936 Bendix trophy in a C17R Staggerwing. Thaden also won the Harmon Trophy for her achievement. Jackie Cochran set a women's speed record of 203.9 mph, established an altitude record of over 30,000 feet, and finished third in the 1937 Bendix Trophy Race, all in a special Model D17W Staggerwing.
In 1970, due to a dispute with the T-6 racing class, the Reno National Air Races invited five Staggerwings to perform a demonstration race. Two G models and two D17 models raced. The five pilots were Bryant Morris, Bert Jensen, Don Clark, Noel Gourselle, and Phil Livingston, the only pilot to have prior racing experience in the T-6 class. The race was flawless with ABC Wide World of Sports coverage, but protesting T-6 racers prevented the class from future competition with allegations of safety issues.
| THE KIT |
Once again, I decided to finish a kit in the “already started” stash (of which I have more than I care to admit, but my consolation is that this is a COMMON malady amongst us modelers). I started this kit some three years ago, painted and decaled it, and then suddenly lost interest. My conscience finally getting the best of me, I decided to dust it off and complete it.
 Ever since I became aware of their existence, I have thought that
the Beechcraft Staggerwing was and still is one of the most beautiful airplanes
ever designed for the civilian market. Thus, I was quite excited when Roden
first released their military version (UC-43) of the aircraft, hoping they would
soon follow that kit with a civilian version.
Ever since I became aware of their existence, I have thought that
the Beechcraft Staggerwing was and still is one of the most beautiful airplanes
ever designed for the civilian market. Thus, I was quite excited when Roden
first released their military version (UC-43) of the aircraft, hoping they would
soon follow that kit with a civilian version.
Alas, Roden followed suit with this kit, and I quickly purchased it. Up until Roden decided to offer it, I believe the only other 1/48 kit of the Staggerwing was the AMT kit (which I recently re-examined and can say that it appears to be a relatively nice kit, given its age. The version I have is the reboxed ESCI/ERTL kit).
The parts are essentially the same as one gets in the UC-43 version. I won’t repeat The Boss' review, which you can find in the MM archives. I will comment that the decals in the kit are of three relatively recent civilian aircraft.
| CONSTRUCTION |
Per the
instructions, I assembled the engine cowling, instrument panel and seats. I then
glued these along with the control stick and rudder pedals to the cabin floor. I
decided that my interior would represent a light tan leather interior, so I
painted the interior and components with Model Master tan. I then moved to the
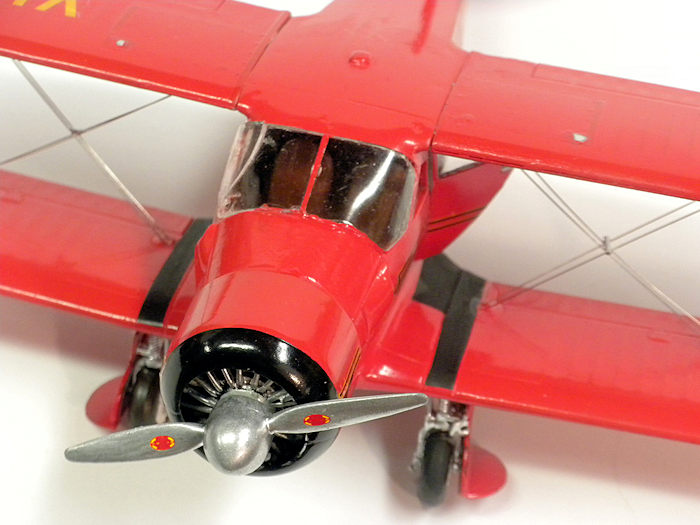
7-part engine, and, when a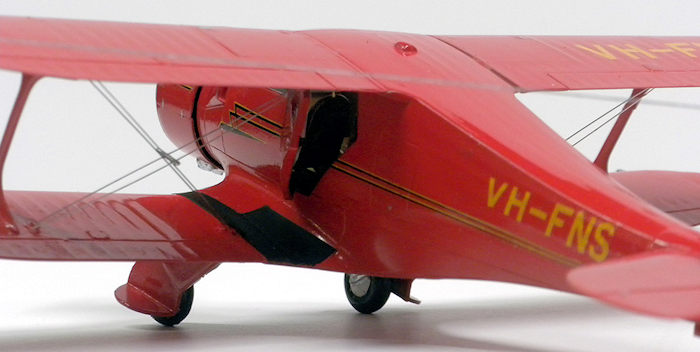 ssembled, I hand-painted it black and then picked out
parts like pushrod covers and other items with Testors Silver.
ssembled, I hand-painted it black and then picked out
parts like pushrod covers and other items with Testors Silver.
I then skipped to step 13 in the instruction sheet and assembled the lower wing. I then glued the cockpit interior and the tail wheel assembly to the right fuselage half, and glued the left half to that. I glued the vertical stabilizers to the rear of the model and let all this dry. Once dry, I moved to step 17 and glued the wing struts to the lower wings. I then attached the upper wings, making sure that everything was aligned properly. I then glued the engine to the front of the model and then covered it with the assembled cowling.
At this stage, I moved to assembling the rather intricate main landing gear. The gear skirts require bending the lower half of the skirt 90 degrees, assuming one intends to display the aircraft with the gear in the down position.
All the parts (with the exception of the front windscreen) fit rather well and required little to no putty.
| COLORS AND MARKINGS |
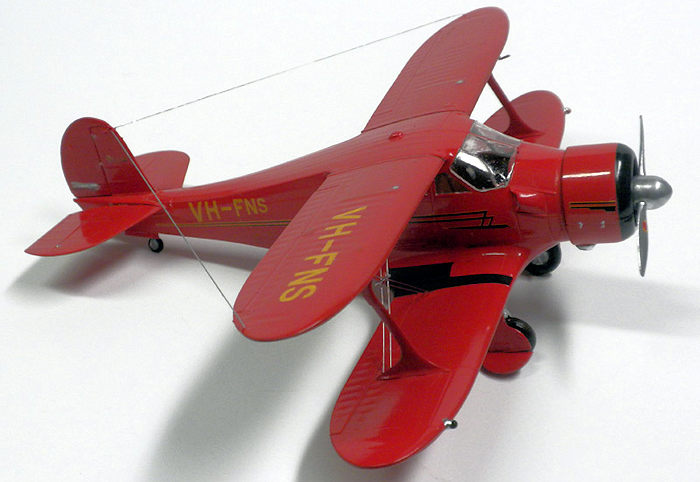
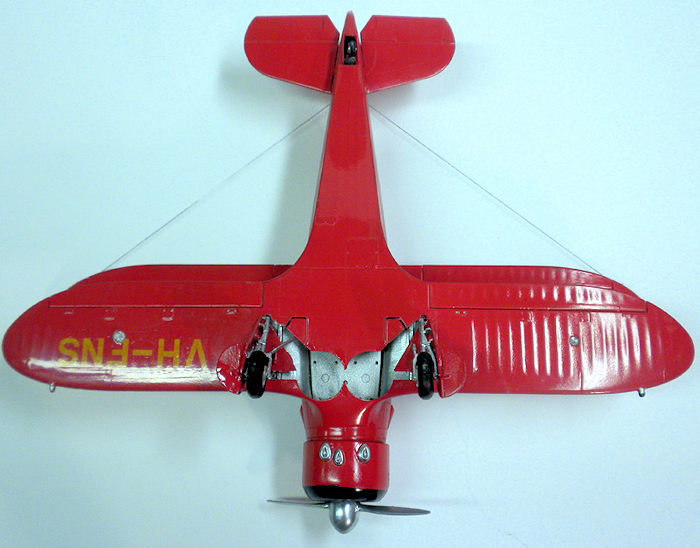
I’m a “red guy,” so I opted to model VH-FNS, which was manufactured in 1942, perhaps as a UC-43 during World War II. I found numerous pictures of this aircraft on the web, so this was a good resource to use in finishing the kit. I did discover that the aircraft was involved in a crash in May 2014 and suffered substantial damage. I don’t know whether or not the aircraft was restored to flying status, but I suspect it was.
For the red paint scheme, I opted to use my go-to red paint: MM Gloss Guards Red. This is a nice, bright red paint and provides a very good gloss finish. In preparation for the overall paint scheme, I sprayed the wheel wells with MM aluminum, and then stuffed wet tissues into the cockpit and wheel wells. I then painted the entire aircraft with the Guards red.
 After a few days, I began the polishing process. This involves
using various grits of sandpaper (actually, I use Micromesh sanding pads, which
come in grits from 1000 to 8000) and wet sanding to achieve a high gloss finish
(this is essentially the process used by custom car builders and is sometimes
called “color sanding”). Once I finished up the sanding, I got out my trusty jar
of “The Treatment” model wax and polished all of the exterior surfaces (note:
you can also use any paste wax such as Johnson’s Fine Wood Paste Wax for this
stage). The key is that the wax polish takes out many of the fine scratches left
by the sanding process.
After a few days, I began the polishing process. This involves
using various grits of sandpaper (actually, I use Micromesh sanding pads, which
come in grits from 1000 to 8000) and wet sanding to achieve a high gloss finish
(this is essentially the process used by custom car builders and is sometimes
called “color sanding”). Once I finished up the sanding, I got out my trusty jar
of “The Treatment” model wax and polished all of the exterior surfaces (note:
you can also use any paste wax such as Johnson’s Fine Wood Paste Wax for this
stage). The key is that the wax polish takes out many of the fine scratches left
by the sanding process.
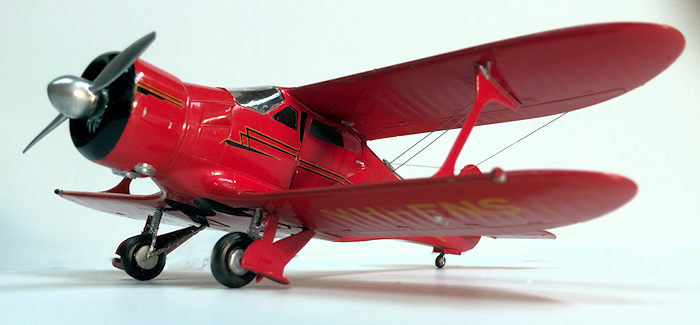
Assuming my airplane model was of one that was natural metal, I masked off wing panels, the rudder, and a band around the rear fuselage. I then took my Floquil Bright Silver, darkened it with some Testors Flat Black, and then shot these panels to give a different hue to the aluminum surfaces.
Once dry, I polished the aircraft surfaces with a flannel cloth. I then assembled the landing gear, and hand painted these. The color scheme on the propellers is quite intricate (i.e., aluminum, flat black and flat yellow), so I decided to “free-hand” these rather than mask them for airbrushing. I then glued the props to the engines.
At this point, I applied the decals for VH-FNS. The decals are okay, but are somewhat thin and require care when applying, particularly the long stripes down the sides of the fuselage. The decals settled nicely with a generous application of Walther’s Solvaset.
 I hand painted the landing gear using some acrylic paints and MM
silver for the landing gear structure. I then glued these to the aircraft.
I hand painted the landing gear using some acrylic paints and MM
silver for the landing gear structure. I then glued these to the aircraft.
My one complaint on this kit is the front windscreen: it just doesn’t fit the model (apparently, The Boss and Tom Cleaver had the same issue when they both built this kit). I tried to seal the gaps with white glue, but this was the one disappointing aspect of the build. The other windows seemed to fit okay. I decided to glue the cabin entry door in the open position.
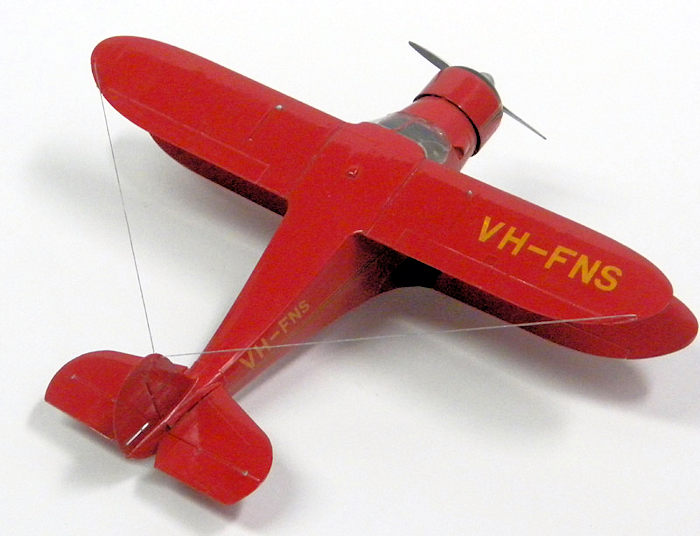
Next came the “dreaded” rigging of the wings. I decided to use guitar string for this, but I had a heck of a time getting the right lengths cut and then glued to the wings. Fortunately, there are only four of these per wing, so that somewhat limited the hate, pain and grief often associated with this process. I cut pieces of round plastic to represent the rigging “stabilizers”- for lack of a better word – that ties the four cables together in the middle on the real airplane.
For the radio antenna, I drilled holes in the wings and vertical tail, then super glued clear fishing line into these holes. Once the glue dried, I “carefully” held a lit lighter below the lines to make them shrink and tighten (note: it only takes a little overdoing of this to make the line melt, so be careful if you use this technique!).
| CONCLUSIONS |
Overall, another good kit from the folks at Roden. Other than the windscreen, fit was very good and the model looks like a Staggerwing, which is my main criteria when I build a kit. If you like civilian aircraft and want an iconic one in your collection, this kit is for you!
| REFERENCES |
Beechcraft Model 17 Staggerwing, Wikipedia, September 2016.
ASN Wikibase Occurrence # 166661, Aviation Safety Network, Worldwide Web, September 2016.
3 November 2016
Copyright ModelingMadness.com
If you would like your product reviewed fairly and fairly quickly, please contact the editor or see other details in the Note to Contributors.