| KIT #: | PA184 |
| PRICE: | $1.49 when new |
| DECALS: | One option |
| REVIEWER: | Michael Stanley |
| NOTES: |
| HISTORY |
Hello
boys & girls.
 In the
middle of all this I was a young boy growing up. Early on I caught the flying
bug. My father and some of my uncles had been pilots or aircrew in "The Big One"
and their stories were fascinating. At the age of eight I began building models.
Plastic models, balsa stick & tissue models and control-line flying models. As a
budding engineer I was particularly fond of the Monogram "Quarter scale" kits
with working features. When I was about ten my best friend,
In the
middle of all this I was a young boy growing up. Early on I caught the flying
bug. My father and some of my uncles had been pilots or aircrew in "The Big One"
and their stories were fascinating. At the age of eight I began building models.
Plastic models, balsa stick & tissue models and control-line flying models. As a
budding engineer I was particularly fond of the Monogram "Quarter scale" kits
with working features. When I was about ten my best friend,
| THE KIT |
This kit is pretty standard fair for the
60's. Raised panel lines, not the best fit, a rough approximation of the
cockpit. At least it doesn't have raised lines for the decals.
 A few
years ago I picked up two Gulfhawks on ebay. One had been started and the other
was missing some pieces. Inventorying everything showed that I would be able to
get one kit out of the two. There were two sets of decals, the first one being
from the original 1960's release which were pretty much worthless and the 1967
release which were the thick ones that Monogram released when it was part of
Mattel. As far as I know there are no aftermarket decals for these markings.
A few
years ago I picked up two Gulfhawks on ebay. One had been started and the other
was missing some pieces. Inventorying everything showed that I would be able to
get one kit out of the two. There were two sets of decals, the first one being
from the original 1960's release which were pretty much worthless and the 1967
release which were the thick ones that Monogram released when it was part of
Mattel. As far as I know there are no aftermarket decals for these markings.
I feel the instructions are one of the nicest features of this old kit. 45 steps spread over eight pages with a nice black & white picture showing details of each step. For the correct assembly of the retractable gear these pictures were essential. To a ten year old it would have really been a great experience to follow those instructions and arrive at result with the retractable gear working.
| CONSTRUCTION |
I followed the instructions very
carefully as I wanted at least try to have the gear workable if at all possible.
I painted the interior Floquil SP Lettering Gray which is a light gray similar
to USN Gull Gray without the brownish tinge. It matches what I have always
assumed was "Grumman Gray" that was used in the 30's and 40's. I know that USN
F3F's were painted aluminum lacquer in the interior however I went with the
gray. If anyone wishes to climb up to the ceiling of the Smithsonian to peek
inside the Gulfhawk hanging there and prove me wrong you are most welcome.
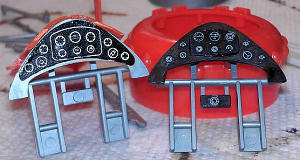 I did the
instrument panel with Mike Grant 1/32 scale individual instrument decals. I just
could not bring myself to use the kit decal which was just some white circles on
a black background. The modeler who had one of the kits before me had done the
cockpit out of the box and after comparing the two I was very happy with my
representation. I also added some seat belts made out of paper and some bent
fine wire.
I did the
instrument panel with Mike Grant 1/32 scale individual instrument decals. I just
could not bring myself to use the kit decal which was just some white circles on
a black background. The modeler who had one of the kits before me had done the
cockpit out of the box and after comparing the two I was very happy with my
representation. I also added some seat belts made out of paper and some bent
fine wire.
The engine also received some detail. T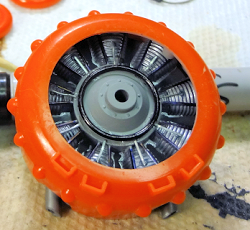 he
engine from the box is very plain yet is pretty visible thru the open front
cowl. I added a wiring harness from bits from my parts box and also did some
detail painting of the crankcase and cylinders.
he
engine from the box is very plain yet is pretty visible thru the open front
cowl. I added a wiring harness from bits from my parts box and also did some
detail painting of the crankcase and cylinders.
Another concession I had to make was to
not do the "hot screwdriver to flare the
axle so the wheels would turn". Even in the 60's that was too hokey. I
also carefully trimmed off the little nubs that Monogram molded into the wings
and fuselage that were supposed to catch the sewing thread they suggested for
rigging.
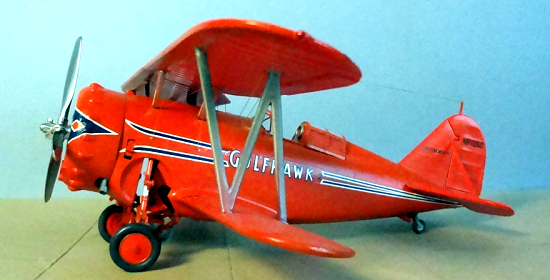
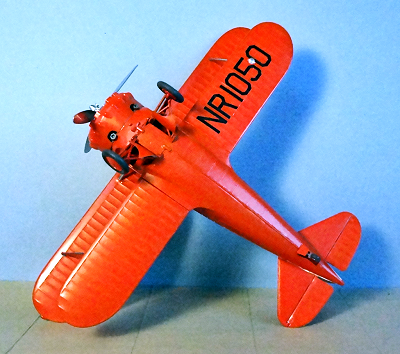
After assembling the fuselage I used a
strip of .020 plastruct to replicate the flange that ran along the bottom of the
actual plane to join the fuselage. It also conveniently covered most of the
fuselage seam! I also opened up the air scoop at the top of the engine for just
a little more authenticity. I left off the oversized canopy slide rails as well.
The old silver plastic that makes up the gear and gearing for the retract mechanism is now 50+ years old and is very brittle. I had to do some repairs with CA on some of the small bits along the way.
| COLORS & MARKINGS |
Since this was a "nostalgia build" I also
decided to use a bottle of Pactra International
 Then it
was time for the decals. I have built many of these kits from the 70's and have
used the old Monogram decals with widely varying amounts of success. This was
one of those that was going to fight me all the way. I coated the decals with
Microscale liquid decal film and then futured the kit and let it dry thoroughly.
I first dipped one of the smaller decals in very hot water to see how this was
going to go. It took forever for the decal to release. When applied they would
not lay down for anything. Gentle pressure with hot water, Microscale SolvaSet
(the red label) and not even my old and cherished Solvaset that I reserve for
only the most recalcitrant decals didn't get results. After a few minutes the
decals would curl up at the edges. Things were not looking good in Mudville.
Then it
was time for the decals. I have built many of these kits from the 70's and have
used the old Monogram decals with widely varying amounts of success. This was
one of those that was going to fight me all the way. I coated the decals with
Microscale liquid decal film and then futured the kit and let it dry thoroughly.
I first dipped one of the smaller decals in very hot water to see how this was
going to go. It took forever for the decal to release. When applied they would
not lay down for anything. Gentle pressure with hot water, Microscale SolvaSet
(the red label) and not even my old and cherished Solvaset that I reserve for
only the most recalcitrant decals didn't get results. After a few minutes the
decals would curl up at the edges. Things were not looking good in Mudville.
I finally resorted to brushing on future
and then gently pressing down with a soft brush as the future set up to get the
edges to lay down. There are a lot of decals on this kit and this method worked
but it took many days. I was not going to let this kit and good ol'
| CONSTRUCTION CONTINUES |
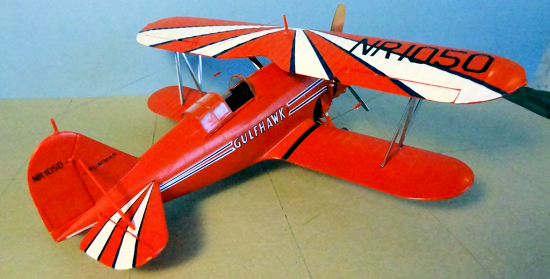
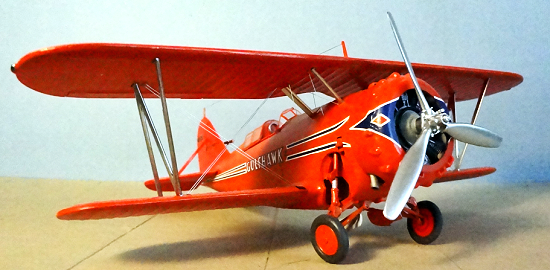
 Finally
all the decals were on and I gloss blacked the struts and prop followed by
Alclad chrome. The kit assembled well and then I rigged it with .007 music wire
measured with dividers and then cut to length. I use white glue as it remains
flexible for a long time and gives the wires some "give" in case you bump them.
The little wire separators were made from some .020 plastruct painted orange.
The antenna is EZ Line.
Finally
all the decals were on and I gloss blacked the struts and prop followed by
Alclad chrome. The kit assembled well and then I rigged it with .007 music wire
measured with dividers and then cut to length. I use white glue as it remains
flexible for a long time and gives the wires some "give" in case you bump them.
The little wire separators were made from some .020 plastruct painted orange.
The antenna is EZ Line.
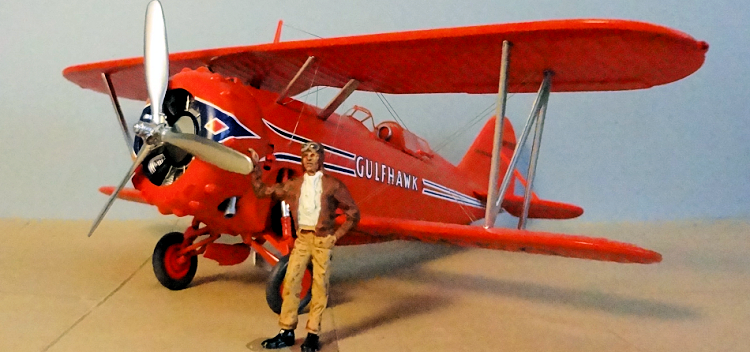
Even though I am not a figure painter I
called a friend in my model club for some advice and came up with a passing
resemblance to Major Al Williams to stand next to his little hotrod. When I took
the kit to our club meeting my friend said the figure turned out pretty well but
I didn't do the final dry brush step enough. Some people you just can't please.
| CONCLUSIONS |
All in all I was very happy with this
build. I did try to retract the wheels one time but did not have the nerve to
get them all the way into the wells. That old Monogram silver plastic is just
too brittle.
| REFERENCES |
http://en.wikipedia.org/wiki/Grumman_G-32_Gulfhawk
May 2012
If you would like your product reviewed fairly and fairly quickly, please contact the editor or see other details in the Note to Contributors.