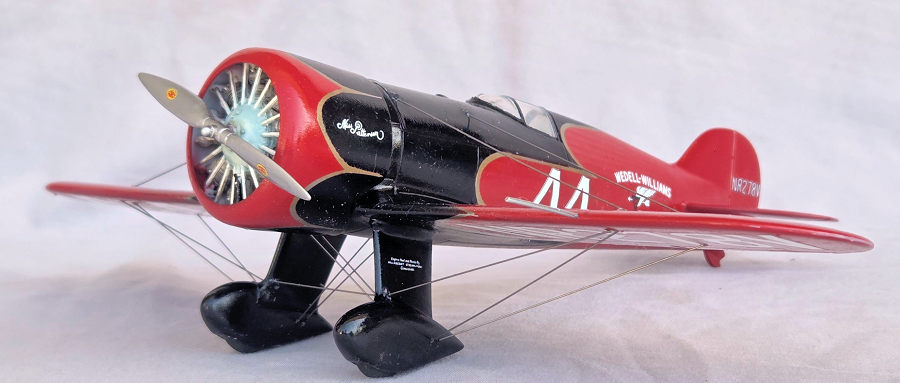
Williams Bros. 1/32 Wedell-Williams Model 44
| KIT #: | 32-121 |
| PRICE: | $40.00 |
| DECALS: | Three options |
| REVIEWER: | John Summerford |
| NOTES: |
| HISTORY |
Jimmy Wedell (pronounced WE-dell) had only a ninth-grade education, couldn't read a blueprint, and was denied Army and Navy pilot training, became a great race pilot and a designer and builder of racing aircraft. During the period 1931 to 1936 the Wedell-Williams racing aircraft took more than their share of firsts, seconds, thirds, and fourth places.
James Roben Wedell was born in Texas City, Texas, on March 31, 1900. His father and mother died when he and his younger brother, Walter, were teenagers. Jimmy was very interested in gasoline engines and at an early age started working for an auto mechanic. Eventually, using a 10 ft. x 10 ft. building, he opened his own garage. The rent was cheap and Jimmy was able to work on cars outside the building.
Walter landed a job as a telegraph operator for the railroad. Despite the difference in jobs. When the two brothers got together, aviation and flying were the main topics of conversation. Jimmy scraped together enough money to purchase two worn out Thomas Morse airplanes and he rebuilt them. Francis Rust, a veteran barnstormer, gave him one hour of flight instruction.
 Jimmy taught Walter to fly
and the two barnstormed throughout the Gulf Coast area. But money was scarce and
Walter joined the Navy as a telegraph operator for a four-year enlistment. Jimmy
travelled south to Mexico and became known as the "Air-Hobo" from Texas.
Eventually, he earned the nickname
Senior Don Jaime,
El Gatilan De La Noche; Sir James, the Night Hawk,
when he would fly through the dark Mexican sky and land on a rutted landing
strip of sand, cactus and mesquite, lit only by small flares or flashlights.
Jimmy taught Walter to fly
and the two barnstormed throughout the Gulf Coast area. But money was scarce and
Walter joined the Navy as a telegraph operator for a four-year enlistment. Jimmy
travelled south to Mexico and became known as the "Air-Hobo" from Texas.
Eventually, he earned the nickname
Senior Don Jaime,
El Gatilan De La Noche; Sir James, the Night Hawk,
when he would fly through the dark Mexican sky and land on a rutted landing
strip of sand, cactus and mesquite, lit only by small flares or flashlights.
When Walter finished his enlistment in the Navy, he joined Jimmy in Mexico and they flew many questionable missions, involving guns, liquor, contraband, Mexican Generals and revolutionaries. Fortunately, Jim and Walter were never in serious trouble. At least none that they couldn't fly out of.
Jimmy was a natural pilot and an intuitive engineer. He wondered about what he might do to improve the performance of the aircraft he was flying. He contacted Harry Palmerson Williams, a wealthy planter and lumberman. Williams wanted to buy an airplane and Jimmy had one to sell. Not only did Jimmy sell him the airplane, but he also gave flight instructions. He shared his ideas with Williams, who sponsored him with two million dollars! The Wedell-Williams Air Service, Inc., was formed in 1928. Jimmy Wedell was appointed President. Initial plans were to teach flying, provide an aerial photography service and win an airmail contract. Wedell's passion for air racing led him to convince Williams to build a racer for the January 1930 Miami Air Races.
Jimmy built airplanes by eye. Work began with Jimmy drawing some chalk lines on the hanger floor. This roughed out the size and shape of the first Wedell Williams Special. From this Walter, Charles (Frenchy) Fortune, Eddie Robertson and Jimmy started welding. Periodically, Jimmy would cock his head and state, "That looks about right for length”, or “span" and not until the racer was finished, was the actual measurement made of the total length or wingspan.
This first aircraft was named "We-Will" but as development and testing continued it became apparent it would not be ready for the 1930 Miami event. Wedell halted development of the "We-Will" design and began a new aircraft, the "We-Winc".
 In parallel to the development of
“We-Winc”, Wedell began the construction of a third aircraft, the "We-Will Jr."
This aircraft first appeared in the Cirrus Derby held in Detroit on July 21, but
the design proved to be underpowered. Further development with improved
aerodynamics, numerous technical innovations and a Hamilton Standard ground
adjustable propeller radically changed the aircraft's appearance. Incorporated
into the design were the wheel spats that would be an iconic feature of the
future racers. It was a typical construction with a braced, low-wing monoplane
utilizing fixed landing gear in large spats. This version was, however, also
underpowered. In development and in competition this version, now dubbed "Model
22", proved to be a disappointment and further work was abandoned.
In parallel to the development of
“We-Winc”, Wedell began the construction of a third aircraft, the "We-Will Jr."
This aircraft first appeared in the Cirrus Derby held in Detroit on July 21, but
the design proved to be underpowered. Further development with improved
aerodynamics, numerous technical innovations and a Hamilton Standard ground
adjustable propeller radically changed the aircraft's appearance. Incorporated
into the design were the wheel spats that would be an iconic feature of the
future racers. It was a typical construction with a braced, low-wing monoplane
utilizing fixed landing gear in large spats. This version was, however, also
underpowered. In development and in competition this version, now dubbed "Model
22", proved to be a disappointment and further work was abandoned.
By 1931, Wedell had turned his attention back to the original We-Will and after a rebuild using the lessons learned in building the “We-Winc” and the “We-Will Jr.” attained an acceptable level of performance. This version was named “Model 44". When mated with a Pratt & Whitney Wasp Jr. engine, the design's true potential began to be realized. That year, the "44" placed second at the National Air Races.
Soon after the '31 Nationals, Wedell began rebuilding the 44 and the “We-Winc” as well as taking a contract to build a Model 44 for noted aviator Roscoe Turner. During Wedell’s second test flight of Turner's Model 44, the left wing experienced a structural failure and was destroyed in the crash. Fortunately, Wedell parachuted to safety. In the aftermath, the assistance of Howard Barlow, an aeronautical engineer, was obtained for the redesign of the wings. The second Turner racer was built with a new wing and proved to be an exceptional performer. The other two Model 44s were rebuilt under the new wing specification.
These aircraft went on to dominate air racing for the next three years. They competed in the 1932, 1933 and 1934 Bendix Trophy races, as well as the 1934 Thompson and Shell Trophy. In September 1933 at the International Air Race in Chicago, the 44 piloted by Wedell set the new world speed record for landplanes at 305.33 miles per hour. Flying a 44, Doug Davis won the 1934 Bendix Trophy but crashed and died when leading the Thompson Trophy Race on September 3, 1934. Roscoe Turner won the Thompson Trophy in a 44 with a different engine, while J. A. Worthen placed third, in his 44.
Unfortunately, Jimmy did not see the race. He died in a flight training accident on June 24, 1934, in Patterson, Louisiana.
| THE KIT |
 Two sprues of white styrene hold
the airframe parts and another holds the engine parts. Another bag holds two
rubber tires, a clear canopy part, a length of vinyl tubing for exhaust pipes,
(optional) and a length of monofilament thread for rigging. The total parts
count is 53, 21 of which are for the engine.
Two sprues of white styrene hold
the airframe parts and another holds the engine parts. Another bag holds two
rubber tires, a clear canopy part, a length of vinyl tubing for exhaust pipes,
(optional) and a length of monofilament thread for rigging. The total parts
count is 53, 21 of which are for the engine.
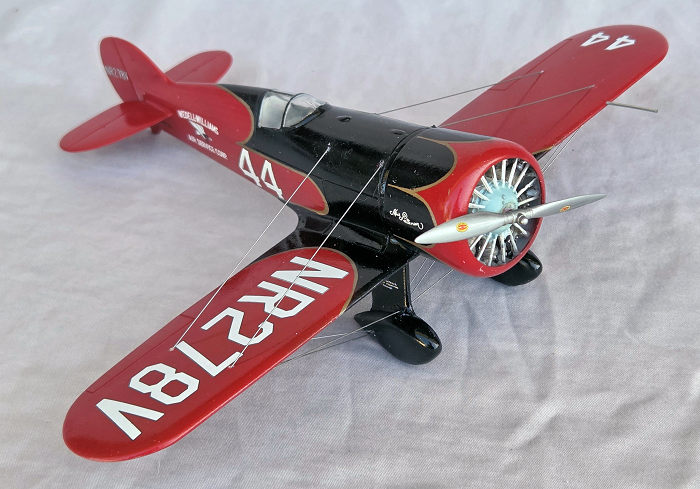
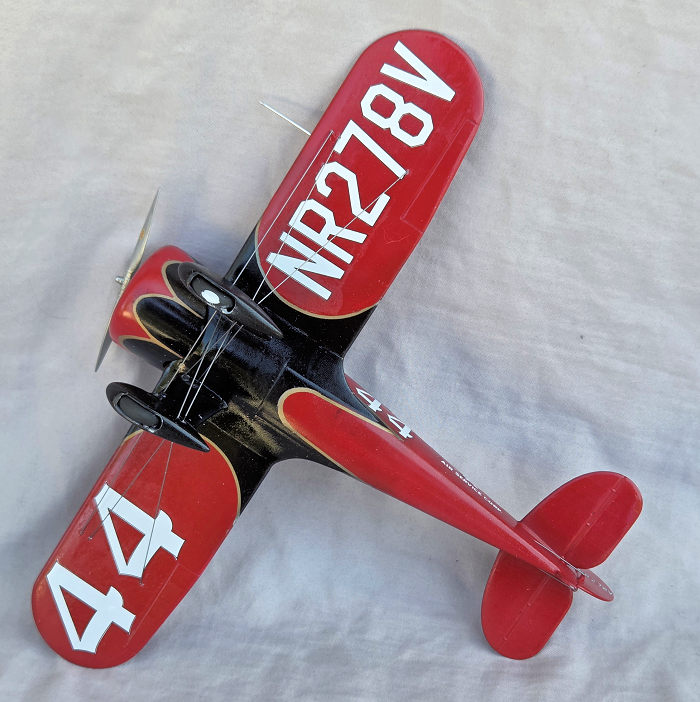
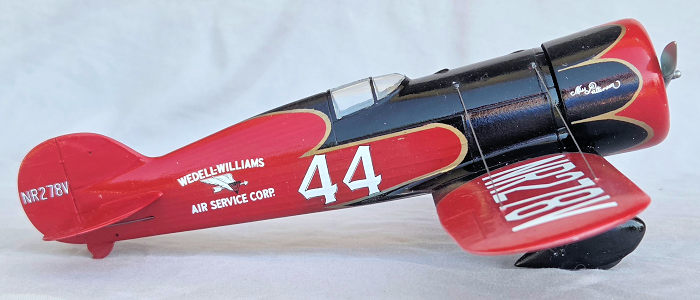
The decals are colorful and well printed. Options are for red and black #44, black and white #92, and cream with red trim #121 sponsored by Gilmore “Red Lion” Brand of gasoline. Of note is that, for the Gilmore option, there is not a decal (or decals) to wrap around the top and bottom of the cowl ring, leaving the modeler to mask and paint it, and hope that the paint color matches the decal.
Exploded view diagrams illustrating assembly are on one side of an 8 ½ by 11-inch sheet and an 11 by 17 sheet holds composite views of the three options and note differences between them, plus assembly notes and a brief history. It behooves the modeler to examine the drawings closely and make one’s own notes.
| CONSTRUCTION |
Several hours were spent studying the drawings, then drilling holes for the rigging and modifying the ailerons for this racer. When that prep work was completed, the interior parts were primed and painted aluminum. Decals were also applied to the instrument panel and compass part.
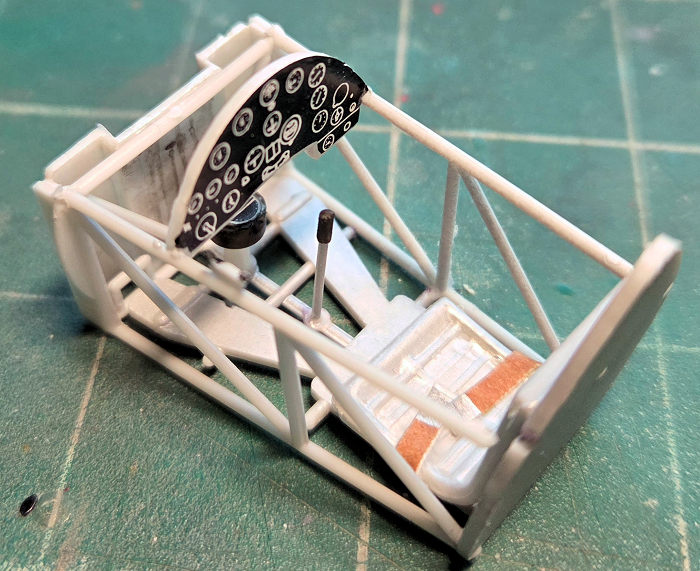 Construction started with the seat.
Seat belts were made from card stock and they were the first pieces glued
together. Much like a Spitfire or Hurricane, the cockpit parts assemble like a
cage. There are not any positive rails or tabs to locate the assembly in the
fuselage, so the bulkhead and instrument panel serve as guides. The headrest
area of the bulkhead is too narrow and required shims to fill the gap with the
fuselage sides. When that was settled, the fuselage halves were mated and the
seams addressed.
Construction started with the seat.
Seat belts were made from card stock and they were the first pieces glued
together. Much like a Spitfire or Hurricane, the cockpit parts assemble like a
cage. There are not any positive rails or tabs to locate the assembly in the
fuselage, so the bulkhead and instrument panel serve as guides. The headrest
area of the bulkhead is too narrow and required shims to fill the gap with the
fuselage sides. When that was settled, the fuselage halves were mated and the
seams addressed.
Like the bulkhead, the cowl assembly does not have a positive locator. Therefore, the engine was assembled, (without the exhaust stubs because the cowl is so deep, they cannot be seen) and the cowl halves were test fitted. The radius of the engine was too large and the rocker covers were gradually ground off with a rotary tool until a tight fit was achieved. After painting, the engine was glued to the fuselage, then the cowl halves glued together over it and with daubs of cyano applied to several cylinder heads to anchor the cowl in place.
Assembling and installing the wings and tail pieces was straight forward. Installing the landing gear was not. Each leg has an odd filler block to install in the fuselage. On one side the block was too long and on the other it was too thin. Material was ground away for the long block and shims added for the other. Once the legs were glued in place, some filling and sanding smoothed the joints.
Test fitting the canopy revealed a gap between the windshield and the fuselage. That was addressed by filling it with clear, water soluble, craft glue after the canopy was in place. After masking, the work on painting started.
| COLORS & MARKINGS |
Further work on the contour of the windshield gap was revealed after the first coat of primer. Additional work was needed on the wing joints and the cowl seams. The cowl was the most difficult to achieve a perfect surface, taking six more sessions.
AK’s Extreme Metal Brass paint was sprayed on where the trim color would separate the red from the black paint. This was my first time using that line of paint and I found it to be easy to work with and robust when cured.
A strip of 1mm tape was wrapped
around the cowl ring, as marked from the back edge of the cowl by a pair of
dividers, to identify the apex of the scallops. Next came the most difficult
part of the project: cutting the masks to go over the trim for the scallops. The
dividers, a template of oval shapes and sizes, a French curve, and two knives
with No. 11 blades repeatedly sharpened with 6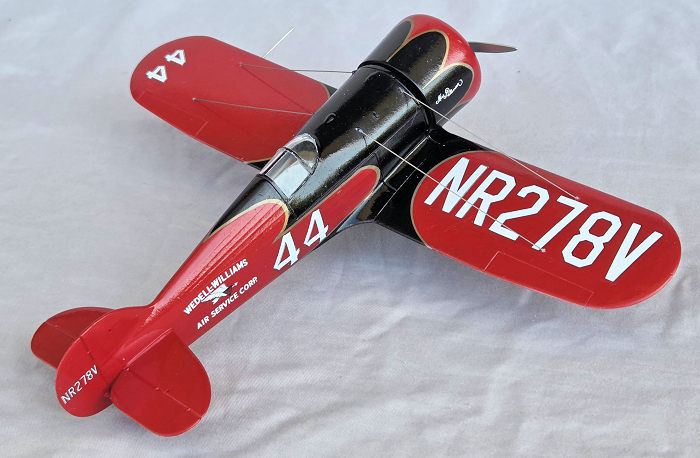 000 and 8000 grit cloth were used
to cut masks to as close to 1mm wide as possible. Each scallop was done in two
parts, the arcs and the tails. To get a consistent set of masks, three were
discarded for each one used.
000 and 8000 grit cloth were used
to cut masks to as close to 1mm wide as possible. Each scallop was done in two
parts, the arcs and the tails. To get a consistent set of masks, three were
discarded for each one used.
Using the dividers plus tweezers, the tails were tacked in place, then the arcs and tails were teased into their final position. The process was repeated on the rest of the model.
Ammo’s Atom line of Insignia Red paint was sprayed over the masks. It too, was my first time using that paint. It dried darker than the wet color and had a flat finish. Though time consuming, masking the red and covering the trim masking, was straight forward. Gloss Black was not available, so Tamiya Semi-gloss was used.
There were a few areas that needed some re-masking and re-spraying when everything was revealed, but they were simple to deal with. Two coats of rattle can clear gloss followed. Unfortunately, during the application of the second coat, one strand of hair fell onto the cowl. Removing it, of course, resulted in the need to mask that area, (again) re-paint, and apply another clear coat.
After sitting for a couple of days, the decals were applied. MIG Ammo Decal Fix #2 was used to ensure that the film melted into the clear coat. The decals behaved well. The following day, a final coat of gloss was sprayed on.
| FINAL ASSEMBLY |
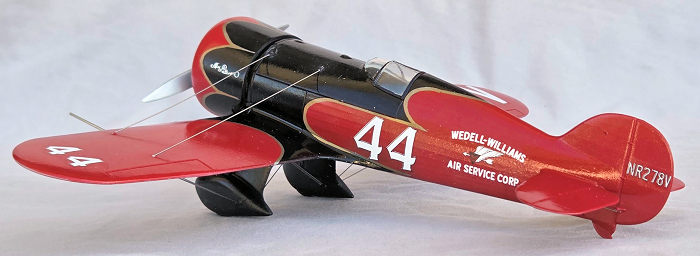 A little bit of clean-up was needed
on the canopy after unmasking it. Some of the primer gray was evident at the
edges and this was hidden by brushing on a wash of black stain.
A little bit of clean-up was needed
on the canopy after unmasking it. Some of the primer gray was evident at the
edges and this was hidden by brushing on a wash of black stain.
Rigging was accomplished over a couple of days using .015 music wire. Some touch-up paint was daubed around the connection areas. After clipping the axle stubs inside the spats, the wheels were installed. One sat further inside the spat than the other, so the longer leg wheel had some material filed off the bottom to level the stance of the plane.
A length of wire from a paperclip served as the pitot tube and mounted to the left wing. The hole in the prop hub needed reaming before it would fit on the shaft. Gluing it in place completed the build.
| CONCLUSIONS |
I like the style of Williams Brothers’ kits. This one assembles into a solid model. Some filling and sanding was needed, but nothing out of the ordinary. I have found that their 32nd scale kits are fun builds. Their smaller scale kits seem to have more issues. Modern kits can have better surface detail, but the deep panel lines in this one are not objectionable.
Yes, the bulk of the time spent on this project was devoted to painting, (well, masking) decaling, and rigging. If it weren’t for the lack of cowl ring decals, I would have painted the Gilmore option, which otherwise has easier masking, although more of it. Still, I’m very pleased with this scheme.
| REFERENCES |
AirRacingHistory.Com and Wikipedia.
21 May 2026
Copyright ModelingMadness.com. All rights reserved. No reproduction in part or in whole without express permission.
If you would like your product reviewed fairly and fairly quickly, please contact the editor or see other details in the Note to Contributors.