Brengun's 1/48 Chester Jeep
| KIT #: | 48005 |
| PRICE: | $35.00 |
| DECALS: | Two options |
| REVIEWER: | John Summerford |
| NOTES: | Resin kit with vacuform canopy. |
| HISTORY |
Courtesy of the Experimental Aircraft Association
The Special, later called the Jeep, was first flown on August 14, 1932. Flight tests proved the aircraft was unsatisfactory for competition and major changes were made before entry in the 1933 races. The 1932 version had a semi-open cockpit with a rather flat windscreen. The airframe was stripped for extensive modifications, including shortening the wings by two feet and chopping the length by 23 inches. The bay behind the cockpit was eliminated and 18 pounds of lead were required to correct the balance. A hatch was installed over the cockpit and the cowling was changed.
 The fuselage
was constructed of welded steel tubing with plywood fairing aft of the cockpit
and covered in fabric. The wings were made of birch spars and plywood ribs with
spruce cap strips. The leading edges were plywood covered and the rest of the
wing was covered with fabric. The Chester Special was powered by a 185-hp
Menasco C-4S engine.
The fuselage
was constructed of welded steel tubing with plywood fairing aft of the cockpit
and covered in fabric. The wings were made of birch spars and plywood ribs with
spruce cap strips. The leading edges were plywood covered and the rest of the
wing was covered with fabric. The Chester Special was powered by a 185-hp
Menasco C-4S engine.
Art first competed with his Special in the 1933 National Air Races, where he took first place in one race and fourth in four others, with his best speed reaching 155 mph. At the 1936 National Air Races the Chester Special appeared under the new name Jeep, taken from a character in the famous Popeye comic strip. Chester raced his Special until 1937, reaching an overall best speed of 235 mph and always taking home at least a little prize money.
Hollywood noticed Art’s airplane as well, as the Jeep made appearances in at least two motion pictures. The first was a 1937 film called Love Takes Flight, starring Bruce Cabot as an airline pilot turned movie star and Beatrice Roberts as a stewardess who takes up air racing. The second was 1939’s Tailspin, which starred Alice Faye as a hatcheck girl who sneaks away from her job to enter a transcontinental air race.
Art Chester later designed the nose and cowling of the P-51 fighter for North American Aviation.
| THE KIT |
 A search on
the internet revealed that Brengun’s kit in this scale is the only one
available. (Dekno offers a 72nd
scale kit and there are stick and tissue offerings.) A small, corrugated board,
top opening box holds 27 gray resin parts, one vac-u-form windshield/canopy, a
decal sheet, and a single sheet of folded paper illustrating a parts map,
exploded assembly instructions, and two painting/decaling diagrams.
A search on
the internet revealed that Brengun’s kit in this scale is the only one
available. (Dekno offers a 72nd
scale kit and there are stick and tissue offerings.) A small, corrugated board,
top opening box holds 27 gray resin parts, one vac-u-form windshield/canopy, a
decal sheet, and a single sheet of folded paper illustrating a parts map,
exploded assembly instructions, and two painting/decaling diagrams.
| CONSTRUCTION |
Everything was scrubbed by an old toothbrush soaked in a gentle cleaner, rinsed, and left to dry.
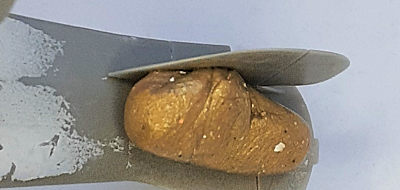
There are only four parts to glue into the cockpit, plus the instrument panel decal. Unfortunately, the rudder bar and control stick broke off the pour stub. The stick was replaced by a piece of stretched sprue and the bar was omitted. More time was spent waiting for the interior paint to cure than assembling the cockpit.
 While
waiting for the two-part engine’s glue to cure, the vents in the front of the
cowl were opened. The upper fuselage piece was added using epoxy and the cowl
was taped in place to assist in alignment. Before the epoxy hardened, it was
cleaned up with a cotton swab soaked in alcohol. After the engine was glued into
the cowl, the subassembly was epoxied to the fuselage. In this example, the seam
was uneven and several sessions of filling (including coats of primer) and
re-scribing was done to get a good line.
While
waiting for the two-part engine’s glue to cure, the vents in the front of the
cowl were opened. The upper fuselage piece was added using epoxy and the cowl
was taped in place to assist in alignment. Before the epoxy hardened, it was
cleaned up with a cotton swab soaked in alcohol. After the engine was glued into
the cowl, the subassembly was epoxied to the fuselage. In this example, the seam
was uneven and several sessions of filling (including coats of primer) and
re-scribing was done to get a good line.
Thinking it would be easier to deal with the canopy before the wings were attached, that was done next. Detail on the clear pieces is not as good as the resin, illustrating the down-side of the vac-u-form process. It was not clear to me where to cut the pieces from the molded sheet, and I guessed wrong, so the lower edges were built up to get them aligned properly. Those areas were not masked, so that the paint would cover them up.
 There are
a couple of shallow recesses molded into the upper fuselage part that are handy
for drilling holes for mounting pins that help attach the wings. Short lengths
of .020 music wire and epoxy were employed. Unfortunately, the stabilizers are
too thin for any wire, so blobs of Silly Putty were used to hold them in place
while the epoxy cured.
There are
a couple of shallow recesses molded into the upper fuselage part that are handy
for drilling holes for mounting pins that help attach the wings. Short lengths
of .020 music wire and epoxy were employed. Unfortunately, the stabilizers are
too thin for any wire, so blobs of Silly Putty were used to hold them in place
while the epoxy cured.
Cyano glue was used to attached the wing struts and the landing gear legs. The wheels and spats were left off to ease painting, so a couple of light coats of rattle can of white auto primer was sprayed on.
| COLORS AND MARKINGS |
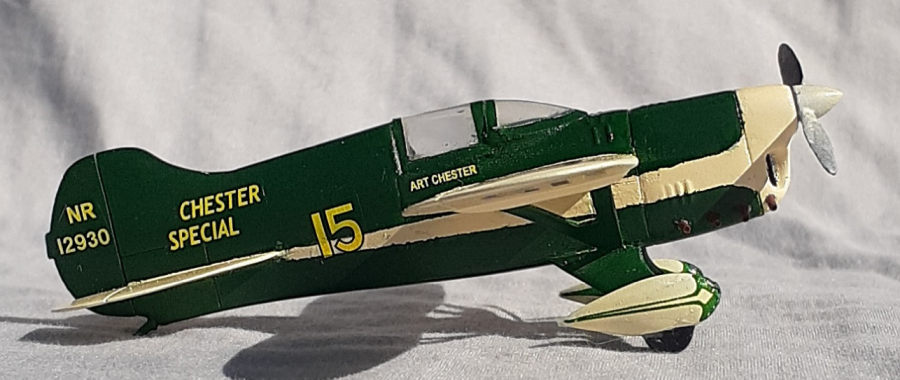
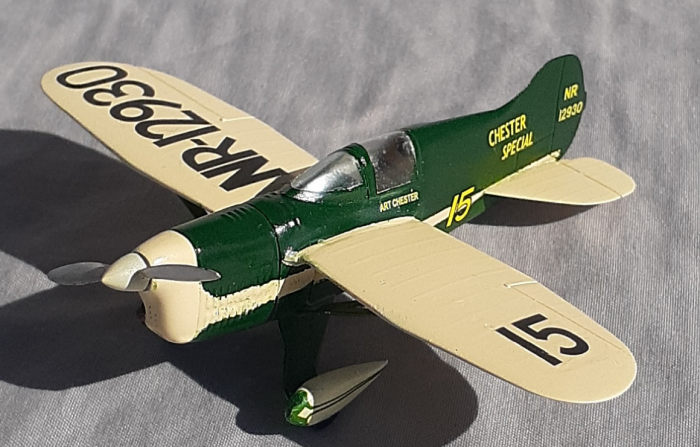
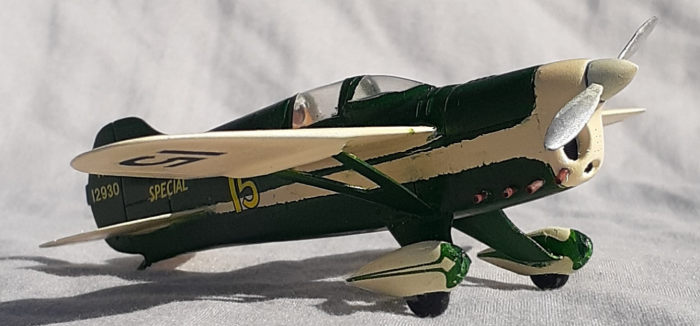
The easy option for painting calls for an all-white scheme. Naturally, I made it more difficult for myself by choosing the two-tone option. The instructions and box lid show the two-tone scheme as green and yellow. However, the only color photo that I could find on the internet shows a green and cream duo, so that was the selection.
Very light beige was sprayed over the wings, stabs, plus the fuselage nose and sides. Several sessions of creating mask patterns and maneuvering them in place followed. Despite being as carful as possible, the left stab did break loose, but not fall off, during the masking. A trace of cyano glue applied by a piece of music wire got it secured in place.
Not much attention was paid
to uneven coverage of the primer on the left side of the fin until the green
paint was sprayed over that area and fish-eye effect emerged. (I guess I didn’t
do a good job cleaning that part.) The session was halte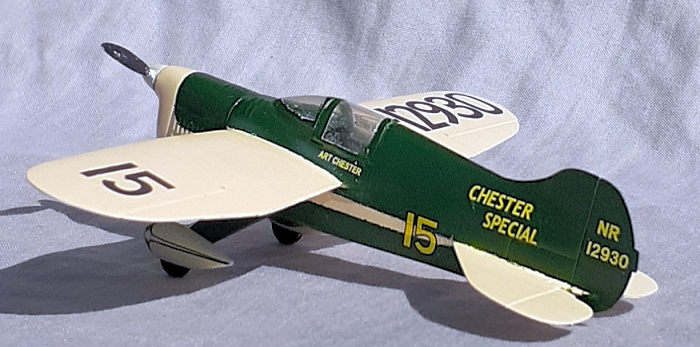 d
and the model was set aside for the paint to cure instead of wiping the area
with a solvent and creating a mess. The next day, the offending area was sanded
down to the resin. The primer was decanted and brushed on. That area was given a
light sanding of 600 grit paper and painting resumed.
d
and the model was set aside for the paint to cure instead of wiping the area
with a solvent and creating a mess. The next day, the offending area was sanded
down to the resin. The primer was decanted and brushed on. That area was given a
light sanding of 600 grit paper and painting resumed.
Unmasking revealed more bits of drama. In some places, the green paint bled under the masking. My spraying technique should have been to lightly spray on one or two coats of “dry” coats, meaning, let the paint cure for several minutes between passes, instead of flooding the surface. Both colors had adhesion issues. The green was easy to touch-up with a brush, but good chunk of beige peeled off the primer on the upper left wing. If that had occurred on the right wing, the registration number decal could have hidden rough edges. As it was, the wing was sanded down and more beige was sprayed on. After all of that was completed, a gloss coat was sprayed on.
Decaling had its dramatic moment too. When it came time to apply the race number over the patched paint work on the left wing, the decal folded over itself. Time was ticking away as I tried to unfold the wet decal with a brush, not knowing if it folded over itself or under. I hit on the idea of just dipping the decal back in the water. It worked like a charm and the decal settled down nicely after it was in place.
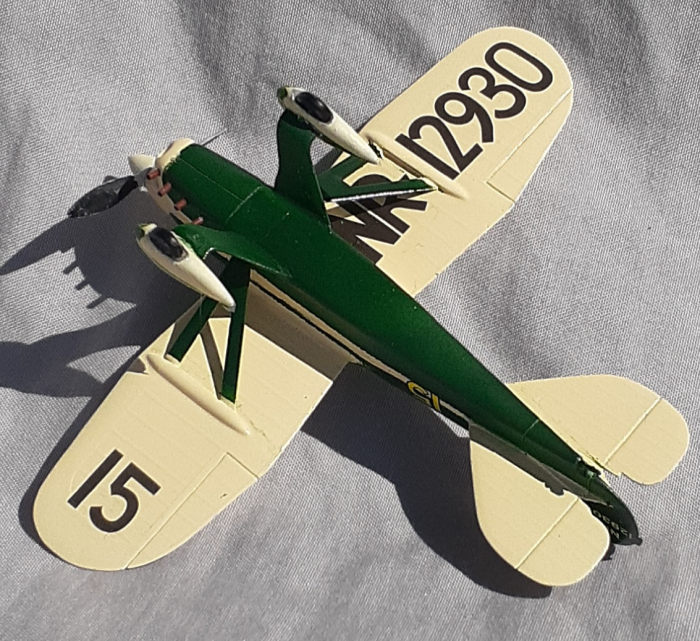
Decals are supplied for the wheel spats. In order to make them work, the leading-edge scallops were slit in seven locations so that they could wrap over the compound curves. There were still some wrinkles, so daubs of Solvaset were applied and a couple of minutes later, the decals were pressed down.
Some clean-up of filler putty was needed after the clear parts were unmasked. The wheels were glued to the spats and while that was curing, the exhaust pipe stubs were installed. There are recesses molded into the spats to aid their mounting to the struts so the result is a strong, easy to align, joint. Once again, the prop was the final piece.
| CONCLUSIONS |
With a wing span of only 4 and 1/8th inches, the Jeep looks like a 72nd scale model. This kit demands careful, deliberate work throughout the build. There is very little room for error, so it is best to have experience with resin before taking this one on. It would be nice if the canopy was molded as well as the other parts. I hope that the next time Brengun does this kit, they mold the two clear parts separately, instead of the single sheet with an ill-defined space between them.
Regardless, the model has generated a lot of discussion in terms of what aircraft does it represent and its scale. It is an intriguing model to have on the shelf.
John Summerford
13 July 2023
Copyright ModelingMadness.com. All rights reserved. No reproduction in part or in whole without express permission.
If you would like your product reviewed fairly and fairly quickly, please contact the editor or see other details in the Note to Contributors.