| KIT #: | 702x |
| PRICE: | $62.50 |
| DECALS: | One option |
| REVIEWER: | Peter Burstow |
| NOTES: | Resin Kit |
| HISTORY |
 The Caudron-Renault
C.600 was a popular two seat light aircraft of the 1930's, 203 being built.
Mostly powered by Renault 4Pgi Bengali Junior engines of 105hp, five were fitted
with De Havilland Gipsy Majors and 18 with a 150hp Renault 4Pei. Mainly a civil
aircraft, some were used by various air arms for training and liaison.
The Caudron-Renault
C.600 was a popular two seat light aircraft of the 1930's, 203 being built.
Mostly powered by Renault 4Pgi Bengali Junior engines of 105hp, five were fitted
with De Havilland Gipsy Majors and 18 with a 150hp Renault 4Pei. Mainly a civil
aircraft, some were used by various air arms for training and liaison.
Two were built as a single-seat version, the C.610, with extra fuel tanks for long range flights.
In May 1938, Elisabeth Lion flew a C.610 from Istres, France to Abadan in Iran, a distance of 4,063 km, beating Amelia Earhart's 1932 women's record of 3,940 km. The record was beaten a few days later by Andree Dupoyron, flying a C.600 4,360 km from Oran, Algeria to Tel El Aham in Iraq.
In June 1938, Lion flew 4,250 km from Istres to Dakar in Senegal, taking 21 hours and 20 minutes, just failing to reclaim the record.
| THE KIT |
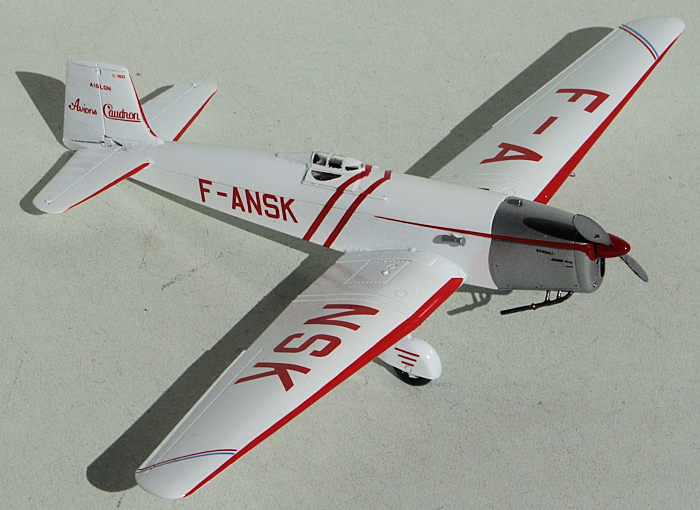
 The kit comes
in a small strong box, with attractive cover art depicting Elisabeth Lion's
record breaking aircraft. The parts are all bagged.
The kit comes
in a small strong box, with attractive cover art depicting Elisabeth Lion's
record breaking aircraft. The parts are all bagged.
There are about 30, highly detailed, resin parts in the kit. The tiny canopy is cast in clear resin, and a pre-cut mask is included. Additional detail is provided with a small fret of etched brass parts, all for use in the cockpit. The instrument panel is a small film, to be sandwiched between a resin part and an etched brass face.
Two small decal sheets are enclosed, with registration, logos, stencils and various stripes. The registration, for Elisabeth Lion's aircraft, is supplied in red, white and black, your choice.
The assembly instructions are a single A4 sheet, with seven construction steps clearly illustrated, and a diagram showing the parts.
The painting and decalling scheme is on a separate sheet, very well printed on glossy paper, with a top view, both sides and a partial bottom view shown.
| CONSTRUCTION |
All the resin parts were washed in warm soapy water to remove release agent, and the main components were removed from the stubs and cleaned up.
Conventionally, construction starts in the cockpit, well shown in five of the seven instruction steps.
 I didn't
bother with the resin part of the instrument sandwich, just attaching the film
to the brass instrument face, using clear lacquer paint. To the floor part, I
added the seat and control column. I then attempted to add the many, very tiny
brass parts, without much success. They are really too small for me to deal
with. I did manage to get the belts onto the seat.
I didn't
bother with the resin part of the instrument sandwich, just attaching the film
to the brass instrument face, using clear lacquer paint. To the floor part, I
added the seat and control column. I then attempted to add the many, very tiny
brass parts, without much success. They are really too small for me to deal
with. I did manage to get the belts onto the seat.
Many of these parts are duplicated, I assume for the two seat version of the kit.
No indication of interior colour was given, so I used a background of light brown, with darker brown and black detailing. As is often the case, almost none of this is visible through the tiny canopy.
All of that detail was hidden by closing up the fuselage halves. I then attached the flying surfaces, tail cone, headrest and canopy. I used clear lacquer to fit the canopy, to avoid any super glue bloom.
Fit was excellent, with any tiny gaps my fault, for over zealously removing casting stubs. The gaps were filled with superglue, using The Boss's method of accelerator and sanding immediately.
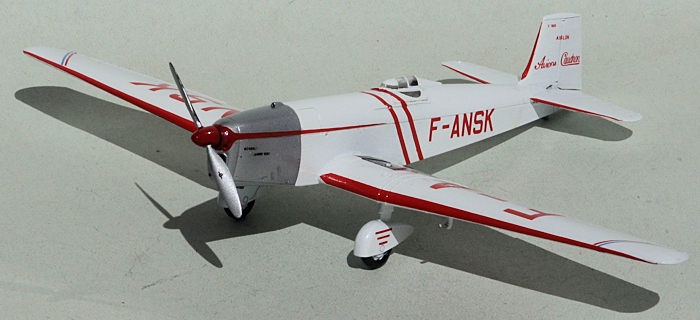
I left off the engine cowling and prop for separate painting. The final construction step was to add the u/c legs, wheels, what I think might be a fuel tank fairing and the tail-wheel, (which I promptly broke off and lost). The last tiny parts were a venturi and a pitot tube.
| COLORS & MARKINGS |
Painting was very easy. First a coat of Tamiya white fine surface primer, which showed many glitches that needed attention. Then a coat of Mr. Finishing surfacer 1500, also white, followed by a light sand using 2000 grit paper.
Then overall many coats, I lost count, of Tamiya TS-101 base white, which covers better than the usual gloss white. I painted the cowling, still separate, with the old standby Tamiya AS-12, bare metal silver. When I was happy with the finish, or fed up with all the coats, I attached the cowling.
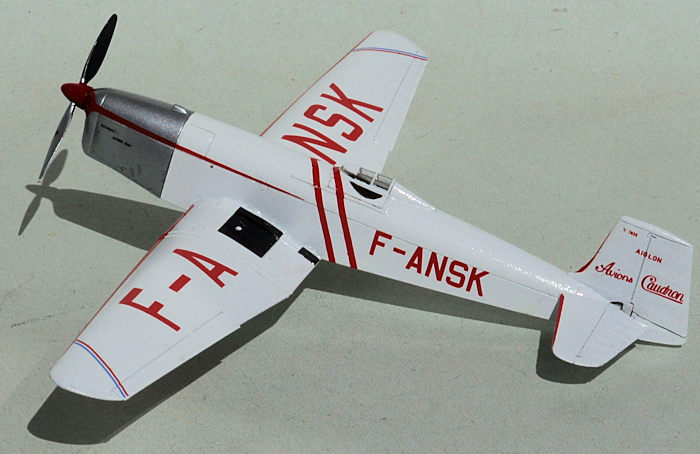
 The propeller
was painted with Mr. Color 8, silver, then I hand painted the spinner red, and
the rear of the prop, black. I painted the tyres and tail skid, the remains of
the tail-wheel strut, a dark grey.
The propeller
was painted with Mr. Color 8, silver, then I hand painted the spinner red, and
the rear of the prop, black. I painted the tyres and tail skid, the remains of
the tail-wheel strut, a dark grey.
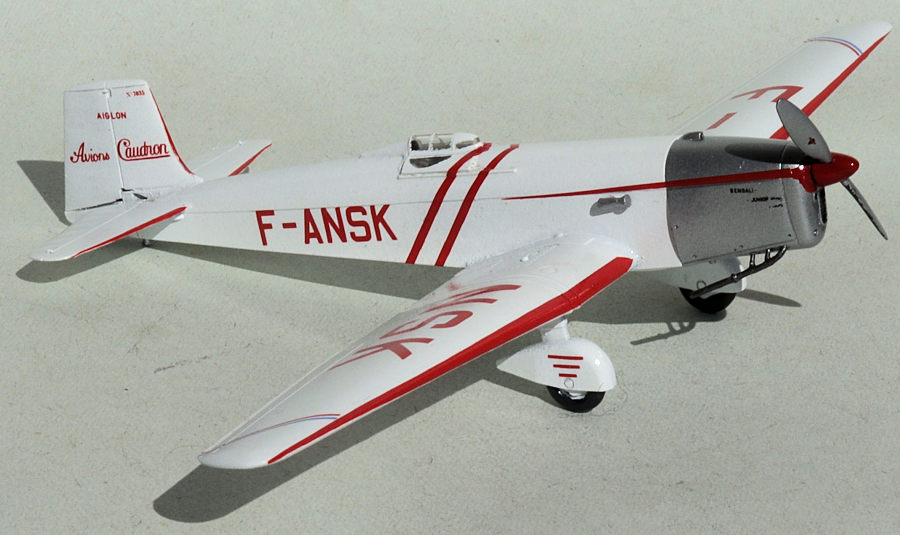
I choose the red registration letters to go with the red stripes, which the model was festooned with.
The decals were thin, with no tendency to curl, but I did break two of the longer stripes. They reacted properly to Tamiya setting and softening solutions. The decals worked very well, and settled into the detail with some encouragement using a wet brush. The leading edges of the tail surfaces were difficult to decal as they were very thin, and the decal needed folding over.
Decalling was done over three sessions, mainly as with the leading edge stripes, I ran out of places to hold the model. I touched up the breaks and around the nose with Mr. Color 3, red. Not a perfect match, but the closest I had.
With the decalling finished, I removed the canopy mask and gave the kit a coat of Long Life, acrylic floor polish. Then I attached the propeller and the model was complete.
| CONCLUSIONS |
A very good quality resin model of a somewhat obscure 1930's record breaking aircraft. An easy and straight forward build, hampered only by some very tiny resin and etched brass parts that I found difficult to handle.
Highly recommended.
| REFERENCES |
https://en.wikipedia.org/wiki/Caudron_C.600_Aiglon
https://en.wikipedia.org/wiki/%C3%89lisabeth_Lion
20 October 2025
Copyright ModelingMadness.com. All rights reserved. No reproduction in part or in whole without express permission.
If you would like your product reviewed fairly and fairly quickly, please contact the editor or see other details in the Note to Contributors.