1/72 Farman Carte Postale
| KIT #: | |
| PRICE: | |
| DECALS: | Home made |
| REVIEWER: | Chris Peachment |
| NOTES: |
10 and 20 thou plastic sheet, rod and strut. |
| HISTORY |
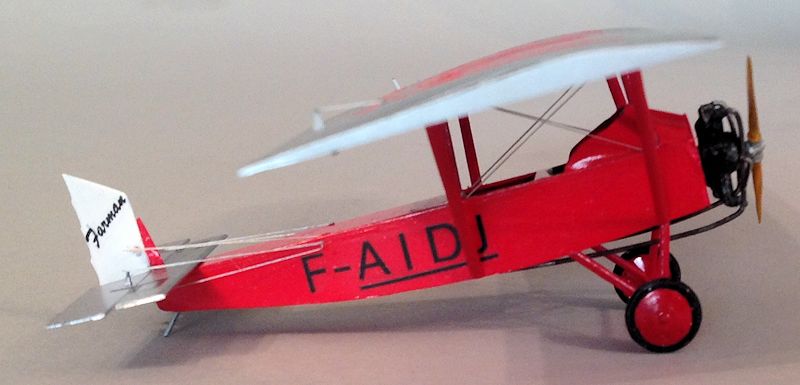
This 1926 sports two seater from the Farman stable came about when they noticed
that they had a spare wing from the giant Farman Goliath airliner hanging around
in the workshop. They took an earlier Farman David light biplane, tore off its
two wings, sawed the tips off the Goliath wing, and mounted it on struts on the
David fuselage.
Once done, they took one look at it, and christened it the Carte Postale or Post
Card.
It was flown in the 1926 Coupe Zenith race by one Monsieur Coupet. Other than
that I can find little reference to it, other than some details of the colour
scheme:
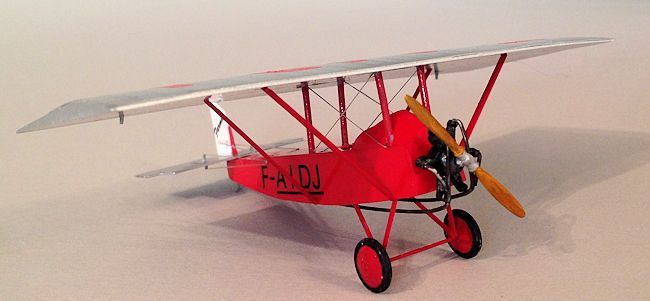
 After a series of letters between the Musée de
l'Air and Jean Liron (who contacted the Farman's pilot, M. Coupet), M. Fillon
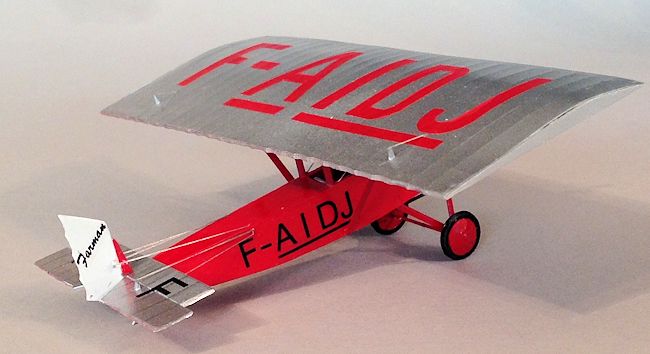
concluded that the Carte Postale did indeed have a red fuselage and silver
wings, with black matriculation letters. A photo of this machine appears in
Liron's book "Les Avion Farman", published by Docavia, in France, some years
ago. Coupet is standing in front of the machine in the photo.
After a series of letters between the Musée de
l'Air and Jean Liron (who contacted the Farman's pilot, M. Coupet), M. Fillon
concluded that the Carte Postale did indeed have a red fuselage and silver
wings, with black matriculation letters. A photo of this machine appears in
Liron's book "Les Avion Farman", published by Docavia, in France, some years
ago. Coupet is standing in front of the machine in the photo.
Since black is a little boring, I decided that
he must have been mistaken and the wing markings were in fact red. The French
can be notoriously colour blind.
I
doubt that more than one was built if only for the reason that they would have
had to make more Goliaths in order to chop them up for the wing. A tedious and
expensive process. And I imagine that a wing with such short span and long chord
would have resulted in high induced drag. And so it was probably rather slower
that the Farman David from which it sprang. It was however very good as a
parasol in hot weather, or as an umbrella when it rained.
| CONSTRUCTION |
I
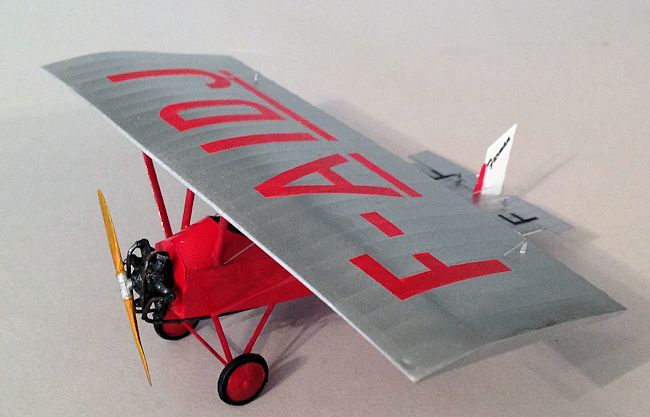
got the wing out of the way first since this was easy. Cut a base in 20 thou
card and the top from 10 thou. Score the ribs on the inside of the upper surface
according to plan using a steel rule and black biro. A couple of passes will
ensure that the ribs stand proud on the upper surface. Also lightly outline the
ailerons, which can later be scored
on top with the tip of a scalpel.
I
cannot see whether the rear cockpit had any instruments, but the aircraft is so
tiny and cramped that I expect any pilot in the rear could see the instruments
over his co-pilot's shoulder. Besides they flew by the seat of their pants in
those days. Two control columns and seats came from somewhere.
“Bof,”
is a good one to signify that you couldn't care less. This must be accompanied
by gestures such as raising the palms upwards and also the eyes towards the
heavens. “Merde” is a little stronger, and is handy for when a control
horn is lifted off by the tension in the wire. If you want the machine to behave
itself, then call it an “emmerdeur” which politely translates as pain in
the arse (ass to you). And if you really want it to get in line tell it to “sois
belle et tais toit”. Though it would be unwise to use this one if your
aircraft is a modern feminist.
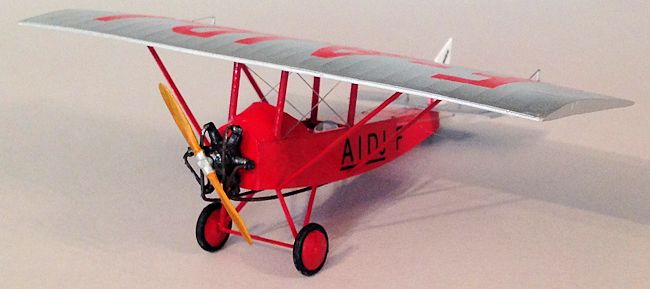
 Turn your attention to the engine. Some plans
show that it had a bullet fairing over the prop spinner and engine cylinders.
This would be tricky. But all the photos that I found showed that it flew
with an open engine. This is a lot less tricky, and so the path of least
resistance once again proved irresistible. I had only five and seven cylinder
radials in my spares box, so I took the seven, cut off all the cylinders bar
one, and re-arranged them into a pleasing six cylinder job, which was painted
black with gunmetal dry brushing and mounted on the front plate.
Turn your attention to the engine. Some plans
show that it had a bullet fairing over the prop spinner and engine cylinders.
This would be tricky. But all the photos that I found showed that it flew
with an open engine. This is a lot less tricky, and so the path of least
resistance once again proved irresistible. I had only five and seven cylinder
radials in my spares box, so I took the seven, cut off all the cylinders bar
one, and re-arranged them into a pleasing six cylinder job, which was painted
black with gunmetal dry brushing and mounted on the front plate.
The exhausts emerge from the front of the
cylinder heads and form a graceful downward curve, turn beneath the engine and
end up below the rear cockpit. Replicate this with plastic rod, bent around
pencils and brush handles of varying diameter. Gunmetal, dark rust and black
openings.
Finally the prop, from the Big Bag of Dead Props was given a wooden appearance (mid stone, dark earth streaks) and a coat of clear orange. Mount it at ten to four, and voila. One tres belle little Post Card from the golden age of French aviation.
| REFERENCES |
http://indooraero.homeunix.net/farman_cpfs.shtml
http://www.outerzone.co.uk/plan_details.asp?ID=1010
http://aero.land.free.fr/david.html
http://richard.ferriere.free.fr/3vues/F-3vues.html
http://www.aeroaces.com/farmandime.htm
September 2014
If you would like your product reviewed fairly and fairly quickly, please contact the editor or see other details in the Note to Contributors.