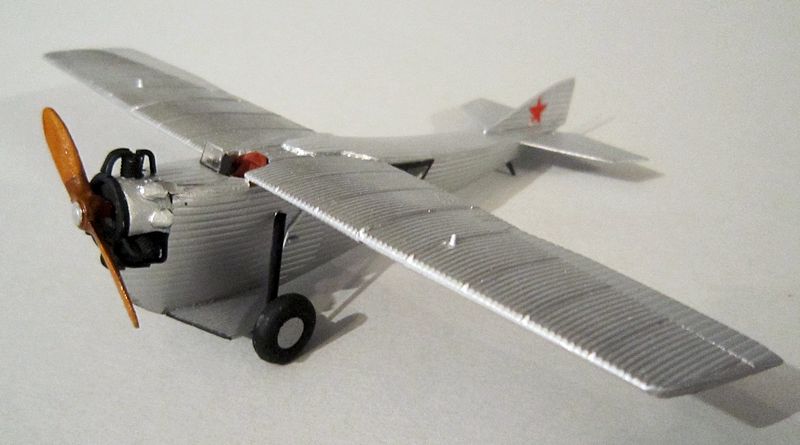
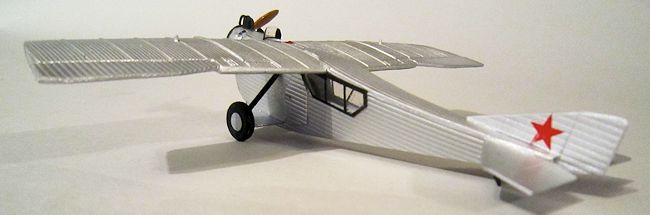
1/72 Tupolev ANT-2
| KIT #: | 1013 (Encore 1/72 I-4) |
| PRICE: | About £6 here in the UK |
| DECALS: | one option |
| REVIEWER: | Chris Peachment |
| NOTES: |
A simple mainstream kit, still readily available, and some corrugated
plastic sheet is all you need. |
| HISTORY |
The designer AN Tupolev was not known for risk taking, and preferred to make
headway using known techniques. However he very early saw the benefit of all
metal aircraft, especially in the Russian winters, and when a new high-grade
alloy was made, named Kolchugaluminum, he saw his chance.
The availability of this duraluminum was regarded by Tupolev as the birth
of the Soviet Union's aviation industry. The techniques used were different from
the industry leader Junkers, but were just as effective. Tupolev made
 trials
with the new materials on aerosleighs, boats, and gliders before embarking on
the ANT-2.
trials
with the new materials on aerosleighs, boats, and gliders before embarking on
the ANT-2.
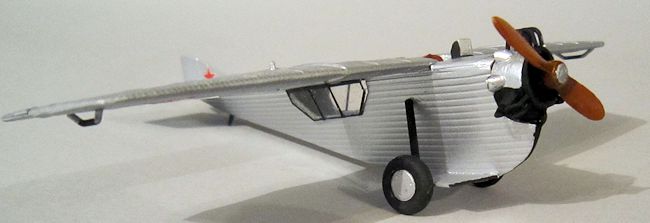
The design was a cantilever high-wing monoplane with fuselage of triangular
cross-section, which gave increased strength and rigidity, and reduced the need
for fuselage struts. There was an enclosed area for two passengers, who faced
each other, with an entrance through a door on the side of the fuselage. The
engine was a three cylinder British Bristol Lucifer of 100hp.
The first flight was on 26 May 1924. It proved difficult to manage and unstable
in flight, but handling was improved after enlargement of the tail. However, due
to material shortages in the USSR, and difficulty of obtaining engines, the
project never reached mass production.
There is a very nice example of the ANT-2
preserved at the Central Air Force Museum at Monino, just outside Moscow.
And some excellent photos of it on the websites listed below. Close inspection
reveals that the duraluminium skin is full of dents. Perhaps Russian panel
beating was in its infancy, or perhaps the museum handlers were a little rough
when wheeling it into place. Even the leading edges are crumpled here and there.
I didn't try to replicate this. What always happens is that, far from looking
like a model of a well used aircraft, it just looks like a badly made
model.
| THE KIT |
The plastic
of the Encore 1/72 I-4 kit, which provided a lot of parts for this one,
is moulded in grey and is easy to work. The detail on it is very good,
especially the corrugations which are moulded in various widths. If you are
building the kit as it is, one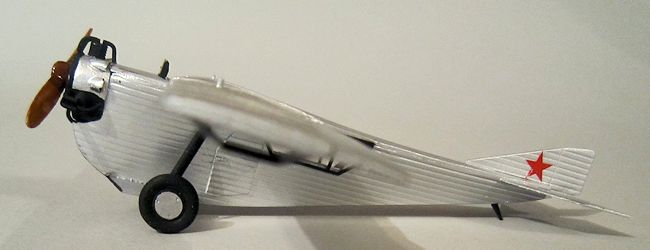 possible problem you might encounter is losing the corrugations due to sanding
or filling. So careful construction would be called for. Scott Van Aken has
built
the base kit
on this website and you can see for yourself
the very good results that you can get, with the bonus, for those of nervous
disposition, of there being no rigging for a biplane.
possible problem you might encounter is losing the corrugations due to sanding
or filling. So careful construction would be called for. Scott Van Aken has
built
the base kit
on this website and you can see for yourself
the very good results that you can get, with the bonus, for those of nervous
disposition, of there being no rigging for a biplane.
This website advertises itself as for the “truly afflicted”. You might well
wonder if you qualify for this title. I suggest there is one sure way to know
that you are in the grip of this strange condition. And that is when you open up
a new kit, survey the parts and wonder what you might convert it into. I surfed
the internet for a while
I was stymied initially because I didn't know how to render the corrugated skin of the different fuselage. On a visit to a modeling exhibition here in London, I came across a stand which catered to the model railway crowd (deluded creatures still stuck in the era of the industrial revolution), but which had some corrugated plastic sheet for sale. I cried Eureka, and got some strange looks from nearby modelers, who weren't yet truly afflicted.
| CONSTRUCTION |
 Plans
were found on the website below, and scaled to 1/72. It is very easy to write
that sentence, but the reality is that I mess around for hours trying to work
out what 1/72nd of the wingspan is, and then blow the plans up and
down until I get what looks to be the right size. Then print them out, only to
discover that what is on paper is not quite the same size as what was on screen,
and then have to go back and zoom in or out by a process of elimination. I
usually end up with a mound of useless plans on the floor under the printer,
which keeps the cat happy.
Plans
were found on the website below, and scaled to 1/72. It is very easy to write
that sentence, but the reality is that I mess around for hours trying to work
out what 1/72nd of the wingspan is, and then blow the plans up and
down until I get what looks to be the right size. Then print them out, only to
discover that what is on paper is not quite the same size as what was on screen,
and then have to go back and zoom in or out by a process of elimination. I
usually end up with a mound of useless plans on the floor under the printer,
which keeps the cat happy.
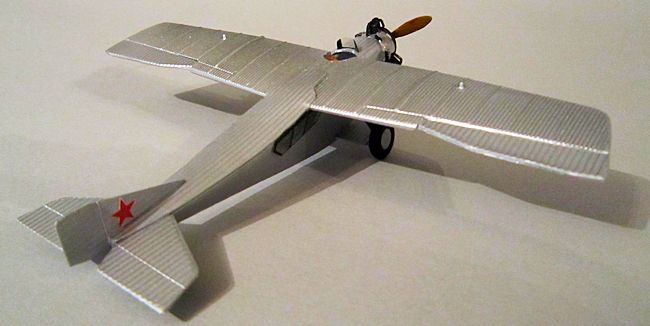
Two fuselage sides were cut from the plans, making sure that the corrugations
run lengthwise. Take it from me, you will feel very silly if you miss this
obvious point. The window areas should be cut out at this stage. The two sides
can be glued along the bottom edge and a few formers of 40 thou card inserted
inside to get the right triangular shape.
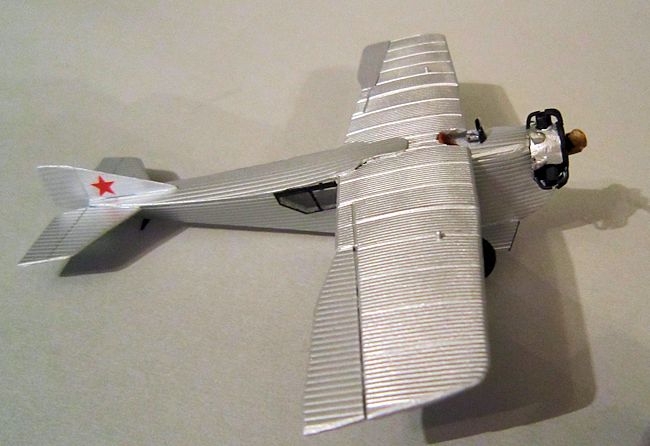
This was left to dry while the one piece wing was modified. A length needs to be
cut from the centre section, to shorten to the correct span and also to
eliminate the leading edge sweepback. The ailerons need replacing with ones of
correct shape. And some judicious sanding to reduce the corrugation from leading
edges which were smooth. Once the wing was completed it can be glued in place on
top of the fuselage.
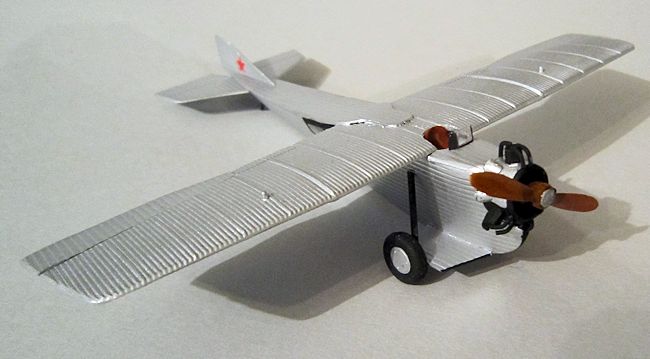
 Now
comes the tricky bit. The nose is a compound curve, and after various attempts,
I found the best way was to carve the engine cowling from solid plastic formed
of three thicknesses of 40 thou card. This was very tricky and took much
fettling and sanding. Basically the area surrounding the engine is of circular
cross section, but there is the streamlined moulding beneath this which forms
the nose of the fuselage. It is best to warm the forward side panels in hot
water in order to mould them around the nose piece. Judicious use of filler will
help especially just under the engine.
Now
comes the tricky bit. The nose is a compound curve, and after various attempts,
I found the best way was to carve the engine cowling from solid plastic formed
of three thicknesses of 40 thou card. This was very tricky and took much
fettling and sanding. Basically the area surrounding the engine is of circular
cross section, but there is the streamlined moulding beneath this which forms
the nose of the fuselage. It is best to warm the forward side panels in hot
water in order to mould them around the nose piece. Judicious use of filler will
help especially just under the engine.
The cockpit area can be cut from corrugated sheet, with the forward cowling bent
into an arch and made to fit around the engine cone. Cockpit details were
limited to a seat mounted on a length of sprue, an instrument panel and a stick,
neither of which can be seen. The
seat was painted leather.
The completed fuselage look weird, and rather like one of those evil war-hammer
things which Chingachgook uses to brain the villain Magua in the film of The
Last of the Mohicans.
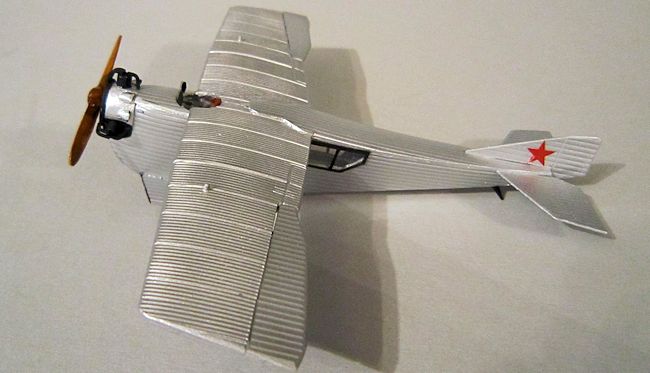
Now comes the engine. The three tiny cylinders were cut from an old WWI rotary
engine of suitable size. There is a collector ring around the nose, which can be
formed of plastic rod. I cannot discern from
 pictures
whether this is an exhaust collector, or some form of fuel inlet. Each piston
has two curved tubes from this ring into the cylinder head, and one curved tube
emerging from the back of the head and into the fuselage. I cannot see from the
pictures where the exhaust finally exits, and am left wondering if perhaps early
experiments at heating the passenger cabin involved passing the exhaust pipe
through the cabin and out of the tail somewhere. A risky business if the pipe
were to leak.
The
little lumps between the cylinders were made using the engine fairings in the
kit, cut down by a large amount.
pictures
whether this is an exhaust collector, or some form of fuel inlet. Each piston
has two curved tubes from this ring into the cylinder head, and one curved tube
emerging from the back of the head and into the fuselage. I cannot see from the
pictures where the exhaust finally exits, and am left wondering if perhaps early
experiments at heating the passenger cabin involved passing the exhaust pipe
through the cabin and out of the tail somewhere. A risky business if the pipe
were to leak.
The
little lumps between the cylinders were made using the engine fairings in the
kit, cut down by a large amount.
In the pictures from Monino, the engine front cover,
behind the propeller, is painted in that peculiar turquoise greeney-blue which
is used on Russian aircraft interiors. I suspect that the museum restorers had a
spare tin of it to be used up. Mine is black,
because I hate that sickly green colour.
The undercarriage is a simple affair, consisting of two axles faired to make a near sesquiplane type wing, and a couple of supporting struts. Wheels and propeller came from the Bag of Handy Wheels and Propellers in the spares box. The rest of the original kit, including two nice different prop spinners and the whole ANT-5 fuselage were put in the Bag of Many Things, also in the spares box. After the engine, making the tailplane from corrugated sheet was a walk in the park. A door can be cut from plan, and glued onto the port side, with a small handle made from thin rod.
| COLORS & MARKINGS |
 he
whole thing was given a blast of Humbrol Silver from a rattle can, and various
bits and pieces touched up in black, especially around the engine and nose. Two
red stars were added to the fin, fell off because of the corrugations, added
again, fell off again, and finally glued in place using copious amounts of
Microsol.
he
whole thing was given a blast of Humbrol Silver from a rattle can, and various
bits and pieces touched up in black, especially around the engine and nose. Two
red stars were added to the fin, fell off because of the corrugations, added
again, fell off again, and finally glued in place using copious amounts of
Microsol.
Two side windows were cut from the plan in clear plastic and the thick surrounds
masked off and painted matt black. And a curved windscreen likewise, with
another thick black surrounding frame.
Finally a couple of skids were made from rod, painted black and silver and added under the wing tips.
| CONCLUSIONS |
 There you
have a delightful early airliner, for two passengers, with no first class or
in-flight hostess trolley. It looks nice posed alongside the Revell Junkers
F.13. In the Monino museum, the aircraft is positioned
under the wing of the Tupolev ANT-25, the huge-winged long distance monoplane,
and I plan to do something similar with mine.
And now I am eyeing an old ICM kit of the Tupelov TB-3,
four-engined corrugated monster, and wondering what it might be converted
into. There is no cure for this disease.
There you
have a delightful early airliner, for two passengers, with no first class or
in-flight hostess trolley. It looks nice posed alongside the Revell Junkers
F.13. In the Monino museum, the aircraft is positioned
under the wing of the Tupolev ANT-25, the huge-winged long distance monoplane,
and I plan to do something similar with mine.
And now I am eyeing an old ICM kit of the Tupelov TB-3,
four-engined corrugated monster, and wondering what it might be converted
into. There is no cure for this disease.
| REFERENCES |
http://www.airliners.net/photo/Russia---Air/Tupolev-ANT-2/1498430/L/
http://www.planesandchoppers.com/picture/number9090.asp
http://greenairdesigns.co.uk/ejcgallery/displayimage.php?pid=1454
http://ram-home.com/ram-old/ant-2.html
http://commons.wikimedia.org/wiki/File:Tupolev_ANT-2_(8911611018).jpg
February 2014
Thanks to If you would like your product reviewed fairly and fairly quickly, please contact the editor or see other details in the Note to Contributors.
.jpg)