| KIT #: | 92056 |
| PRICE: | Approx £15 or approx $30 |
| DECALS: | Five options |
| REVIEWER: | Chris Peachment |
| NOTES: | Short run with etched parts |
| HISTORY |
The
Avia B. 122 sometimes known as the
Vosa
(or Wasp) was a Czechoslovak single-seat trainer, developed in the mid-1930s. It
saw limited service in the first years of WWII.
It came about because of a decision in
the spring of 1934 by the Czechoslovak Army Command that pilots of the Czech Air
Force should take part in the Coupe Mondiale international aerobatics
competition. The Czechoslovakian aircraft manufacturer Avia was given the task
of designing an aircraft. The
B.122
was 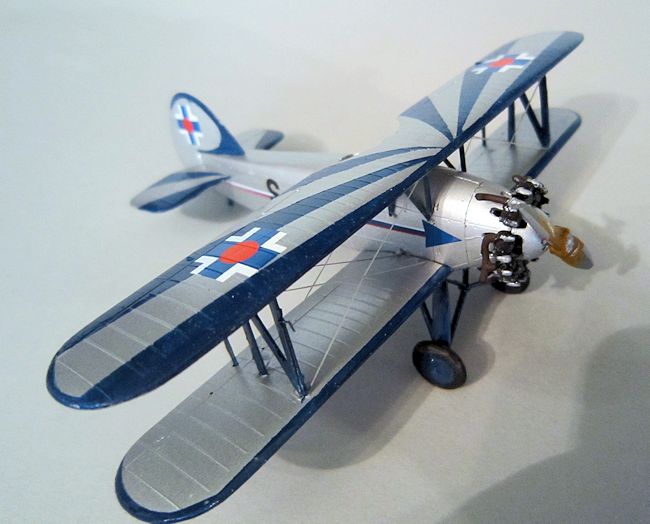 duly presented after only six weeks of work. An astonishing achievement,
even by the standards of the time. Consider how the F-16 might look and perform
if it had been designed in 6 weeks.
duly presented after only six weeks of work. An astonishing achievement,
even by the standards of the time. Consider how the F-16 might look and perform
if it had been designed in 6 weeks.
The pilots had only a few weeks to master the aircraft as the competition was to
be held in July 1934. Luckily, the design was sound and the Czechoslovak pilots
won 4th and the 8th place in the competition.
Afterwards, the aircraft was modified, using the pilots' suggestions, and this became the improved version Ba.122, which had a larger rudder and a more powerful engine. Thirty five of this version were built. In the 1936 Berlin Olympics Czech pilots took 2nd, 3rd and 8th place. Some of these aircraft were equipped with 9-cylinder Walter Pollux engines, instead of the 7-cylinder Castor. 1937 was also a good year, as the Avia managed to take 1st and 3rd place at the International Flying Meeting in Zurich in July and August 1937. These successes led to export orders from the USSR and Romania. The outbreak of WWII put an end to further development. Some Avias saw service in the Luftwaffe when parts of Czechoslovakia were absorbed into Germany in 1939. Other aircraft were sold to the Slovakian and Bulgarian air forces. Slovakia, at this time, became a separate state for the first time in history, under a Nazi puppet regime.
| THE KIT |
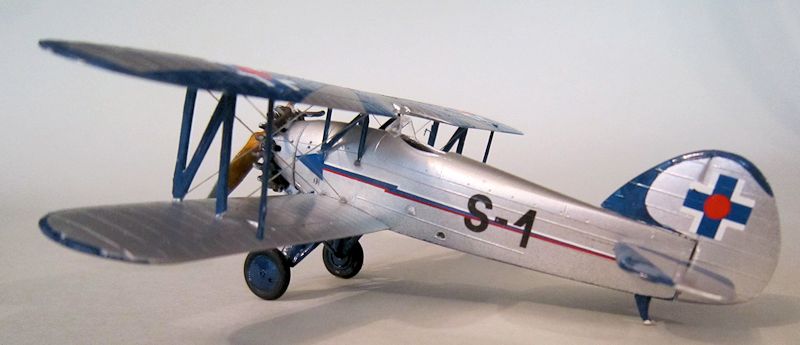
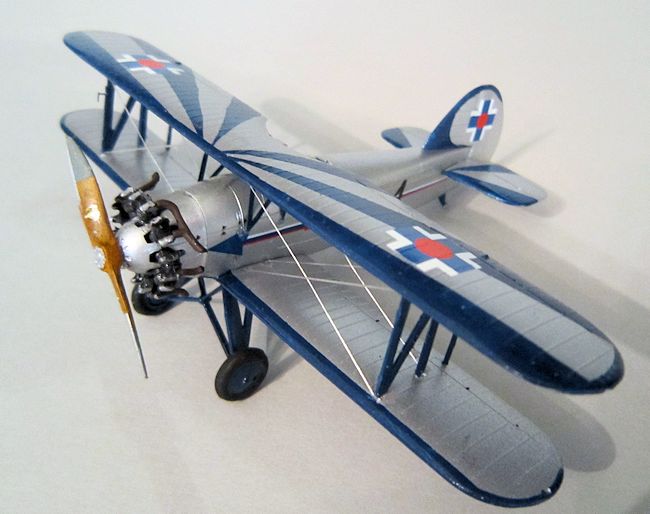
The kit is all that you would expect of a short run kit, although after all
these years, 'short run' is not the grim forecast it once was. Parts are crisply
moulded, there is no flash, and no cleaning up required beyond the usual
trimming and removal of seams. The fit is good, and little sanding or filling is
required. Detailing is very fine. The etched set is easy to use, and the wide
range of decals are all excellent.
| CONSTRUCTION |
I wish I could think of something new to say about another build of a small 1/72
single seater, but construction follows all the usual lines. Cockpit assembled,
inserted, trimmed to fit, fuselage halves joined, sanded, filled, sanded,
blasted with silver with the wings,
decals attached, struts lined up, wings attached, rigging done, engine
assembled, put on nose, propeller painted finally attached. You all know the
score by now, and if you are a beginner and do not, then follow the
instructions, they are good and clear. So perhaps I should alert the modeller
keen to do this kit to a few hefferlump traps (see Winnie the Pooh, a good novel
on how to face life's challenges with kind-heartedness and humour. Incidentally,
there are streets in both Warsaw and Budapest named after him).
First, the cabane struts are etched. Now this is not a good thing. I have come
across this in the past, and torn finished kits to pieces because the struts
have been etched and I could not live with the look. They cannot escape having a
flat, two dimensional quality. The only thing to do is to scratch build some
struts using plastic or brass strut material. On this one, I tried something
new, by thickening them with paint.
 Since the blue I used was Tamiya Blue X-4,
this can work well, as the paint is thick to begin with, and if brushed on
lavishly, it gets more than halfway there. I am happy with the results, partly
because I could not have scratched the complex shape of the struts too well.
Since the blue I used was Tamiya Blue X-4,
this can work well, as the paint is thick to begin with, and if brushed on
lavishly, it gets more than halfway there. I am happy with the results, partly
because I could not have scratched the complex shape of the struts too well.
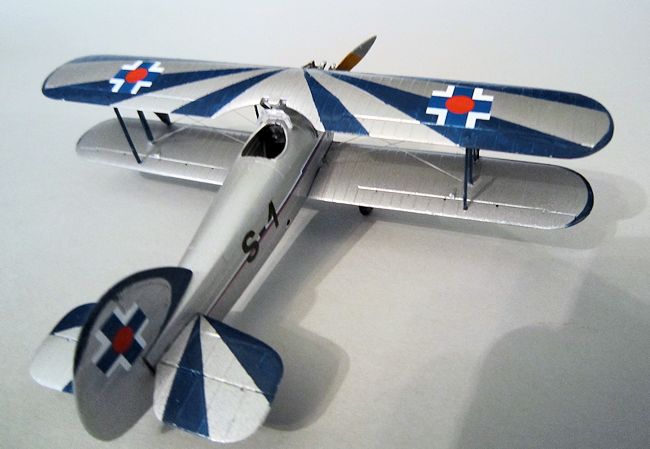
Third, when using gloss paint, as in this model, you are going to get unwanted
reflections in the pictures. It is
visible in a couple of the photos, with what looks like an errant blob of silver
on the leading edge of the wing. In fact it is a trick of the light, but it
looks like a big mistake. With hindsight, I ought to have tried a coat of satin
varnish, since gloss paint never looks right on a small model, even if the
original was highly polished. And most aerobatic aircraft are buffed up to a
high speed shine.
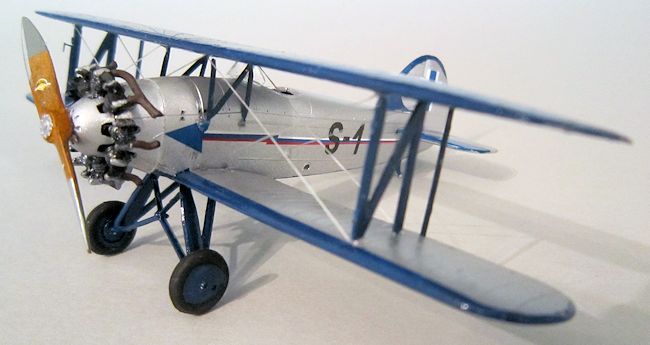
Fourth, the engine exhaust are small, fiddly and a sore test of one's
fortitude. Here the instructions come to the rescue, with a couple of b and w
photos of the original. Nonetheless, it is serious work. As a general rule, the
exhaust pipes lie straight in line fore and aft with the airflow.
And the curved outlets must turn outwards at right angles to the pipe.
There are also a couple of joined exhausts just to muddy the waters. They are
very visible, so an hour or two getting them right will be rewarded. I painted
mine dark rust, with some black dry brushing near the outlet.
 Fifth, the undercarriage fit can be problematic as there are no locating
holes. Instead of drilling some, which could be wrongly placed, I offered up the
finished undercarriage with some Humbrol Clearfix as glue. Any water soluble PVA
would do. The advantage is that if you get the placement wrong, you can rub off
the errant glue with a damp fingertip. And one of the first things that
beginners learn is that you can't do that with polystyrene cement. Remember
those early attempts which looked like a criminal's fingerprint sheet.
Fifth, the undercarriage fit can be problematic as there are no locating
holes. Instead of drilling some, which could be wrongly placed, I offered up the
finished undercarriage with some Humbrol Clearfix as glue. Any water soluble PVA
would do. The advantage is that if you get the placement wrong, you can rub off
the errant glue with a damp fingertip. And one of the first things that
beginners learn is that you can't do that with polystyrene cement. Remember
those early attempts which looked like a criminal's fingerprint sheet.
Sixth, the propeller needs care and attention. It is wood grained for half its
length, but than has grey bandages for the outer half, and a metal leading edge
to each blade. It is all in the masking. There are also a couple of very nice
maker's logo decals which give it a lift.
And that is about it. Suddenly I
hear wailing howls of bitter
discontent. “But what about the rigging?”
What about it? It is as easy as rigging ever gets, and there is only one thing
to do if you want to master it. Get on with it. Set to it with gusto, safe in
the knowledge that it is the making of any biplane. Elastic thread coloured with
a silver gel pen, and anchored with tiny drops of superglue applied with a
sharpened toothpick. By your sixth or seventh attempt, you will wonder what all
the fuss was about.
| CONCLUSIONS |
One dinky little aerobat which I would love to hurl around the sky. It has that
chunky unbreakable look about it, which is due to the wings being set four
square with no stagger or dihedral.
This would leave it with neutral handling, combined with the slight instability
which is necessary for quick manoeuvres.
| REFERENCES |
http://commons.wikimedia.org/wiki/File:Avia_Ba-122_(OK-AVE)_pic1.JPG
http://www.svazletcu.cz/eng/clp7.html
http://wp.scn.ru/en/ww15/o/209/83/0
http://www.flightsim.cz/forum_prispevek.php?id=429386&lan=0
http://www.gonzoaviation.com/clanok/avia-ba-122
July 2014
If you would like your product reviewed fairly and fairly quickly, please contact the editor or see other details in the Note to Contributors.
_pic1.JPG)